
Amazing Color Changing Flowers Experiment
Categories STEM Activities
Learn about how plants drink water with capillary action in this super-fun color changing flowers experiment where the flowers burst into a rainbow of color! Kids of all ages will love it!
Rainbows are totally amazing, and so are flowers. Combine them in this super-fun color-changing flowers science experiment. It’s a fun addition to rainbow science experiments !

Rainbow Flowers Capillary Action Science Experiment
I n this experiment, you can see it happen because the flowers will gradually change color!
But not always like you think. Our flowers changed color at the very tips first!

The Science: Capillary Action for Kids
The reason flowers change color has to do with how they soak up water.
All plants require water to survive, but they drink it from the ground. So, to move it from the ground to the leaves, plants use what is called “capillary action” to move the liquid to the top of the plant.
Basically, this happens by water evaporating in the leaves, causing a pressure change in the stem that helps the liquid from the roots rise to the surface.
Why do flowers change color with food coloring?
Flowers change color with food coloring due to capillary action. Plants take up water through the roots or stem and bring it up to the flower petals. When the water is dyed, the color moves along with the water and dyes white leaves colors!

Why would capillary action be critical for plants to survive?
Water doesn’t usually travel vertically due to gravity. So that means, if there wasn’t capillary action involved, plants could only get water if their roots were directly touching water. That would be almost impossible for plants to do!
If we didn’t have capillary action, plants would have evolved another way to get water. Possibly by being able to move around like animals and humans!
This experiment would also be a fun addition to science experiments for St. Patrick’s Day , spring science experiments, St Patrick’s Day STEM activities and spring STEM activates !
What you’ll need for the rainbow flowers experiment:
- White flowers (carnations are best)
- Liquid food coloring (we order from Amazon because it can be hard to find the right kind in stores)
- 6 mason jars

How to Do the Capillary Action Experiment with Flowers

Fill each jar with about 6 ounces of water. Place one color of the rainbow in each jar. We used just about a full container of liquid dye in each container to get the colors we did, but we did have too much water to begin with.
Start with about half a container of dye and go from there.

Cut each white flower stem at an angle and place in the water.

Put your flowers in a sunny place, and wait!
What happens when you put white flowers in colored water
Within 3 days you should see distinct colors start to emerge. Keep your flowers in the colored water until they start to wilt for maximum color absorption.

Pro tip: If your flowers don’t appear to be changing color within 3 days or so, you probably are A, using a less-than-ideal type of flower like we were (carnations are best, turns out), or B, didn’t put enough dye in the jars. To get our flowers to change color, we had to use nearly a whole bottle of liquid dye per jar.

The type of dye also matters. We tried gel food coloring first, but it wasn’t strong enough to dye the flowers.
More Rainbow Science for Kids
Fizzing Rainbow Experiment for Toddlers
Rainbow Slime
Walking Rainbow Experiment
Rainbow rice sensory bin
Share this project with a friend!

- arts & crafts
- _famous artists
- _process art
- _paint recipes
- _keepsake crafts
- _book activities
- _sensory bins
- _sensory play recipes
- _science experiments
- _free printables
- _colouring pages
- _valentines day
- _st patrick's day
- _mother's day
- _father's day
- _thanksgiving
Colour Changing Flowers Science Experiment - A fun science project for kids

MORE FUN SCIENCE PROJECTS FOR KIDS
Colour changing flowers science experiement for preschoolers.

Supplies needed for the colour changing flowers science experiment
- White flowers
- Glass jars (we used baby food jars)
- Liquid water colour or food colouring
What are the best flowers to use for the colour changing flower experiment?

How to set up the colour changing flowers experiment
Step 1: get your supplies ready for the flower experiment and predict what will happen.

STEP 2: Fill glass jars with coloured water

STEP 3: Prepare the flowers
Step 4: place the flowers into the coloured water .

How long does it take to change the colour of a flower with food colouring or liquid watercolour?

The science behind the colour changing flowers science experiment.

Cool Science Experiments for Preschoolers (and older kids too!)

- — Share It —
No comments

Hello & Welcome!

Follow By Email
Join the fun subscribe to our newsletter to have fun ideas delivered to your inbox subscribe.

Get FREE craft and activity ideas
Join our newsletter to have ideas delivered to your inbox each week!
There was an error submitting your subscription. Please try again.
Copyright Messy Little Monster . Blog design by Designs by Kassie . Privacy Policy Here
-->
 Short explanationLong explanation.
 Leaf pigments chromatography Rainbow milk Homemade yogurt Screaming dry ice Dry ice in a balloon Special: Dry ice color change Dry ice smoking soap bubble snake Dry ice giant crystal ball bubble Dry ice in water Gummy bear osmosis Floating ping pong ball Rotating Earth Special: Colored fire Special: Fire bubbles Water cycle in a jar Egg drop challenge Taking the pulse Orange candle Glass bottle xylophone Warped spacetime Homemade rainbow Water implosion Warm and cold plates Plastic bag kite Tamed lightning Yeast and a balloon Forever boiling bottle Moon on a pen Moon in a box Inexhaustible bottle Crystal egg geode Magic ice cut Heavy smoke Popsicle stick bridge Micrometeorites Special: Fire tornado Special: Whoosh bottle Dancing water marbles Brownian motion Flying static ring Water thermometer String telephone Special: Dust explosion Disappearing styrofoam Special: Burning money Special: Burning towel Salt water purifier Fish dissection Hovering soap bubble Homemade sailboat Water mass meeting Plastic bag and pencils Water sucking bottle Water sucking glass Mentos and coke Aristotle's illusion Spinning spiral snake Imploding soda can Carbon dioxide extuingisher Plastic bag parachute Dental impression Impact craters Rolling static soda can Static paper ghost Color changing flower Upside down glass Shrinking chip bag Solar system model Strawberry DNA Electric motor Flashy electric motor Bouncing soap bubbles Toilet paper roll maraca Cloud in a bottle 1 Cloud in a bottle 2 Balloon rocket Water whistle Special: Screaming gummy bear Homemade compass Trash airplane Wind-up spinner toy Tea bag rocket Balancing soda can Lung volume test Fireproof balloon Baking powder popper Expanding space Straw propeller Wooden cutlery Levitating match Human reflexes Electromagnet Soil layers Straw potato Straw rocket launcher Traveling flame Water bowls Straw duck call Solar eclipse Silo of salt Balloon skewer Newspaper tower Microwave light bulb Heavy paper Rubber chicken bone Homemade marble run Drops on a coin Cartesian diverContent of website.  Save Your Favorite Ideas  Grow a Rainbow Experiment Want to grow your own rainbow? Try this simple science experiment! You only need paper towel, water and washable markers. Kids will love to see their rainbow “grow” in this easy activity! RELATED: Surprise Rainbow Activities  You will love seeing the rainbow come together in this simple science experiment! You can even do different patterns and colors too.  Grow a Rainbow Experiment for KidsHere is what you will need for this activity:
 Watch the Full Video Tutorial HereWhat is the science behind this experiment. This science experiment is a great example of chromatography. Chromatography is a way of separating out a mixture of chemicals. If you ever got a paper with ink wet you would have seen the ink move across the page in streaks. Capillary action makes the marker dye move up the paper towel. The water moves upward through the paper towel, lifting the washable dye molecules with it. Because the washable markers are water based, they disperse in water. Set up a few different scenarios and hypotheses. For example, if you were to try this experiment without any dye, you would still see the water rising upwards towards the center of the paper towel. If you were try this experiment with permanent markers it would not work. This is because the markers are not water based (they are alcohol based) so the dye in the marker does not travel with the water. You can also show that permanent markers will disperse with rubbing alcohol but not with water.
Growing Rainbow Experiment Instructions1. Fold over a piece of paper towel (so you have 2 pieces on top of each other). Trim the length to be 7.5 inches (any longer and the rainbow may not connect fully). TIP : The shorter your piece of paper towel, the better it will connect. Also make sure you are using an absorbent paper towel. We used Bounty.  2. Draw rectangles of the rainbow colors on each end.  You want to make sure to fill these colors in well so there is enough dye to travel across the paper towel. TIP: Add lots of marker to the ends, you want a good amount of dye to travel up the paper towel.  3. Place 2 cups with water filled 3/4 full. You only want the bottom of the paper towel in so leave some space from the top of the cup.  Then place the paper towel into the cups, with one end in each cup. TIP: Do not place the ends too deep in the water or the dye may dissolve into the water instead of moving up the paper towel.  4. The washable marker dye with slowly make it’s way up with the water to meet the other side in the center of the paper towel.  5. Leave the paper towel for 10-15 minutes and it will eventually connect the colors together.  We love how simple this science experiment is! Expand on the learning by testing with permanent markers or just water to see what happens in those scenarios. More Rainbow ActivitiesYour kids will also love to try these surprise rainbow activities !  See this fun rainbow slime. Kids will love building a rainbow out of slime!  Make some rainbow playdough! This playdough recipe is super soft and lasts for months!  For another fun rainbow activity, this rainbow rice is our favorite sensory bin!  Related Ideas: Cloud Dough The BEST Playdough Recipe 50+ Christmas Crafts for Kids Salt Dough RecipeShare a comment. We LOVE hearing from you! Submit your question or comment here. Your email address will not be published. Required fields are marked * Cancel Reply8 comments on “grow a rainbow experiment”. Me and my neighbors did the rainbow paper towel one and had lots of fun! Hi can you pre color the paper towel? And do the experiment another day? We want to do it for a party and have it pre colored so all the kids have to do is dip it in water. Yes that should still work! I love it. Thanks. I’m doing this as a virtual library lesson for a 25 minute class. If anyone is pressed for time like me it actually works faster with an unfolded cheap paper towel <5 minutes. BEST experiment crafts I have seen in a long while. I hunt down ideas for my grandchildren when they come to visit and these are all on point and they will love them Thanks. I will use all of them (except the rice) . GREAT ideas. Thanks so much Lee! What is the purpose of folding the paper towel in half (step 1)? We found that the colors moved across the paper better when there are 2 layers.  Sign up for my FREE newsletter and get new ideas to your inbox!Color Changing FlowersIt’s easy to see how plants drink water by doing this simple science experiment: Color Changing Flowers. Learn about plant biology and create a beautiful flower rainbow the kids will love. It’s a must-try kids’ plant experiment! And for endless science fun, check out our 30 Science Experiments in our shop!  Getting ReadyThis experiment can be done with any white flower. Carnations, daisies and white roses will all yield gorgeous results. We live next to a field with hundreds of wild white daisies growing in it. One sunny day we took a walk and picked a handful.  Once we got home we filled six small film canisters with water and then dripped about 3 drops of food coloring in each one. We made an entire rainbow: red, orange, yellow, green, blue and purple. The kids placed a few flowers in each container and then we waited to see what would happen.  Color Changing DaisiesIt took a few hours for anything visual to happen. During that time, we talked about how plants drink water. I asked the kids how very tall plants get water all the way up to their highest leaves, branches and flowers. The kids had lots of very funny and creative ideas! I guided the discussion to lead my children to the conclusion that plants absorb water through their roots in the ground. Water moves from the roots up through the stem and into the leaves and flowers through tissue called xylem. After a couple of hours we started to see blue-tinged petals on the flower in the blue water. Little by little, each of the other flowers changed colors, too! It was interesting to note that some of the colors, like blue and purple, were more vibrant than other colors, like orange and yellow.  We left our color changing daisies overnight to develop. The next morning we had a beautiful daisy rainbow.  How Plants Drink WaterAs mentioned above, water moves through plants through the xylem . But how does water defy gravity and move upward to the very highest leaves of a tree? The answer lies in capillary action , which is defined as the process that plants use to pull water up from the ground. There are several factors that enable capillary action to happen. First is the force of adhesion, which is the attraction between water molecules and plant fibers. Second is the force of cohesion, which is the attraction of one water molecule to another water molecule. Third is transpiration. When water evaporates from the leaves, buds, and petals of a plant, more water is drawn upward to fill in the empty space. It is similar to what happens when a person sucks water through a straw. All three of these factors combine to enable a plant to draw water from the ground and distribute it throughout the entire plant. Doing this color changing flower experiment makes it easy to see how capillary action works. Must-Try Science ActivitiesContinue the science fun with our 30 Science Experiments – complete with a no prep journal! Similar Posts Pumpkin Number Bonds Flower Symmetry Activities Farm Addition Cards Valentine Pattern Block Mats Number Comparison Cards Outer Space Clip CardsLeave a reply cancel reply. Your email address will not be published. Required fields are marked * Rainbow Flowers Science Experiment You will need:

The Science Bit:
Optional extras to try:
You May Also Like Top 5 things to do with kids in Bury Fun Science: The Cheltenham Science Festival 2015 Speedy experiment – nervous coinsRun your own fun science branch. A Fun Science franchise is perfect if you want to run your own business without the risks and hassle of starting up alone. Interested? Then click the link for more information!  Rainbow Walking Water Science Experiment for KidsThis walking water science experiment is so much fun and super easy to do! My kids absolutely loved it! It even comes with free printable recording sheets for kids as young as preschool! Check out the video to see how easy this walking water experiment really is. This rainbow activity is perfect for spring science!  Walking Water Science ExperimentOk, this might just be our favorite science experiment! The whole family (adults included) were completely mesmerized with process. We all couldn’t believe how quickly the water traveled up the paper towel and neat it was to watch the colors mix together. We have wanted to try it out for a long time now and I am kicking myself for waiting so long. I don’t know why, but I thought it might be difficult to do or take a long time. I was way wrong. It was very easy and we started seeing results right away!  Related: Simple Spring Science and STEAM Activities The walking water science experiment is great at any time of the year, but it is especially perfect for spring. I love doing rainbow activities in the spring, so this was a great addition to our rainbow theme activities. If you are looking for simple science to do with the kids and something that will really WOW them, this is definitely one to try. You only need a few simple supplies that you probably already have around the house.  Setting Up the Rainbow Science ExperimentSupplies Needed:
* The pick-a-size paper towels are best because then you just use half sheets for each cup. If you only have full sheets, then cut them in half. I’ve also heard that more absorbent paper towels work better too. I buy the cheap store brand ones, and our water moved pretty quickly from cup to cup, so I am not sure how important that is. It may have went quicker with something more absorbent though. 1. Print out the recording sheets and make copies, if needed. 2. Place 7 cups in a row and pour water in the 1st, 3rd, 5th, and 7th cup. My cups were about 3/4 full. I have since heard that fuller is better. 3. Add 5 drops of red food coloring to the 1st cup and the 7th cup. 4. Add 5 drops of yellow food coloring to the 3rd cup. 5. Add 5 drops of blue food coloring to the 5th cup.  Doing the Walking Water ExperimentYou want to try to use the same amount of food coloring in each cup. When I did this with my kids they did drop an extra one or two in since they can’t control it well, but I just added a drop or two more to the others to even it out. 6. Take a half sheet of paper towel and fold it in half lengthwise and in half again lengthwise. 7. Trim off some of the length so that there isn’t too much excess paper towel that will stick up in the air between each cup. This will make the water walk more quickly. 8. Place one half of a rolled paper towel in the 1st cup and place the other half in the cup next to it. Then another paper towel from 2nd cup and into the 3rd cup. This continues until you have placed the last paper towel that drapes over from the 6th cup to the 7th cup. 9. Stare at the cups and watch what starts happening. You should quickly be able to see the colored water begin to crawl up the paper towel. 10. Don’t forget to do the first part of the recording sheet. Students will predict what they think will happen.  This walking water experiment is AWESOME! Keep checking back every couple of minutes. Soon you will be able to see that the water has crawled all the way up the paper towel and is beginning to walk back down into the empty cup next to it. Since the cup on either side of an empty cup has colored water in it, the two colors begin to mix in the empty cup. So cool! Keep coming back throughout the two hours or soon and observe what is happening.  Question to AskWhat do you think will happen to the water? What is happening now? Why do you think the colors are changing? Why might the water be able to move up against gravity like that? How this Science Experiment WorksThe water moves up the paper towels through a process called capillary action. The paper towel is made from fibers and the water is able to travel through the gaps in the fibers. The gaps in the paper towel act like capillary tubes and pull the water upward. This is what helps water climb from a plant’s roots to the leaves at the top of the plant or tree. The water is able to move upward against gravity because of the attractive forces between the water and the fibers in the paper towel.  I even removed one of the red cups and made a color wheel so I could introduce the kids to that as well. I hope your kids have a great time with this super cool walking water science experiment!  Other Cool Science Experiments for KidsThis rainbow Walking Water Science Experiment is one of our most popular science activities! Try this super simple Oobleck recipe that only requires two household ingredients! This rainbow skittles experiment is sure to WOW the kids! You can also make a rainbow of flowers with this super cool color changing flowers experiment ! This pepper and soap experiment is very simple to do, but always engages the kids! Did you know you can put paper under water and it will stay dry? Give it a try with this keep paper dry under water experiment . The kids love this cool trick! Explore Newton’s color wheel while making colors disappear with this totally awesome science activity! Explore chromatogography with this super fun STEAM activity that combines science and art! This rain cloud jar science experiment give children a chance to explore clouds and rain in a hands-on and engaging way The kids will get a kick out of this super cool dancing raisins science experiment ! Check out these other science experiments and activities for kids. This lava lamp science experiment is always a hit with the kids!  If you haven’t tried this magic milk science activity , you have to! It is so awesome and super easy to do.  This leak proof bag science experiment will make your kids jaw drop! It’s hard to believe, but it works. 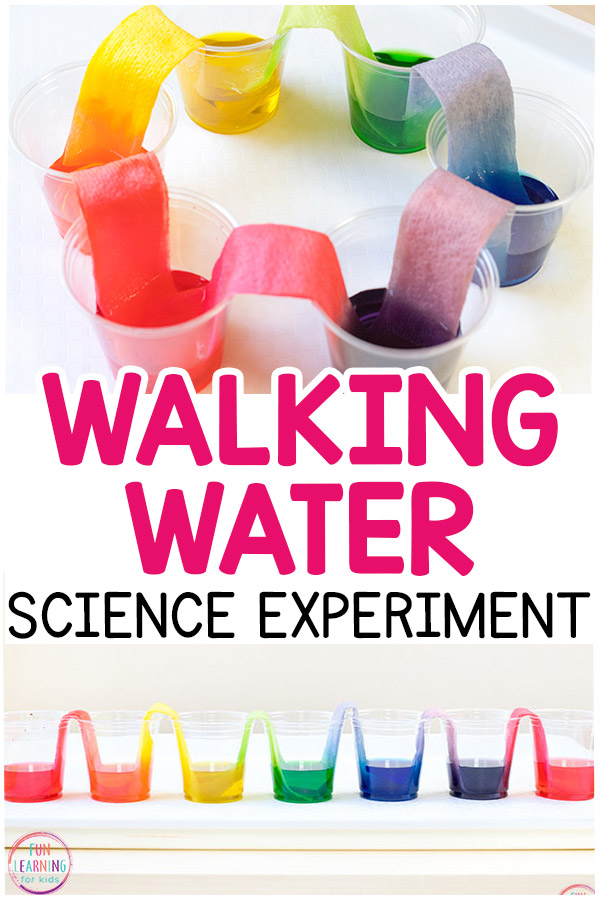
Report Abuse Growing A Jeweled Rose
Flower Experiment for Kids Color Changing Flowers


Making Rainbow Flowers


Flower Experiment Results


 More About the AuthorCrystal Underwood is the writer and creator of Growing A Jeweled Rose. She has worked extensively with children and strongly believes in the importance of play at the core of early learning. She is passionate about the early years and believes that childhood should be a truly magical time in life. For all the best kids activities connect with Growing a Jeweled Rose below!  you may also like  Snow Paint Recipe No-Cook Cinnamon Ornaments

Coloring Carnations Science Experiment for Kids Disclosure: There are Amazon Affiliate links in this article which means, at no additional cost to you, we could receive compensation for our recommendations. You can read our full disclosure policy on our Disclosure Page for more details. I really wanted my kids to see this science experiment through their own eyes and question what was happening and learn. So, I purchased a bouquet of inexpensive white carnations from a local flower shop and we set about with a dyed carnations science experiment for kids . This experiment is as much about the process as it is about the end result. I began by asking my girls to guess what the result would be. If we placed 2 white carnations in 3 vases, one with a few drops of red food colouring, one with a few drops of blue food colouring and one with a few drops of yellow food colouring...what would happen to the flowers...what was their hypothesis? Dyeing Carnations Science Experiment for KidsYou will need 3 empty, clean jars 3 different colours of food colouring - red, blue and yellow carnations paper to write your predictions/results They made a few predictions;
 Once the hypotheses were written down we proceeded with the experiment. We placed a few drops of food colouring in the bottom of our clean jars. Then we added water to the jars. We chose red, blue and yellow. How long does it take to dye carnations? The results lead us to discuss how flowers consume the water and where the water goes after they "drink" it up. The proper scientific term is transpiration . What is transpiration?Transpiration is the process by which the water molecules are "pulled" up the flower, in almost a vacuum like fashion. As the water evaporates from the petals of the flower, more water molecules are drawn up the stem. We cut open a flower stem to take a look at the internal structure of the flower stem. We could see the tube in the centre of the flower stem... the xylem ...this is the path the water takes up the stem and out into the flower petals. Amazing.  How to Make Rainbow Coloured Flowers Have you ever tried colouring carnations? What science experiments from your childhood do you want to do with your kids? Related Posts  BE SURE TO SUBSCRIBE TO KITCHEN COUNTER CHRONICLES TO HAVE OUR DELICIOUS RECIPES, FUN CRAFTS & ACTIVITIES DELIVERED DIRECTLY TO YOUR INBOX.Follow kitchen counter chronicles on facebook:: pinterest :: twitter, more science.  Jen Farr is a mother living in Toronto, Canada. She has been sharing her DIY crafts, recipes, activities and parenting advice for over 15 years on her blog Kitchen Counter Chronicle. Jen is the mom of 2 lovely daughters. She believes in the power of taking small steps that can make big impacts on the world. Reader InteractionsCerys @ Rainy Day Mum May 02, 2013 at 5:51 pm I've never done this experiment with carnations - we've used roses, diasies, daffodils, tulips but not carnations. I love the colour mixing variation on it as well. maryanne @ mama smiles May 03, 2013 at 8:24 pm I really need to do this with my kids this year. It works so beautifully with carnations! May 05, 2013 at 11:30 am I picked up some carnations at the store yesterday and they have been in water for almost 24 hours already and so far only 1 of the yellow has even started to change? May 05, 2013 at 2:40 pm Hmm, try trimming the bottom of the flowers and putting them back in the water...a fresh cut might help get things moving. Let me know how it goes. April 26, 2014 at 11:57 am We're about to embark on this science experiment today! Excited about it! Just one comment about your webpage, which has been so helpful. The correct spelling would be "dyeing carnations." "Dying carnations" are...well, they're just dead flowers. :0) Thanks again! January 23, 2015 at 1:50 pm what happen if u use warm water insead of colfd water?????? IF U READ THINS CAN U TELL ME?? plz January 25, 2015 at 10:41 am Hi Jessica, flowers tend to like cooler water as warmer water forces them to open quicker...that's why I suggest cool water. Give it a try with warm water, I'm sure it would work as well. February 24, 2015 at 2:35 pm thx u Jen now i cna get a little help withe my flower dye project.  How To Dye Flowers Rainbow – Create Multicolored RosesBy: Author Agnes Hsu Posted on Last updated: February 16, 2021 Categories Create , Latest Originally posted on 21/07/2014 By using this site, you agree to our Terms of Use . This post may contain affiliate links. Read our disclosure policy. Follow us on Instagram for more fun ideas for kids!Have you ever seen the vivid hues of a rainbow dyed rose? These striking flowers can easily be created at home with some simple resources. Dying flowers is also an awesome rainbow-colored science experiment to do with your kids. You can teach them a little biology while creating something beautiful at the same time. Keep reading to find out how to dye flowers rainbow colors. .jpg) Materials You’ll Need For Rainbow Dyed Flowers
.jpg) How to Make Rainbow Roses – Instructions:Now it’s time to get to the fun part of making your multicolored roses. This step-by-step tutorial will guide you through this seamless process. Step 1: Prep Your Rainbow RosesStart off with your white roses – it’s best to choose ones where the buds have just started unfurling their petals. If the bud is tightly closed, it may not end up opening. Or, if the petals have already unfurled, the rose may wilt before the dye has reached the petals. Once you have your rose, strip all the thorns and leaves off. Cut each stem in a slant to make it easy for the colored water to travel up. Leave the roses for about three hours so that they take up the dyed water more readily. Step 2: Create The Flower Dye MixesPlace your food coloring or gel paste in each container and fill with water. We used enough to get vibrant hues for each container and followed the colors of the rainbow (red, orange, yellow, green, blue, indigo). .jpg) Step 3: How To Dye The flowersIf you want to try the tie-dye effect, make vertical cuts of about 3 inches into the stem of the flower. You could even split the stems into thirds or fourths, but we stuck with two. Have a close-up look at how our split stems looked (placed in orange and indigo) in the picture above. Do not make more than four vertical cuts; otherwise, the stem will become too fragile. If you do not want a tie-dye effect, leave the vertical cuts. Step 4: Watch Your Dyed Flowers Come To LifePlace the stems of the roses into the color containers. For the cut flower stems, place each split into a different color container. Now, all that’s left to do is wait patiently. Over the next two to three days, you’ll observe the flowers color and bloom. Watching The Flower Dye Experiment Take PlaceWhile a step-by-step guide tells you exactly what to do, you sometimes need a visual aid. Below you’ll see the entire process of the rainbow roses gaining their color. Day One: Colors Start To AppearYou can clearly see that the roses started gaining their rainbow colors at the tips of their petals. In the split stem roses, you can see that the two tones are appearing on each side of the rose. .jpg) Day Two: Rainbow Roses Coloring Becomes More VividBy the second day, the coloring of the rainbow roses had become more intense, especially at the tips of the petals. .jpg) On day two, we took the tie-dye roses out since the split stems started to break off a bit. Although we didn’t get the bright multi-colors we thought we would; I love the soft and almost watercolor-like effects. .jpg) Day 3: Your Rainbow-colored Roses Are CompleteBy day three, the roses were in full bloom. The colors are definitely brighter all around, especially compared to day one. .jpg) What We Learnt Making Rainbow FlowersThis fun science experiment resulted in gorgeous pastel flowers that almost remind me of pretty tissue paper flowers . My kids (ages 5 and 3) had so much fun partaking and observing the changes along the way. Below are some of the learnings we applied.
.jpg)
.jpg) Loved This Rainbow Rose Experiment?This easy experiment is a great way to teach your kids some biology in a fun way. The process is super simple, and the outcome is gorgeous. These rainbow-colored roses even lasted (in a vase) for a few days past the experiment. Now that you know how to make a rainbow flower, get your hands on a bunch of roses and make your own gorgeous rainbow roses. .jpg) 10 Ways to Make a Pretty Floral Crown12 dazzling flower crafts, 8 easy preschooler science experiments.  Agnes Hsu is a mom of three and has been inspiring parents and kids to get creative with easy activities and family friendly recipes for over 10 years. She shares her love for creative play and kids food to her 2MM+ followers online. Agnes' commitment to playful learning and kindness has not only raised funds for charity but also earned features in prestigious nationwide publications.
fun & meaningful learning every day Rainbow Experiment Ideas Sure to Engage Your PreschoolersShared by Mary Catherine Leave a comment Choose a fun and engaging rainbow experiment to try with your kids this spring. The only tough decision is determining which rainbow science activity to try first. Hands-on science is the name of the game in preschool and kindergarten. Young children love exploring their world with all of their senses, and this definitely helps them to learn as they do.  Related: Spring Activities for Preschoolers Table of Contents Set Up a Rainbow Experiment This SpringBelow you’ll find a variety of rainbow science experiments and activities for young children. I think these ideas would be perfect for a preschool rainbow theme , teaching children about colors, or just as fun additions to your science lesson plans. You’ll notice I mentioned both rainbow science experiments AND rainbow science activities. You may wonder if those terms are interchangeable, but I didn’t use them as such. When it comes to science experiments, children are walked through the scientific process. This means talking about the materials and the experiment ahead of time. It also means engaging the children in their thoughts about what will happen during the experiment and encouraging the kids to come up with their own hypotheses about what will happen. In terms of science activities, these are fun ways to explore early science concepts with the children. You will note, though, that many simple science activities can be translated to true science experiments. It just takes a little bit of extra planning and questioning!  Related: St. Patrick’s Day Activities for Preschoolers Scented Rainbow ScienceI have to tell you, the kids and I have done this scented rainbow science experiment so many times. There’s a possibility I could set this whole thing up in my sleep, I think. You can adjust this rainbow experiment to suit your own purposes, of course. Consider using ice cube trays with special shapes, or focus in on just one or two colors instead. But definitely be sure to include the scent aspect to this idea, as it really grabs the kids’ attention. Rainbow Glitter JarsThese rainbow glitter jars turn out beautifully each and every time (at least, they have for us). The jars can be a simple activity that you make ahead of time for the kids. Or you can include the children and turn it into a rainbow experiment by determining how much of each ingredient to use to make the glitter fall slowly. See them in action here: Rainbow Discovery BottleThis rainbow bottle from Preschool Inspirations are another take on a colorful sensory jar. What I love about it is that the colors don’t all run together. Because it takes a little bit of finagling, you will likely want to make this rainbow bottle ahead of time. This way, you can decide the exact steps to include the children in. Homemade SpectroscopeMake a homemade spectroscope like Buggy and Buddy did, using just a few basic materials. This is definitely something you’ll have to do for the kids ahead of time, but it shouldn’t take too long to make. Once the spectroscope is made, take the kids outside and help them learn how to use it to see rainbows. Rainbow Density JarYou’ll need quite a few ingredients for this density jar rainbow experiment from Playdough to Plato. But, trust me, it’ll be worth it. This is a great science activity to use when teaching children about the concept of density. Yes, preschoolers and other young children can definitely learn about scientific concepts like this. Even if they don’t completely grasp it at first, they will have a blast learning along the way. Rainbow PaperThis paper rainbow experiment from Science Kiddo is one that’s on my list to try. I’ve done it years and years ago, but really need to try it with the kids again soon. I’d definitely suggest that you try this one out ahead of time to perfect your “technique”. That way, once the kids are ready, you can model the activity and help walk them through what to do. Walking Water Rainbow ExperimentCoffee Cups and Crayons shares how to set up the classic walking water science experiment. This is a perfect one to use when introducing the kids to the steps of the scientific method. Consider arranging the whole setup in a circle or a half-circle if you want to invoke a rainbow. Encourage the children to draw their observations as the experiment progresses. I’m sure you will hear many an “Oooooh!” and “Ahhhhh!” from the kids. Rainbow Ice ExperimentThis melting rainbow ice experiment from Powerful Mothering looks gorgeous! The colors, and the question of “Can you melt the ice?” will surely draw the kids in and keep them engaged the entire time. Depending on the weather, you might even try this one outside. This way, the kids can also experiment with melting the ice in direct sunlight and in the shade. How to Flip a RainbowThis is probably the easiest rainbow experiment of the whole bunch! Lemon Lime Adventures shows us how to teach light refraction in a super fun (and super easy) way. Once the kids understand how to do this activity, you could even consider adding it to the science center for independent exploration. Rainbow SlimeThis colorful slime from The Best Ideas for Kids is definitely worth making when you’re teaching the kids about rainbows! Of course, I wouldn’t suggest it for younger children who are still putting things in their mouths. But for older kids who can follow basic safety instructions, it will definitely be a fun science activity about rainbows. Crystal Rainbow ExperimentFSPDT walks you through the process of making crystal rainbows with the kids. I’ve made basic crystal snowflakes with the preschoolers before, and the kids seriously loved everything about it. I can only imagine that adding the rainbow aspect to it would be even more fun for the children. How to Make a RainbowScience Sparks explains a couple of different ways the kids can make rainbows . I can see trying these ideas both inside the classroom and outside on the playground. The children will be so excited to run home and tell their families about making rainbows at school. Skittles Rainbow ScienceBreak out the candy for this rainbow experiment from Fantastic Fun and Learning. This is a great candy science activity to try with the kids during the spring or right after Halloween (when oodles of candy is on-hand). You can also try this with candy hearts if it’s near Valentine’s Day. The great thing about this rainbow science is how you can really engage ALL of the kids’ senses during the entire activity. Color Changing FlowersThis classic science activity from Laughing Kids Learn must be included in a list of rainbow experiments, of course! Teach the children about plants and absorption by creating a rainbow of colorful flowers. Of course, you can also adjust the experiment to focus in on just one or two colors if you’d rather. But I think a rainbow makes it even more fun for the kids (or maybe just for me). Rainbow Ice Tower ExcavationChallenge the kids to excavate the rainbow items from ice with this activity from Fun at Home with Kids. I love how this rainbow experiment is super simple to set up, and it gives the kids many chances to explore the scientific method with common items. Now that I’ve tossed out so many ideas, which rainbow experiment will you try first with your preschoolers? Related: “I See a Rainbow” Preschool Color Activity Preschool Science MaterialsThese rainbow science experiments are perfect for the spring. But don’t wait until then to get your classroom interested in science. To amp up your students’ excitement, keep your classroom stocked with some great science materials. Check out this list and decide which items will work well in your classroom (I may get commissions for purchases made through links in this post):
The children are going to absolutely love learning about these science tools. And I know they’ll love getting to use them even more! Preschool Rainbow Lesson PlansMake life a little easier for yourself with done-for-you teaching resources from Preschool Teacher 101 . You’ll find preschool lesson plans , math and STEM activities , and literacy resources all ready to go for you. Be sure to check out our membership options for even more bang for your buck. Pop over and read more about our rainbow lesson plans for preschoolers . It’s a week’s worth of rainbow activities already planned for you, with printable lesson plans, book suggestions, center ideas, and related printables.  Leave a Reply Cancel replyYour email address will not be published. Required fields are marked * Save my name, email, and website in this browser for the next time I comment. Search the Fun!Fun by categories. Rainbow Science ExperimentsThis collection of rainbow science experiments is perfect for exploring colors. Use rainbows to introduce other science concepts as well.  What is a Rainbow?A rainbow is made by separating white light into the colors of the visible spectrum. This can be done with a prism or through water. A rainbow forms in the sky when sunlight passes through water droplets in the air. 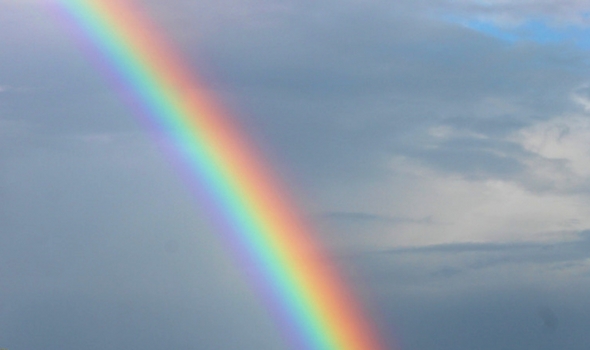 Typically we name 6 colors of the rainbow – red, orange, yellow, green, blue, and violet (purple). A rainbow of visible light is truly a spectrum – that means it’s a range of colors that gradually changes from red to violet. Sometimes you’ll see people mention cyan (a color between green and blue) or indigo (a color that’s the border between blue and violet). To be really specific, we use a number (the wavelength) to talk about the color. How to Make a Rainbow – Make your own rainbow with a flashlight, water glass, and paper. Layering Liquids Density Experiment – Make colorful layers of fruit juice using different concentrations of sugar. Rainbow Foam Eggs – Turn a classic science experiment with yeast and hydrogen peroxide into a colorful sensory experience.  Rainbow Soda Geysers with Ada Twist – Make soda geysers using different colors of soda. Do they all work as well? Rainbows in Milk – The classic magic milk experiment using soap and food coloring is a fun way to make moving rainbows. Rainbow Texture Explorations – This is a fabulous sensory science activity that works on making observations and learning colors.  Fizzy Color Mixing Experiment – Add a rainbow of color to classic baking soda and vinegar science. Prism Exploration – Use a prism to create and observe rainbows. Buggy and Buddy shows us how. Walking Water Experiment – Coffee Cups and Crayons teaches us about capillary action and color mixing with this rainbowtastic activity. How to Dye Rainbow Flowers – This activity from hello, Wonderful also uses capillary action to dye flowers. Use this idea to talk about transpiration in plants. Make a Skittles Rainbow – This colorful science idea from Science Sparks uses water and skittles or any candy coated treats really.  Rainbow Water Xylophone – Mama.Papa.Bubba shares directions for making music with colored water. Rainbow Spin Mixing – This STEAM activity from Babble Dabble Do combines science and art to learn about physics and color theory. More Rainbow ActivitiesColor Sorting Fine Motor Activity Inspired by The Hidden Rainbow – Move the colored drops of water into their matching buckets. This one is great for observing the properties of water, too. Find the Unicorn Rainbow Sensory Bin – Can you find the unicorn hiding among the rainbows and dragons? See the supplies we used plus all of the other rainbow inspired learning ideas from the Virtual Book Club for Kids.  Learn Colors with Ramps and Car Rainbows – I set up this car activity to help my toddler learn colors. Launch the cars down the ramp to create a car rainbow. Rainbow Dot Art – Make a giant rainbow on sticky paper. It’s great for fine motor skills and makes a cool piece of art.  Make Rainbow Dot Art with M&M’s – This post was sponsored by M&M’s Crispy, but you can use regular M&M’s or Skittles. (M&M’s don’t have purple, so you can substitute brown. Skittles don’t have blue. Unless you order them specially.) 15 Rainbow Scavenger Hunts – If you love rainbows and you love scavenger hunts, then you will love this collection of ideas. Subscribe to the Inspiration Laboratories newsletter. Each issue has exclusive hands-on science explorations for children, a recap of our latest activities, and special resources selected just for you! This post was originally published on March 5, 2021. Leave a Reply Cancel replyYour email address will not be published. Required fields are marked * Save my name, email, and website in this browser for the next time I comment. © 2024 Inspiration Laboratories |
IMAGES
VIDEO
COMMENTS
How to Do the Capillary Action Experiment with Flowers. Fill each jar with about 6 ounces of water. Place one color of the rainbow in each jar. We used just about a full container of liquid dye in each container to get the colors we did, but we did have too much water to begin with. Start with about half a container of dye and go from there.
STEP 3: Prepare the flowers. To prepare the flowers for this colour changing flowers experiment you will need to cut them so that they are slightly taller than the jars that you are using. You will need to cut the bottom of each flower with a diaganol cut so that the flower can easily drink the coloured water.
Make a rainbow flower using a simple method. This is an experiment about water transport in plants. ... Then test the hypothesis by doing the experiment. Which flower species gives the best result? What does the flower look like after 1, 2, 4, 6, 12, 24, 48, 72 hours?
Growing Rainbow Experiment Instructions. 1. Fold over a piece of paper towel (so you have 2 pieces on top of each other). Trim the length to be 7.5 inches (any longer and the rainbow may not connect fully). TIP: The shorter your piece of paper towel, the better it will connect. Also make sure you are using an absorbent paper towel. We used Bounty.
You can use the colors of the rainbow with this color changing flower experiment! This is another experiment using capillary action. This rainbow skittles experiment is a fun rainbow activity for the kids! Looking for more capillary experiments. This Celery Food Coloring Experiment is fantastic! - via Little Bins for Little Hands
Learn about plant biology and create a beautiful flower rainbow the kids will love. It's a must-try kids' plant experiment! And for endless science fun, check out our 30 Science Experiments in our shop! Getting Ready. This experiment can be done with any white flower. Carnations, daisies and white roses will all yield gorgeous results.
Colour changing flowers is an easy science experiment for preschool, kinder & older kids. This science activity is a fun way to learn about capillary action & pH. ... Turn your garden full of white flowers into a rainbow wonderland with this color changing flower activity. It is a hands-on experiment for kids, exploring parts of plants and ...
Learn all about plants with this fun and engaging science project. Dye flowers with food coloring, and make a unique rainbow rose. Perfect for a science fair...
This activity is an amazing visual for kids. It teaches them how a plant absorbs water up it's stem and nourishes its petals or leaves. The brightly coloured water will transform the white flowers within only a few minutes. It's amazing and creates a great 'WOW' factor for kids. To do this science activity you will need the following ...
Let the kids personalise your flowers and see what happens when plants drink with this fun rainbow flowers science experiment! Colour your flowers for any occasion or just let the kids go wild! You will need: Pale/white flowers. Carnations work well. Vases / glass jars (number depends on how many different colours you want) Food dye (colours are personal choice) Water Method: Put some water in ...
Liquid food coloring in a variety of colors. Instructions: To start you will want to trim down the stems of the flower so they fit your cups or glasses. Add water to each cup. Then put about 10-15 drops of food coloring in the water and stir around a bit. Add at least one carnation to each glass of colored water.
2. Place 7 cups in a row and pour water in the 1st, 3rd, 5th, and 7th cup. My cups were about 3/4 full. I have since heard that fuller is better. 3. Add 5 drops of red food coloring to the 1st cup and the 7th cup. 4. Add 5 drops of yellow food coloring to the 3rd cup. 5.
Learn about parts of flowers, capillary action, gravity, colours and more with this super simple experiment for kids of all ages! STEAM activity, that is per...
1. Pour a half glass of water. Add two tablespoons (30 milliliters) of food coloring to the water. 2. Cut the stem short and stand a flower in the glass. 3. Wait one day. The flower changes color ...
Transform white flowers into rainbow flowers with the color changing flower experiment for kids! (FULL TUTORIAL) Fun and educational kids activities - slime, glow in the dark, play dough, science experiments, kids crafts, fun recipes, and more! ... Flower Experiment for Kids March 01, 2019.
Color Changing Flowers. Children will be amazed by the dramatic change they will see in this color changing flowers project!In this flower activity for kids children will be able to try a capilary action experiment that will allow them to visualize that scientific principle in a super cool science experiment for kids.This flower experiment is perfect for toddlers, preschoolers, kindergartners ...
Erupting Rainbow Experiment (via She Knows) With just some kitchen ingredients, you can make a colorful volcano in minutes that will mesmerize your kids. Rainbow Flower Experiment (via hello, Wonderful) An easy color absorption experiment that results in stunning effects every time! Rainbow Spin Mixing (via Babble Dabble Do) Create brilliantly ...
Dyeing Carnations Science Experiment for Kids. You will need. 3 empty, clean jars. 3 different colours of food colouring - red, blue and yellow. carnations. paper to write your predictions/results. They made a few predictions; they predicted the carnations would change colour,
Step 4: Watch Your Dyed Flowers Come To Life. Place the stems of the roses into the color containers. For the cut flower stems, place each split into a different color container. Now, all that's left to do is wait patiently. Over the next two to three days, you'll observe the flowers color and bloom. Watching The Flower Dye Experiment Take ...
Color Changing Flowers. This classic science activity from Laughing Kids Learn must be included in a list of rainbow experiments, of course! Teach the children about plants and absorption by creating a rainbow of colorful flowers. Of course, you can also adjust the experiment to focus in on just one or two colors if you'd rather.
This rainbow experiment is an amazing way to see different colors traveling along a piece of paper towel. Talk with your little ones about water molecules and capillary action as they watch. Here's how simple it is to do this project. Cut a piece of paper towel in the shape of a rainbow. Color small rainbow boxes at the base of each rainbow end.
I've always wanted to try these Rainbow Flowers! What a fun experiment this was!! Do you think it was a success? Could I have done something differently f...
Rainbows in Milk - The classic magic milk experiment using soap and food coloring is a fun way to make moving rainbows. Rainbow Texture Explorations - This is a fabulous sensory science activity that works on making observations and learning colors. Fizzy Color Mixing Experiment - Add a rainbow of color to classic baking soda and vinegar ...