Preschool Inspirations
Preschool Activities and Learning

Easy Baking Soda and Vinegar Volcano Eruption for Kids
May 28, 2014 by Katie T. Christiansen 5 Comments
Need a super simple baking soda and vinegar volcano recipe? This one takes about three minutes to prep (and the kids get to help). It uses six common ingredients, and there is no mess to clean up afterward! If simple and no cleaning is music to your ears, you’re in the right place. We’ve made this five times in the past two weeks, so it’s definitely a loved activity here.

I have always loved making volcanoes with my kids, but they can be time-consuming and require lots of prep. Well, “lots” may be stretching it, but in my world, if it’s not simple, it doesn’t usually happen. The sad truth is that while I’ve thought about making a volcano tons of times, I’ve only made it happen a few. I wanted to change that by making it a super easy process. I hope you absolutely love it!
And if you love these types of science experiments, you can see even more baking soda and vinegar experiments that are simple and so fun! They are also an awesome addition to a preschool curriculum .
Baking Soda and Vinegar Volcano

How do you make the easiest volcano recipe in the world?
Ingredients
- Plastic cup (We tried a water bottle, but the plastic cup worked much better)
- 3-4 Tbs of baking soda at least (we usually do 4-6 which makes it extra foamy and will do 2-3 eruptions)
- 1 tsp of dish soap
- 1 cup (8 oz) of Vinegar to start with per eruption…then they’ll be asking for more 🙂
Location: an area with pea gravel, sand, or dirt
While you mix the base ingredients, have the kiddos make a mound out of pea gravel (or you could certainly do this with dirt). Once you have a mound, put the cup on top of it, and turn it into a mountain. How easy is that!

We give it a good stir just before adding the last ingredient. Now it’s time for the eruption! Pour in the vinegar until it starts foaming over, pouring it’s lava all over the rocks.

The pictures really don’t do this justice, but our pea gravel mountain was just under a foot tall (30 cm).

Here’s our bubbly red lava taking over the rocks. In the background here, I’ve been hearing “there she blows!”

It is also super fun to mix up the colors a little bit! We can pour the vinegar in about three times before we need to add more baking soda to our solution.

Baking Soda and Vinegar Volcano Video
Want to see it in action? Here’s the video!
Since we can’t get enough of this, here are some more snapshots of our other volcano eruptions.

What does it look like afterward? Here’s a picture of ours once we took away the plastic cup. You can hardly even tell we did anything, and the rocks must be nice and clean with the baking soda and vinegar. If the washable paint doesn’t come off the rocks right away, it will within a few days or the next rain.

If you want to see what this looks like with dirt, check out these fun volcano posts!
Easy Backyard Volcano by Mom with a Lesson Plan
Erupting Volcanoes in Preschool by Teach Preschool
Or if you have the time to make it a little fancier, here are some more great ideas:
Build, Paint, and Erupt Volcano by Fun at Home With Kids
Erupting Volcano Dinosaur Printable from Fun at Home With Kids
Comparing Homemade Volcano Recipes by Still Playing School
How to Build a Volcano by Kids Activities Blog
Ice Volcanoes by Reading Confetti
Messy Play Fun with Shaving Cream from Fun-A-Day!
Erupting an Easy Homemade Volcano by Mom to 2 Posh Lil’ Divas
- Recent Posts

- Rainbow Sensory Bottle - March 3, 2024
- Teaching Neurodivergent Children in Early Childhood Education - January 8, 2024
- Creating Musical Memories: Teaching Music in Preschool - October 6, 2023
September 13, 2016 at 8:32 am
My son tried this Has lots of fun!
February 28, 2018 at 4:38 pm
I like the idea I have to try it thank you Katie from preschool inspirations I love it and it looks fun and cool because I have a science fair at Edison elementary and I think it would be cool thanks
April 29, 2018 at 5:51 pm
Can you do this without the paint too?
May 2, 2018 at 9:19 am
Hi Amanda, it works without paint. It just won’t be colored. Have fun!
[…] sort of guided activity during my break time. For example some fun science experiments. Making a baking soda and vinegar volcano is super easy and fun. It doesn’t take too long either so you can easily do this with your […]
Leave a Reply Cancel reply
Your email address will not be published. Required fields are marked *
Notify me of follow-up comments by email.
Notify me of new posts by email.
This site uses Akismet to reduce spam. Learn how your comment data is processed .
Get access to my VIP Subscriber Library and my weekly resources.
- Grades 6-12
- School Leaders
Teach students checking vs. savings accounts!
Every product is independently selected by (obsessive) editors. Things you buy through our links may earn us a commission.
How To Make a Baking Soda Volcano With Free Observation Sheet
This experiment will have kids erupting with applause!

The classic baking soda volcano experiment has been entertaining kids (and adults) of all ages for decades. But it’s more than just a lot of fun. This experiment also teaches kids about simple chemical reactions and physical properties. The best part? It’s easy to do and uses only a few basic ingredients. Read on to see how to conduct the baking soda volcano experiment, and fill out the form on this page to grab your free recording sheet!
How does the baking soda volcano experiment work?
This experiment involves pouring vinegar mixed with dish soap into a small amount of baking soda. The baking soda acts as a base while the vinegar is an acid. When the base and the acid come together, they create an endothermic reaction that produces carbon dioxide. The dish soap helps to create the foaming effect as the “lava” pours out of the volcano.
What does the baking soda volcano teach?
The baking soda volcano experiment is a great way to demonstrate a chemical reaction between an acid and a carbonate. When the carbonate (found in the baking soda) is exposed to the acids (found in the vinegar), it creates a decomposition reaction that releases carbon dioxide as gas. While this experiment is an example of an acid-base reaction, it’s also a great simulation of a real volcanic eruption.
Is there a baking soda volcano video?
This video shows how to make a volcano erupt using ingredients you can probably find in your kitchen.
Materials needed
To do the baking soda volcano experiment, you will need:
- Baking soda
- Food coloring
- Mini Paper Cups
- Plastic Volcano Form
Our free recording sheet is also helpful—fill out the form on this page to grab it.
Baking soda volcano experiment steps:
1. to start, place a tiny paper cup into the hole at the top of the plastic volcano mold..

2. Once your volcano is set up, pour 1 to 2 teaspoons of baking soda into the paper cup.

3. Next, add about a half cup of vinegar into a plastic measuring cup.

4. Add a few squirts of dish soap to the vinegar solution.

5. Add some squirts of red and yellow food coloring to the vinegar mixture.

6. Use a plastic spoon to mix all the ingredients in the plastic measuring cup together.

7. Pour the vinegar solution into the small paper cup at the top of the volcano.

8. Finally, watch and enjoy the eruption!

Grab our free baking soda volcano experiment worksheet

Fill out the form on this page to get your free worksheet. The worksheet asks kids to guess the correct order of the steps in the experiment. Next, kids must make a prediction about what they think will happen. They can use the provided spaces to draw what happens before and after they add the ingredients. Did their predictions come true?
Additional reflection questions
- What role does the dish soap play in the reaction that occurs?
- How would it be different if you added baking soda to the vinegar instead of the other way around?
- What do you think would happen if you added a different liquid than vinegar?
- What do you think would happen if you added more baking soda?
Can the baking soda volcano experiment be done for a science fair?
Yes! If you want to do this experiment for a science fair, we recommend switching up some of the variables. For example: Does the amount of baking soda matter? Does the type of dish soap? Form a hypothesis about how changing the variables will impact the experiment. Good luck!
Looking for more experiment ideas? Check out our big list of experiment ideas here.
Plus, be sure to subscribe to our newsletters for more articles like this., you might also like.

16 Red-Hot Volcano Science Experiments and Kits For Classrooms or Science Fairs
Kids will erupt with excitement! Continue Reading
Copyright © 2024. All rights reserved. 5335 Gate Parkway, Jacksonville, FL 32256
How to Make a Baking Soda Volcano
Step-By-Step Instructions for a Classic Science Fair Project
busypix / Getty Images
- Ph.D., Biomedical Sciences, University of Tennessee at Knoxville
- B.A., Physics and Mathematics, Hastings College
The baking soda and vinegar volcano is a classic science project that can help kids learn about chemical reactions and what happens when a volcano erupts . While it's obviously not the real thing, this kitchen equivalent is cool all the same! The baking soda volcano is also non-toxic, which adds to its appeal—and it only takes about 30 minutes to complete.
Did You Know?
- The cool red lava is the result of a chemical reaction between the baking soda and vinegar.
- In this reaction, carbon dioxide gas is produced, which is also present in real volcanoes.
- As the carbon dioxide gas is produced, pressure builds up inside the plastic bottle, until—thanks to the detergent—the gas bubbles out of the mouth of the volcano.
Volcano Science Project Materials
- 6 cups flour
- 2 cups salt
- 4 tablespoons cooking oil
- plastic soda bottle
- dishwashing detergent
- food coloring
- baking dish or another pan
- 2 tablespoons baking soda
Make the Chemical Volcano
- Start by making the cone of your baking soda volcano by mixing 6 cups flour, 2 cups salt, 4 tablespoons cooking oil, and 2 cups of water. The resulting mixture should be smooth and firm (add more water if needed).
- Stand the soda bottle in the baking pan and mold the dough around it to form a volcano shape. Be sure not to cover the hole or drop dough inside the bottle.
- Fill the bottle most of the way full with warm water and a bit of red food coloring. (You can do this prior to sculpting the cone as long as you don't take so long that the water gets cold.)
- Add 6 drops of detergent to the contents of the bottle. The detergent helps trap bubbles produced by the chemical reaction so you get better lava.
- Add 2 tablespoons baking soda to the liquid in the bottle.
- Slowly pour vinegar into the bottle, and then watch out...It's eruption time!
Experiment With the Volcano
While it's fine for young explorers to tackle a simple model volcano, if you want to make the volcano a better science project, you'll want to add the scientific method . Here are some ideas for different ways to experiment with a baking soda volcano:
- Make a prediction about what happens if you change the amount of baking soda or vinegar. Record and analyze the effect, if any.
- Can you think of ways to change the volcano to make the eruption go higher or last longer? This might involve changing the chemicals or the shape of the volcano. It helps to record numerical data, such as the volume of liquid, the height of the "lava," or the duration of the eruption.
- Does it affect your volcano if you use a different kind of chemical to color the volcano? You could use tempera paint powder.
- Try using tonic water instead of regular water to get a volcano that glows under black light.
- What happens if you substitute other acids instead of vinegar or other bases instead of baking soda? (Examples of acids include lemon juice or ketchup; examples of bases include laundry detergent and household ammonia.) Use caution if you decide to substitute chemicals because some mixtures can be dangerous and may produce hazardous gasses. Never experiment with bleach or bathroom cleaners.
- Adding a bit of food coloring will result in red-orange lava! Orange seems to work best. Add some red, yellow, and even purple, for a bright display.
- Take Your Volcano Science Project to the Next Level
- Baking Soda and Vinegar Chemical Volcano
- Fizzy Sparkling Lemonade Made With Science
- 5 Types of Science Fair Projects
- Fizzy Sherbet Powder Candy Recipe
- Middle School Science Fair Project Ideas
- Elementary School Science Fair Projects
- Chemistry Science Fair Project Ideas
- You've Got Ingredients for a Chemical Volcano
- Ketchup and Baking Soda Volcano
- Equation for the Reaction Between Baking Soda and Vinegar
- Lemon Fizz Science Project
- How to Make a Homemade Volcano That Smokes
- How to Make a Volcano Using Pop Rocks
- 8th Grade Science Fair Project Ideas
How to Make a Baking Soda and Vinegar Volcano at Home
- University of Strathclyde
- Ithaca College
Marilyn Nieves / Getty Images
- Pest Control
- Natural Cleaning
- Green Living
- Thrift & Minimalism
- Sustainable Eating
- Working Time: 11 - 30 minutes
- Total Time: 15 minutes - 2 hours
- Skill Level: Kid-friendly
- Estimated Cost: $3-5
Building a baking soda volcano in your kitchen is a fun science project with the added "wow" factor of an explosion (without really having anything explode).
It's great for a rainy day, a summer afternoon, or any time you're trying to show your kids just how cool science can be. Here's how it's done:
What You'll Need
Ingredients/materials.
- 3 to 7 cups Warm water
- Red food coloring
- 5 drops Dishwashing detergent
- 2 tbsp Baking soda
- 2 cups White vinegar
Supplies/Tools
- Empty soda bottle (2-liter or 20-ounce depending on how big you want your volcano)
- Baking pan or large tray
Instructions
Create your baking soda volcano.
Place the plastic bottle inside a baking pan or large tray and mold your volcano around it.
For a quick and easy alternative, reach for play dough and let the kids use their creativity to mold the volcano. If you have more time—or would like to keep the kids entertained longer—use paper-mache or clay (try making these fun materials using dryer lint ), or make your play dough with a few simple ingredients.
Simple DIY Play Dough Recipe
Ingredients
- 6 cups of flour
- 2 cups of salt
- 4 tbsp vegetable oil
- 2 cups lukewarm water
Mix all ingredients together until you get a moldable consistency—smooth and firm.
Keep in mind that clay and paper-mache will need time to dry, but they should create a sturdy structure that will also be fun to paint.
Whichever technique you choose to create your volcanic cone, be sure to keep the bottle opening free of material. Use the bottle cap or cover the opening with tape to prevent any material from getting in the bottle.
Load Your Baking Soda Volcano
Using the funnel, fill the bottle two-thirds full with warm water and a few drops of food coloring.
Add the dishwashing detergent and baking soda to the liquid in the bottle and give it a gentle stir.
Prepare for the Explosion
Before adding the final ingredient, ensure you're wearing protection over your eyes. Keep your face away from the volcano as the mixture may shoot up quite a bit, especially if you use a smaller bottle.
As precisely as possible (without using the funnel), pour the vinegar into the bottle and prepare for your miniature-sized volcanic eruption.
Baking soda and vinegar mixed together produce carbon dioxide gas , which bubbles up (with the help of detergent) and forces the "lava" to erupt.
Variations of the Baking Soda Volcano
The same ingredients can be used for a few versions of this volcanic experiment.
In this simple variation, you'll mix the baking soda with water to make a slurry which will be added at the end (you'll need a clean plastic cup and a spoon to mix it).
You'll also use a smaller bottle, so the explosion will seem bigger. Be sure to place your volcano in a large tray to contain the mess or make this an outdoor activity. Eye protection is especially important.
- Mold your volcano around a 20-ounce soda bottle. (Follow step 1 above to create your volcano structure.)
- Mix 1 cup of vinegar, 1 cup of warm water, a teaspoon of dishwashing detergent, and a few drops of food coloring. Add this mixture to the bottle in your volcano.
- In a clean plastic cup, combine 1/2 cup of baking soda and 1/2 cup of water. Use a spoon to mix the slurry thoroughly.
- As quickly as possible, add your baking soda slurry to the bottle and watch your volcano explode.
Give these two homemade volcano experiments a try and see which one creates a cooler explosion! To turn this experience into a complete science lesson, check out Why Do Volcanoes Erupt?
- Make a Small Wind Turbine That Kids Can Help Build
- Natural Dyeing Guide: How to Dye Fabric Using Food Scraps
- 8 Art Supplies You Can Make at Home
- Making Soap: 5 Tips for Homemade Soap
- 25 Things to Do With Old Candle Jars
- How to Make Macrame Plant Hangers for Your Home
- How to Clean Your Solar Lights With Eco-Friendly Materials
- Make Pretty Robin's Eggs With a Simple Cabbage Dye
- Learn How to Make Disposable and Reusable Baby Wipes at Home
- 9 DIY Projects That Reuse Your Old Glass Bottles
- Make a Water Powered Flashlight
- How to Make a Spice Painting
- How to Make Your Own DIY Fire Logs Out of Recycled Newspaper (Video)
- How to Make Rose Water
- How to Make an Orange Pomander
- How to Make an Elderberry Tincture
- PRO Courses Guides New Tech Help Pro Expert Videos About wikiHow Pro Upgrade Sign In
- EDIT Edit this Article
- EXPLORE Tech Help Pro About Us Random Article Quizzes Request a New Article Community Dashboard This Or That Game Happiness Hub Popular Categories Arts and Entertainment Artwork Books Movies Computers and Electronics Computers Phone Skills Technology Hacks Health Men's Health Mental Health Women's Health Relationships Dating Love Relationship Issues Hobbies and Crafts Crafts Drawing Games Education & Communication Communication Skills Personal Development Studying Personal Care and Style Fashion Hair Care Personal Hygiene Youth Personal Care School Stuff Dating All Categories Arts and Entertainment Finance and Business Home and Garden Relationship Quizzes Cars & Other Vehicles Food and Entertaining Personal Care and Style Sports and Fitness Computers and Electronics Health Pets and Animals Travel Education & Communication Hobbies and Crafts Philosophy and Religion Work World Family Life Holidays and Traditions Relationships Youth
- Browse Articles
- Learn Something New
- Quizzes Hot
- Happiness Hub
- This Or That Game
- Train Your Brain
- Explore More
- Support wikiHow
- About wikiHow
- Log in / Sign up
- Education and Communications
- Science Experiments
- Junior Science Experiments
How to Create a Mini Volcano
Last Updated: August 23, 2024 Fact Checked
This article was reviewed by Anne Schmidt . Anne Schmidt is a Chemistry Instructor in Wisconsin. Anne has been teaching high school chemistry for over 20 years and is passionate about providing accessible and educational chemistry content. She has over 9,000 subscribers to her educational chemistry YouTube channel. She has presented at the American Association of Chemistry Teachers (AATC) and was an Adjunct General Chemistry Instructor at Northeast Wisconsin Technical College. Anne was published in the Journal of Chemical Education as a Co-Author, has an article in ChemEdX, and has presented twice and was published with the AACT. Anne has a BS in Chemistry from the University of Wisconsin, Oshkosh, and an MA in Secondary Education and Teaching from Viterbo University. This article has been fact-checked, ensuring the accuracy of any cited facts and confirming the authority of its sources. This article has been viewed 308,921 times.
Mini volcanoes are a popular science experiment for children to learn about chemical reactions. When baking soda and vinegar combine in the volcano, they make a water and carbon dioxide “eruption” that looks like lava from a volcano! You can easily do this fun experiment at home using a cup, baking soda, salt, and vinegar.
Ingredients
- 2 tablespoons (28.8 g) of baking soda
- 1/2 teaspoon (3 g) of salt
- 1-2 drops of washable paint
- 1-2 drops of dish soap
- 1 cup (240 mL) of vinegar
Mixing the Lava Ingredients
- The baking soda will react with the vinegar to cause the reaction, so make sure there's more baking soda than salt in the cup.
- Washable paint is less likely to stain your hands or the ground than food coloring, but you can use food coloring if you don't have paint available.
- The color and type of dish soap doesn't matter, as long as it produces bubbles when added to water.
- If you don't have a small toothpick or stick, you can use a spoon. However, since the spoon is bigger, some of the baking soda “fuel” can stick to the spoon, causing the reaction to be less intense.
Building the Volcano
- Remember that the outside of the volcano will quickly be covered with the “lava,” so the clay doesn't need to be dry.
- You might also have to trim around the base of the volcano to make sure it isn't crooked. Don't worry about making it perfect, as long as the general shape is right.
- Thinner paper, like regular printer paper, will start to collapse once it gets wet when the lava starts. Try to use a thicker paper, like construction paper, or a coated paper, like wrapping paper.
- For clay figures, you can press plastic dinosaur figures into the clay to create a fun Jurassic scene!
- If you're doing the project outside, consider using rocks or sand to surround the base of your volcano, making it even more realistic!
Making an Eruption
- If you're doing this experiment with kids, you can talk to them about what's going to happen as you start pouring the vinegar into the cup.
- If it doesn't start within 10 seconds, add an extra tablespoon (14.4 g) of baking soda to the reaction.
- If the lava starts to lose its color, add another drop of paint before adding more vinegar!
Community Q&A
Reader Videos
- Don't be afraid to touch the lava as it comes out of the volcano! Since its just water and bubbles, it's safe to play in the lava while you watch it erupt. Thanks Helpful 2 Not Helpful 0
Tips from our Readers
- To reuse your volcano, simply add more baking soda and vinegar. For each 2 tablespoons (28.8 g) of baking soda, you can safely add 2-3 cups (473-710 mL) of vinegar before needing to rebuild.
- Doing this experiment indoors? Be sure to place your volcano over a spill-proof tray or inside a large plastic bin to catch any overflow. Wipe up spills immediately to avoid stains.
- Get creative with building materials! Use playdough, salt dough, or papier mâché instead of clay for the outer structure. Or recycle items like oatmeal containers for the base.
- For a more dramatic eruption, add several drops of red or orange food coloring to the baking soda mixture. The more vibrant the lava color, the more exciting for kids.
- Capture the volcanic eruption on video by setting up a smartphone or tablet on a tripod. Kids will love rewatching the experiment and seeing their reactions.
- Involve kids in preparing the experiment by allowing them to measure ingredients or mix the “lava." More participation builds science curiosity.

Things You'll Need
- Plastic cup or jar
- Aluminum foil and modeling clay
- Rolling pin
- Construction paper and tape
- Washable paint (optional for adding color to lava and decorating)
- Markers (optional for decorating)
- Plastic tray
- Toothpick or stick for stirring
You Might Also Like

- ↑ https://www.youtube.com/watch?v=qalAKtLbjX8
- ↑ https://www.youtube.com/watch?v=nFZhbEi19M8
- ↑ https://youtu.be/mWZW4FeHHbU?t=216
- ↑ https://www.youtube.com/watch?v=8AqoOOJ3H_I
- ↑ https://www.youtube.com/watch?v=wFSYLQkMR7U
- ↑ https://www.youtube.com/watch?v=U8VEnGcfXHY
About This Article

- Send fan mail to authors
Reader Success Stories
Joel Mendez
Mar 20, 2016
Did this article help you?

Prashant Sutar
Feb 25, 2017

Featured Articles

Trending Articles

Watch Articles

- Terms of Use
- Privacy Policy
- Do Not Sell or Share My Info
- Not Selling Info
Get all the best how-tos!
Sign up for wikiHow's weekly email newsletter
- Skip to primary navigation
- Skip to main content
- Skip to primary sidebar

- FREE Experiments
- Kitchen Science
- Climate Change
- Egg Experiments
- Fairy Tale Science
- Edible Science
- Human Health
- Inspirational Women
- Forces and Motion
- Science Fair Projects
- STEM Challenges
- Science Sparks Books
- Contact Science Sparks
- Science Resources for Home and School
Volcano Experiment – Baking Soda Volcano
March 20, 2018 By Emma Vanstone 1 Comment
When you think of great science experiments for kids one of the first that springs to mind is probably a baking soda volcano and vinegar volcano. I remember making one with my little brother in the kitchen when he was about 4 or 5. Baking soda volcanoes and coke floats were our favourite summer activities.
You might also like our 10 science experiments every child should try at least once with a free printable checklist to work through.
A baking soda volcano eruption is a fantastic first demonstration of a chemical reaction as the ingredients are safe ( although do wear safety glasses to protect your eyes from vinegar )
Why does a baking soda and vinegar reaction happen?
If you combine an acid and an alkali they react together to neutralise each other. Vinegar is an acid and bicarbonate of soda is an alkali.
The reaction releases carbon dioxide gas, which is the bubbles you see. If you add washing up liquid ( dish soap ) to your eruption mix the bubbles make the washing up liquid bubble up, giving the appearance of lava erupting from a volcano .
How to make a baking soda volcano
What you need to make a baking soda volcano.
Basically you need the ingredients for the volcano eruption , a jar or small bottle for the eruption to happen in and something to use as the volcano part.
Volcano – sand, snow, modroc etc
Small jar or bottle
Red food colouring
Baking soda
Volcano Instructions
I don’t usually measure an exact amount of each, but a good dollop of baking soda, a squirt of dish soap and a bit of red food colouring mixed with a little water should give you a good eruption. If it doesn’t, add a bit more baking soda.
If you want to make a very quick and easy baking soda volcano a sand volcano is a good option, or a snow volcano !

Volcano Experiment Extension Ideas
What happens if you don’t use the dish soap? Can you predict what might happen before trying it?
What happens if you add extra dish soap?
Volcano Experiment Extra Challenge s
Can you think of an acidic fruit you could use to make an baking soda volcano eruption without adding vinegar?
Create a papier mache volcano ? We love this version from Red Ted Art.
Design a multicoloured volcano? We split our jar in half and poured yellow food colouring into one half and red into the other for this.

What’s your favourite baking soda volcano to make?
What is a volcano?
A volcano is a mountain that contains a magma ( rock so hot it has turned into a liquid ) chamber. The magma chamber is filled with liquid rock. If enough pressure builds inside the chamber the volcano can explode shooting the magma from the top! When magma is on the surface of the Earth we call it lava! This is a volcanic eruption and can cause a lot
Make a model of a famous volcano
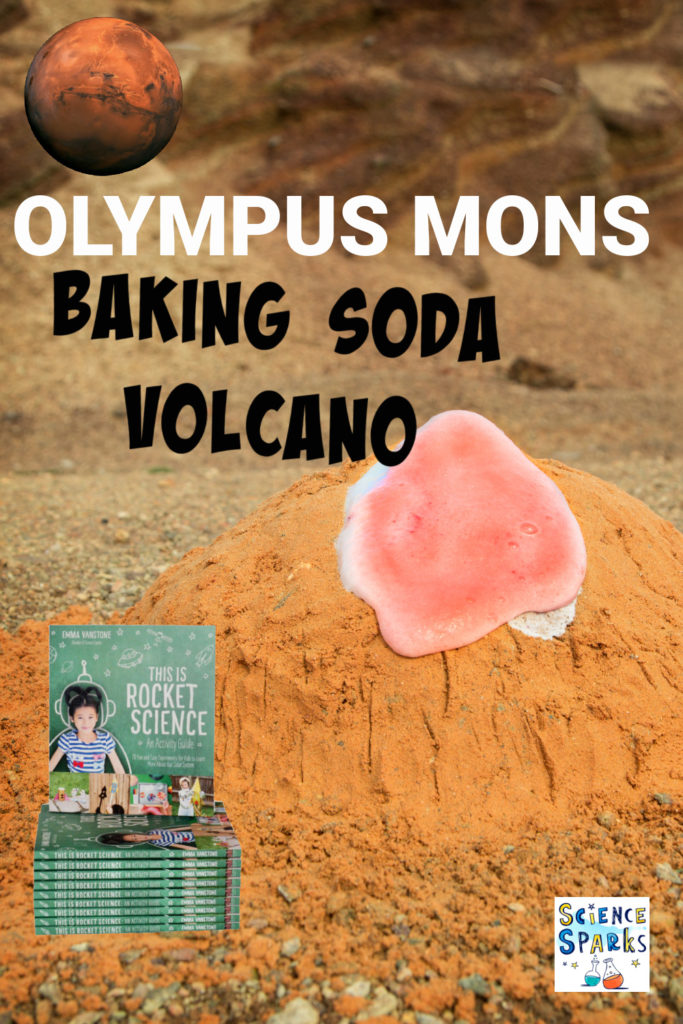
Another idea is to make a model of a famous volcano. In my book This Is Rocket Science one of the activities is to make a baking soda Olympus Mons . It’s a great way to learn about chemical reactions, volcanoes and Mars!!
Contains affiliate links
Last Updated on March 2, 2021 by Emma Vanstone
Safety Notice
Science Sparks ( Wild Sparks Enterprises Ltd ) are not liable for the actions of activity of any person who uses the information in this resource or in any of the suggested further resources. Science Sparks assume no liability with regard to injuries or damage to property that may occur as a result of using the information and carrying out the practical activities contained in this resource or in any of the suggested further resources.
These activities are designed to be carried out by children working with a parent, guardian or other appropriate adult. The adult involved is fully responsible for ensuring that the activities are carried out safely.
Reader Interactions
March 21, 2018 at 2:44 pm
My kids just love making erupting volcanoes – they are really fascinated by them. Love your challenges and extension ideas – will defo give them a try!
Leave a Reply Cancel reply
Your email address will not be published. Required fields are marked *
Science Fun
How to make a Volcano
- 10 ml of dish soap
- 100 ml of warm water
- 400 ml of white vinegar
- Food coloring
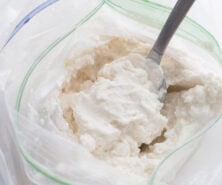
- Baking soda slurry (fill a cup about ½ with baking soda, then fill the rest of the way with water)
- Empty 2 liter soda bottle
Instructions:
NOTE: This should be done outside due to the mess.
- Combine the vinegar, water, dish soap and 2 drops of food coloring into the empty soda bottle.
- Use a spoon to mix the baking soda slurry until it is all a liquid.
- Eruption time! … Pour the baking soda slurry into the soda bottle quickly and step back!
WATCH THE QUICK AND EASY VIDEO TUTORIAL!
How it Works:
A chemical reaction between vinegar and baking soda creates a gas called carbon dioxide. Carbon dioxide is the same type of gas used to make the carbonation in sodas. What happens if you shake up a soda? The gas gets very excited and tries to spread out. There is not enough room in the bottle for the gas to spread out so it leaves through the opening very quickly, causing an eruption!
Extra Experiments:
1. Does the amount of vinegar change the eruption? 2. Does the amount of water change the eruption? 3. Does the amount of baking soda change the eruption?
EXPLORE TONS OF FUN AND EASY SCIENCE EXPERIMENTS!
SUBSCRIBE AND NEVER MISS A NEW SCIENCE FUN VIDEO!
previous experiment
Next experiment.
1. Learn about volcanoes
2. prepare your crater, 3. make your volcano erupt, 4. form the lava flow, 6. make more eruptions, 7. trade your volcano, 8. take core samples, 9. record your findings, 10. compare your map.
Learning Space
Teachable Moments
Stay Connected

Make a Volcano
Make a volcano with baking soda, vinegar and play dough. Then, add multiple layers that you can investigate like a NASA scientist. Test your family and friends to see if they can guess what's inside your volcano!
Watch the Tutorial
See below for materials and step-by-step instructions. For more video tutorials and activities like this one, visit Learning Space .
Watch en Español : Seleccione subtítulos en Español bajo el ícono de configuración.
In this episode of Learning Space, you will make a volcano with baking soda, vinegar and play dough. Then, add multiple layers that you can investigate like a NASA scientist. | Watch on YouTube
Piece of cardboard OR a cookie sheet
3 or more colors of play dough ( download recipe ) or soft clay
Baking soda
Paper towels
Colored pencils OR crayons (ideally matching the colors of the play dough)
2 sheets of graph paper OR plain paper
1-3 clear plastic drinking straws

Find out how volcanoes form and what causes them to erupt . Then click the planets in this interactive image to learn about volcanoes on planets throughout our solar system. Get inspired before you create your own volcano by checking out these images of volcanoes on Earth .
› Learn more about this image

Cut off the top of the paper cup so it's only about 0.5 inches (1-2 cm) tall. Place the paper cup at the center of your piece of paper and trace around the bottom to make a circle. The circle and the cup represent the crater inside your volcano. Tape the cup to the piece of cardboard or a cookie sheet. Mark north, east, south and west on both the paper and the cardboard or cookie sheet.

Fill the cup with a spoonful of baking soda. Then, slowly pour in enough vinegar to make the mixture foam up and flow out of the cup. This simulates an eruption and lava flowing out of your volcano.

If possible, use a colored pencil to trace around the edge of where the lava flew out of your volcano. Dab up the fluid with a paper towel. Then, cover the area inside the line you traced with a thin layer of one color of play dough to mark where the lava flowed.

On your graph paper, use a colored pencil that matches the color of the play dough you put down to draw the shape of your lava layer. This is the start of a map that will show where lava flowed during each eruption of the model volcano. Be sure the orientation of the cardinal directions on your map match the ones on your model volcano.
Repeat steps 3-5 three or four more times. Each time, put down a new layer of play dough and then map it out by drawing the shape of that layer on your graph paper. If you have more than one color of play dough, change colors between eruptions so it's easier to see the different layers.
If possible, trade your volcano with another person, so you can investigate one that is unknown! If you can't trade with anyone, find a family member who didn’t watch you build the volcano and challenge them to do the next steps.

Cut a plastic straw into thirds or fourths. Push an open end of the straw straight down through the play dough lava flows until you reach the bottom. Twist the straw in place and lift out a sample. This is what's called a core sample.
Looking through the clear straw, you can see the layers underneath the surface of the volcano. You can use this sample to investigate how the layers of the volcano formed over time. Repeat this step with each of your three or four straw pieces. Think about the best places to collect samples so that you can get as much information as possible.
On a blank piece of graph paper, draw a circle and cardinal directions like you did in Step 2. Use your core samples to make a prediction of where each layer of the volcano you’re studying begins and ends.
Then, use colored pencils that match the colors you find in the volcano to draw the layers on your graph paper. Try to get as close as you can with as few samples as possible!
Once you’ve created a map of your predictions, compare it with the known map from steps 2-6.
Save Your Favorite Ideas

Baking Soda Volcano

This classic baking soda volcano science experiment is a fun way to learn about the baking soda and vinegar reaction. Add an additional educational twist by making a color mixing experiment with it!
RELATED : Baking Soda & Vinegar Experiment

Baking Soda and Vinegar Volcano
Kids love doing this easy science experiment. Not only is it a fun activity but it’s a great learning exercise too. They can also learn about color mixing if you mix some of the colors together!
To save a step, you can just add your favorite food coloring into the cups and do it that way too!

The Science
What happens when you mix vinegar and baking soda?
You see the bubbling and foaming but what is causing this reaction? The baking soda (sodium bicarbonate) is a base while the vinegar (acetic acid) is an acid and what you are seeing is an acid/base reaction. Initially, the reaction makes carbonic acid which is unstable and breaks down into carbon dioxide (CO2) and water which is what creates all of the fizzing and bubbles as the gas leaves the water.

Watch the Video Tutorial
Supplies needed to make a baking soda vinegar volcano.
- Baking Soda – we like this large 5 lb bag for activities since it’s more economical
- Concentrated Food Coloring – red, yellow, blue – or you can choose any color you’d like. We like to use this liquid food coloring gel since it’s concentrated and makes the colors really vibrant
- Squeeze Bottle
- Dish Soap – any kind should work
- A Popsicle Stick or Spoon
- A Tray – we like these plastic white serving trays for messy experiments or sensory play
How to Make a Baking Soda Volcano
1. Add 1/4 cup of baking soda to a bowl.
Make 1 bowl for each color you want to do.

2. Add a drop of food coloring into a tablespoon of water.
We made red, yellow and blue primary colors so we could mix them together to make secondary colors.

3. Add the food colored water to your baking soda and mix.

4. Add a spoonful of two colors into a cup for the experiment.
We did red and yellow, blue and yellow, and red and blue to mix primary colors to make secondary colors.
If you don’t want to do color mixing, you can use whatever color you’d like by following the same steps!
Note: Purple will come out more of a dark red color when mixing.

5. Add a drop of dish soap on top.

6. Add half vinegar and half water into a squeeze bottle.
You can use full vinegar also but we like to mix with some water so we don’t have to use as much.
If you don’t have a squeeze bottle, you can use a pouring cup instead.

7. Squeeze a little bit of the vinegar and water mixture into the cup (not enough for it to start exploding out).
Then use a popsicle stick or spoon to mix the two colors together. You should now start to see the new color forming – green, orange or purple.

8. Keep adding the water and vinegar mixture into the cup to make the whole mixture foam and erupt out of the cup like a volcano.

Kids can continue to squeeze more of the vinegar and water mixture until it no longer erupts. Add more baking soda in and continue the experiment!
You can also repeat the experiment by trying all of the color mixing options.
To make it look more like a volcano, you can use red or orange coloring and bury the cup in some sand outside.
More Science Experiments
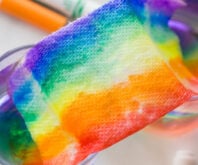
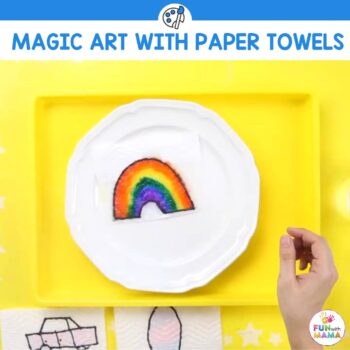
Try this fun and easy Grow a Rainbow Experiment . You only need washable markers and paper towel!

For another fun experiment, make some oobleck!

Try a rainbow rain cloud in the jar experiment!

More Science for Kids

Fluffy Slime Recipe
Ice Cream in a Bag

Oil and Water Experiment

Walking Water Experiment
Related ideas:.

How to Make Slime With Contact Solution

How to Make Oobleck
Grow a Rainbow Experiment
Share a comment.
We LOVE hearing from you! Submit your question or comment here.
Your email address will not be published. Required fields are marked *
Cancel Reply

Sign up for my FREE newsletter and get new ideas to your inbox!
Enter your email to download PDF and receive updates from OSMO
Scan to get started.
The Assessment App is available only on the Apple App Store . Please scan the QR code below with your iPhone device to download the app.

How To Make a Volcano for Kids
Want To See A Volcano Erupt Up Close? Make Volcanoes Erupt In Your Backyard With The Volcano Science Experiment . The best way to help your child learn puzzling acids and base concepts is by conducting a simple volcano experiment for kids at home. A baking soda vinegar volcano is the best way to teach children about the chemical reaction between acids and bases. Help your child learn how to make a volcano for kids.
- Things You Need For The Volcano Science Project
A Step-By-Step Guide On How to Make A Volcano For Kids
The science behind the volcano eruption experiment, 5 creative ways to make a volcano at home.
A volcano science experiment is a great way to help children understand the lesson on acids and bases. Help your child understand the chemical reaction between acids and bases using this simple science experiment for kids at home.
Things You Need For The Volcano Science Project
Making a volcano at home is an easy and fun project to do with your kids. Here is a list of things you need to perform the volcano science project. Most of the materials on the list are inexpensive and easily available. In fact, you might even find them in your pantry.
Things You’ll Need For Volcano Experiment For Kids:
- 100 ml of warm water
- 10 ml of dish soap
- 400 ml of white vinegar
- Empty 2-litre soda bottle
- 2 drops of red food coloring
- Baking soda slurry ( ½ cup baking soda and ½ cup water)
Wondering how to make a homemade volcano? It’s pretty simple. Here is a step-by-step guide to performing the volcano science experiment with your kids.
- Step 1: Mix the dish soap, water, white vinegar, and food coloring and pour it into the empty soda bottle.
- Step 2: Make a baking soda slurry with ½ cup baking soda and ½ cup water. Mix it thoroughly with a spoon, until it’s completely dissolved.
- Step 3: Now, it’s eruption time! Quickly but carefully pour this slurry into the bottle and step back. Now, watch the volcano erupt and spill out red lava!
Download How To Make Volcano Printable
The volcano science experiment will leave your kids in awe as the homemade volcano erupts and spills out red lava. Help them understand the science behind the experiment by asking them questions and giving them hints. Here is a list of questions to help you start.
- What did you learn from the volcano eruption experiment?
- Why do you think the liquid in the soda bottle erupted when you added the baking soda slurry to it?
- How does the volcano science project work?
The homemade volcano erupts because of a chemical reaction between an acid and a base. The acetic acid present in the vinegar reacts with the sodium hydrogen carbonate in the baking soda and produces carbon dioxide. The base (sodium hydrogen carbonate) undergoes a decomposing reaction when it is exposed to the acid. This produces a gas called carbon dioxide, which causes the homemade volcano to “erupt!” The dish soap becomes foamy and the bubbles and spill out like lava.
Do you know there are several ways to make a volcano at home? Now that you know the science behind volcano eruptions, here are 5 more ways to make a volcano at home!
Tape Volcano
Things you need:
- Tall plastic container
- Baking soda
- Acrylic paints
- Plastic plate
Instructions:
- Step 1: For this baking soda vinegar volcano, tape the top of your tall plastic container to the side of your plastic plate. The plate serves as the base for your volcano. Continue to add tape around your container in this fashion.
- Step 2: Paint your ‘volcano’ with acrylic paint. (We recommend using brown paint)
- Step 3: Once you’re done making your volcano, add a few drops of baking soda and vinegar inside the volcano and watch it erupt! You can add some red food coloring to make the volcano look more realistic with red lava spilling out.
Ice Volcano
- Plastic wrap
- Small bowls
- Step 1: To build an ice volcano, place a ball (that doesn’t float) at the bottom of each bowl. Line each of these bowls with plastic wrap.
- Step 2: Next, add a mixture of baking soda, water, and food coloring to these bowls so that they completely cover the ball underneath.
- Step 3: Place these bowls in the freezer for some time.
- Step 4: Once they’re frozen, pry out your ‘volcano’ from the bowls and add a few drops of vinegar into it. Your ice volcano will erupt as soon as the vinegar touches it!
Sand Volcano
- 1 tbsp baking soda
- 2 cups vinegar
- Empty plastic bottle
- Red/orange food coloring
Instructions: Want to build a sand volcano in your backyard? Here’s how you can do it.
- Step 1: First, place an empty plastic bottle in a mound of sand.
- Step 2: Use a funnel to add some baking soda to the bottle.
- Step 3: Mix some food coloring and vinegar together and pour this mixture inside the bottle and watch your volcano erupt!
Mini Volcanoes
- Red, blue, green, yellow, orange and pink food coloring
Instructions: Here’s how to make a volcano for kids using an egg carton.
- Step 1: Cut out the bottom of each egg holder in your egg carton and flip it over. You’ll notice that each slot now looks like a mini volcano.
- Step 2: Pour some baking soda into each slot.
- Step 3: Then, add some colored vinegar solution (vinegar + food coloring) into the slot. You can create several different colored eruptions in this way. The colorful eruptions will leave your child in awe.
Newspaper Volcano
- Large plastic bottle
- Cellulose adhesive
Instructions: Make a volcano at home using newspaper!
- Step 1: First, place a bottle in the middle of your cardboard base. Apply the adhesive paste all over the cardboard and glue the crumpled newspaper over it.
- Step 2: Then, glue the newspaper around your bottle too, and paint the entire structure to ensure it looks like a volcano. Set it aside and allow it to dry for a couple of hours or days.
- Step 3: When it’s ready, ask your child to pour the baking soda, vinegar, and food coloring into the bottle to make the volcano erupt.
We hope you enjoy making these volcano science projects with your little one. These experiments hone their understanding of science and instill in them a sense of creativity and imagination.
For more fun kids learning games and activities, check the rest of our website!
Frequently Asked Questions on How To Make a Volcano for Kids
What are the materials used for making a volcano for kids.
The materials used for making a volcano for kids are luke warm water, white vinegar, soda bottle, dish soap, red coloring solution, and baking soda slurry.
How To Make a Volcano for Kids?
To make volcano for kids, firstly take a soda bottle and mix water, dish soap, food coloring and white vinegar. Then, make baking soda slurry and add slowly to this solution. Let the children watch the volcano erupt and understand the concept of eruption properly.
| Kids Learning Related Links | |
Subscribe to Osmo & get
your first purchase

You’ve been subscribed with
Check the welcome mail to download the printables and avail your discount.
Explore our award-winning products for kids learning.
* Offer valid only for 7 days.
Accept cookies?
We use cook ies to give you the best online experience and to show personalised content and marketing. We use them to improve our website and content as well as to tailor our digital advertising on third-party platforms. You can change your preferences at any time.
Popular search terms:
- British wildlife
- Wildlife Photographer of the Year
- Explore the Museum
Anthropocene
British Wildlife
Collections
Human evolution
- What on Earth?
During Beta testing articles may only be saved for seven days.
Create a list of articles to read later. You will be able to access your list from any article in Discover.
You don't have any saved articles.
How to make a volcano
Volcanic eruptions are one of the most powerful natural forces on our planet.
Making your own miniature erupting volcano is a great, safe way to start learning about these incredible geological features.
Watch the video above to find out how to make a volcano model from household items, then stand back and watch it erupt.
Read on for written instructions and to discover more about volcanoes.
How to make an erupting volcano model
For the volcano model:.
- Two A3 sheets of card
- 200 ml plastic bottle
- Paint and paintbrushes
For the eruption:
- 1 tbsp bicarbonate of soda (baking soda)
- 1 tbsp washing up liquid
- 2 tbsp water
- ½ cup vinegar
- 1 tbsp red food colouring
1. Place your bottle upside down in the centre of a sheet of card and draw a small circle around the neck.
2. Cut a straight line through the card to the middle of the circle, and cut it out.

In the middle of the card, draw around the bottleneck and cut out the circle
3. Overlap the two sides of the card to make a cone shape. Tape this into place, leaving a hole where you cut out the circle. Cut around the base of the cone so that it sits flat, but make sure that it is still taller than your bottle.
4. Place the cone over the bottle. Tape the top of the paper cone to the neck of the bottle to hold it in place. Tape the base of the cone to the other sheet of card.
5. Use paint to decorate the cone and make it look like a volcano. Allow your model to fully dry.

Cut away the card at the base of the cone so that it sits flat
6. In a bowl, combine the bicarbonate of soda and washing up liquid. Add the water and mix thoroughly. Pour this mixture into your volcano.
7. In a cup, mix together the vinegar and food colouring.
8. When you're ready, pour the vinegar into the bottle with the bicarbonate. Wait for it to erupt and watch how the lava flows.
9. Experiment with different amounts of bicarbonate and vinegar and see how the volcano's eruption changes.

Stand back and watch your volcano erupt
Take care when handling the eruption ingredients and stand back when watching the eruption to make sure you don't get any in your eyes. Make sure you are working in a well ventilated area.
To make cleaning up easier, it's best to stand your model on a wipe-clean surface.
What is a volcano?
Rather than being one solid surface, Earth's crust and the uppermost parts of the mantle (together called the lithosphere) are broken into several tectonic plates that float over the asthenosphere. This is a deeper layer of rock that is a solid but flows very slowly.
This slow process moves the plates further apart (divergent boundary) or closer together (convergent boundary), or causes them to slide past each other (transform boundary).
Volcanoes typically form at divergent and convergent boundaries, but are also seen in hot spots in the middle of tectonic plates.

Mount Fuji is one of the world's most famous active volcanoes. It last erupted in the early 1700s and is located about 100 kilometres from Japan's capital city, Tokyo, although some smaller cities sit much closer. © Marion & Christoph Aistleitner via Wikimedia Commons ( CC0 )
Volcanoes are an opening of the Earth's crust through which molten rock, gases and ash can escape. This mixture of materials is called magma while it's underground, lava when it is erupted and igneous rock once it's cooled and solidified on the surface.
Volcanoes are typically high ground or mountains, sometimes with very steep sides made from the magma that erupted.
Types of volcano
Volcanoes come in a variety of shapes and sizes, primarily caused by the different types of magma, but also by how volcanoes behave and where they're located.
Stratovolcanoes
Stratovolcanoes are the most common and perhaps most recognisable type of volcano. Stratovolcanoes are steep-sloped and cone-shaped. They are also known as composite volcanoes.
They mostly produce explosive eruptions and are most commonly associated with convergent plate boundaries. Their lava is sticky (viscous), which means that it doesn't usually spread too far before cooling on the surface, giving the volcano a tall and cone-shaped profile.

Mount St Helens, a stratovolcano in the United States, famously erupted in May 1980. An explosive lateral blast occurred when a strong earthquake caused a massive landslide that collapsed the northern face of the mountain. This reduced pressure and allowing the volcano to explode from its side. © Harry Glicken , USGS/CVO via Wikimedia Commons
The violent 79 AD eruption of the still-active stratovolcano Mount Vesuvius in Italy is regarded as the deadliest in European history. It may have killed more than 16,000 people in total.
Several settlements were destroyed by its pyroclastic flow, the most famous being the ancient Roman city of Pompeii. Pyroclastic flow is a very hot mixture of ash, gases and other volcanic materials that moves at high speed along the flank of the volcano.
This was a Plinian eruption, with jets of magma and gases emerging from the volcano at high speeds. These types of eruptions can last for several days and cause a plume of superheated ash and gas that can expand and reach a height of 55 kilometres.
Stromboli is another of Italy's active stratovolcanoes, but it behaves differently to Vesuvius. This island volcano has been exhibiting a pattern of eruption for 2,000 years. Mildly explosive blasts of magma - called fire fountains - consistently occur from a few minutes to a few hours apart. This type of eruption is known as strombolian and is exhibited by other volcanoes around the world, such as by Mount Erebus in Antarctica.

A gouache painting by Mauton of Mount Vesuvius erupting in 1836. Image courtesy of Wellcome Collection , Public Domain
Shield volcanoes
Shield volcanoes are generally not as tall as stratovolcanoes, although they can still reach great heights. Olympus Mons is a shield volcano on the planet Mars . It's the largest volcano in the solar system at around 25 kilometres tall and 624 metres in diameter.
A shield volcano's eruptions are usually gentle and non-explosive and are instead known for their lava flows and fountains. Shield volcanoes have runny lava (low viscosity) that travels further than the stickier lava of stratovolcanoes. This flowing lava results in the far-reaching, gently sloping sides of these volcanoes.

Mauna Kea is a dormant shield volcano in Hawaii. Its peak is the highest point in the state of Hawaii, at 4,207 metres above sea level © Nula666 via Wikimedia Commons (CC BY-SA 3.0)
Shield volcanoes are typically located on hot spots found across tectonic plates rather than at the boundaries. The best known are the Hawaiian volcanoes such as Mauna Loa, Mauna Kea and Kīauea.
Other volcanoes around the world also exhibit gentle Hawaiian eruptions. This type of eruption can produce lava fountains that can be hundreds of metres tall and travel at speeds of up to 100 metres per second.
Cinder cones
Cinder cones are relatively small volcanoes made from loose volcanic material. Most are short-lived and can grow on the sides of larger volcanoes. They typically form through an explosive eruption or lava fountain from a single vent.
One of the best known is Parícutin, a volcano that suddenly formed in a cornfield in Michoacán, Mexico, beginning in 1943. Due to its continuous strombolian eruptions, the volcano grew until its eruptions ceased in 1952. It had reached 300 metres tall.
Parícutin was the first time that volcanologists were able to document the full life cycle of a volcano.

The cinder cone volcano, Parícutin, erupting in 1943 © Bodil Christensen via Wikimedia Commons
Supervolcanoes
The largest and most explosive volcanoes on Earth are popularly called supervolcanoes , although this isn't a scientifically defined type of volcano. These enormous volcanoes produce giant calderas - volcanic craters formed by the collapse of the volcano itself when the magma chamber below was emptied by an eruption.
One of the most famous is Yellowstone in the United States, which has a caldera around 72 by 55 kilometres. The Yellowstone supervolcano last erupted around 630,000 years ago.

The Yellowstone supervolcano is well known for its geothermal activity in the form of hot springs, fumaroles and geysers
There are around 20 known supervolcano sites around the world. The most recent supereruption was of Taupo volcano in New Zealand around 26,500 years ago.
The eruption of the Indonesian supervolcano Toba around 73,000 years ago is also thought to have triggered a drop of 2-3 degrees Celsius in air temperature globally, causing a five- to seven-year volcanic winter. This eruption may have had an profound impact on the course of the human species.
- Your question
Ask our scientists
Do you have a burning question about science or nature you want answered? Fill out the form below and we'll work with our scientists to answer some of them in our online magazine Discover or on our YouTube channel .
This new feature is in beta. Find out more .
Find out more

Supervolcanoes and their enormous eruptions
Discover what a supervolcano is, what their eruptions are like and how they impact our planet.

The 1883 Krakatau eruption: a year of blue Moons
The mystery of blue Moons lies in the ashes of volcanic eruptions.

Inside the mind of a volcano
As the new Volcanoes and Earthquakes gallery prepares to blast open, Museum volcanologist talks about predicting disasters and exploring off limits on the slopes of volcanoes.

Exploring Martian mysteries in lceland's volcanoes
Learn how Iceland's volcanic terrain is shaping the way scientists explore the surface of Mars.
Don't miss a thing
Receive email updates about our news, science, exhibitions, events, products, services and fundraising activities. We may occasionally include third-party content from our corporate partners and other museums. We will not share your personal details with these third parties. You must be over the age of 13. Privacy notice .
Follow us on social media

- Science Notes Posts
- Contact Science Notes
- Todd Helmenstine Biography
- Anne Helmenstine Biography
- Free Printable Periodic Tables (PDF and PNG)
- Periodic Table Wallpapers
- Interactive Periodic Table
- Periodic Table Posters
- Science Experiments for Kids
- How to Grow Crystals
- Chemistry Projects
- Fire and Flames Projects
- Holiday Science
- Chemistry Problems With Answers
- Physics Problems
- Unit Conversion Example Problems
- Chemistry Worksheets
- Biology Worksheets
- Periodic Table Worksheets
- Physical Science Worksheets
- Science Lab Worksheets
- My Amazon Books
5 Ways to Make a Volcano

There is more than one way to make a chemical volcano. Actually, there are several methods. Here are some of the best, from the tried-and-true baking soda and vinegar volcano to the most exotic dry ice volcano.
Make the Volcano Cone
You can use a bottle or can or really any container for your volcanic eruption, but it’s easy to make the volcano shape by coating your container with clay or papier mache. Here is a simple recipe for a homemade clay volcano:
- 6 cups flour
- 2 cups salt
- 2 cups water
- 4 tablespoons cooking oil
- Mix the ingredients together in a large bowl. It’s easiest if you stir the flour, salt, and oil together first and then mix in the water. You can add more water if needed. You want a firm, smooth dough.
- Stand an empty soda bottle or can in a pie tin or baking pan (so your ‘lava’ won’t make a mess) and mold the dough into a volcano shape. Be sure you don’t drop dough into the bottle or cover the opening.
- If you want to paint the volcano, wait until the dough is dry.
Now for the recipes! Most use common ingredients that you have at home.
Baking Soda and Vinegar Volcano
This is the classic science fair project volcano. The baking soda (sodium bicarbonate) reacts with the vinegar (weak acetic acid) to produce carbon dioxide gas. The detergent traps the gas, which is heavier than air, so it flows down the side of the volcano.
- liquid dishwashing detergent
- red or orange food coloring
- baking soda
- Pour warm water into the volcano until it is 1/2 to 3/4 of the way full.
- Add several drops of food coloring.
- Add a squirt of detergent. This helps the ‘lava’ foam up and flow.
- Add a couple of spoonfuls of baking soda.
- When you are ready to start the eruption, pour vinegar into your volcano.
- You can recharge the volcano with more baking soda and vinegar.
Note: If you don’t have vinegar, you can use another acidic liquid, like lemon juice or orange juice.
Yeast and Peroxide Volcano
- packet of quick-rise yeast
- hydrogen peroxide (3% sold in stores or can use 6% from beauty supply stores)
- food coloring
- Pour the hydrogen peroxide solution into the volcano until it is nearly full. The 3% household peroxide is safe to handle, but wear gloves and use extreme caution if you use the 6% peroxide, which can give you chemical burns!
- Add several drops of food coloring for your lava.
- When you are ready for the eruption, add the packet of yeast to the volcano.
Ketchup and Vinegar Volcano

This volcano bubbles and oozes lava. The eruption is not so dramatic, but is interesting and long-lasting. The acidity of the vinegar and tomatoes in the ketchup reacts with the baking soda to produce carbon dioxide gas, which gets trapped as bubbles by the detergent.
- dishwashing liquid
- Mix together ketchup, warm water, and a squirt of detergent to make lava.
- Pour the mixture into the volcano so it is nearly full.
- When you are ready for the eruption, add baking soda.
Mentos and Diet Soda Volcano

This volcano erupts instantly and spectacularly. For a truly memorable volcano, use diet tonic water instead of diet cola and shine a black light on the volcano. This produces a vivid blue glowing eruption!
- diet soda (regular soda works too, but produces a sticky mess)
- Mentos candies
- Fill the volcano full of soda (or you could have molded the volcano around a full soda bottle.
- When you are ready for the eruption, drop all of the Mentos candies into the mouth of the bottle at once. One easy way to do this is to roll a sheet of paper around the candies, put your finger beneath them to hold them in place, and release the candies over the hole. Be prepared for a major splash!
Dry Ice Volcano
This volcano appears to smoke, releasing a cascade of bubble lava.
- Fill the volcano with warm water.
- Add a bit of dishwashing liquid.
- When you are ready to start the eruption, use gloves or tongs to drop a piece of dry ice into the volcano.
Do you need more ways to make a volcano ? You can bake a souffle to model the geological processes or make a realistic wax volcano .
Related Posts
- Skip to main content
- Skip to primary sidebar
Fun with Mama
Toddler and preschool activities
Written by Nadia T • Feb 8, 2024 • 8 Comments
FUN Baking Soda Volcano Experiment For Kids

Have you ever tried the Baking Soda volcano experiment? This has been amongst my children’s FAVORITE activities ever. It is simple to put together and you probably already have everything you need in your kitchen. (Minus the sand.) Read on to see how you can create a volcano science experiment for kids
Volcano Science Experiment
Have you ever tried the baking soda volcano for kids? Watching the volcano explore is truly one of the most surprising and exciting moments for a young child. I love that it can be a science experiment for 3-year-olds all the way to 13-year-olds. It doesn’t lose its excitement. I have started doing science experiments for kids from the time my children were 2 years old. The vinegar and baking soda science experiments are always so easy to put together and definitely have that wow factor!
Related : Lemon Volcano Science Experiment for Kids
If you would prefer to purchase a Volcano set you can do that, but it is also very easy to do with materials you probably already have at home. (We’ve done it both ways… at home and purchased, both equally as amazing to see.)

Please note that affiliate links may be used in this post. Please see my disclosure policy for more information.
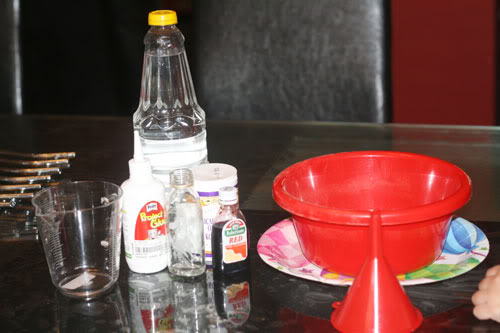
Volcano Experiment Ingredients:
- Sand (it’s in the red dish),
- A glass bottle for the volcano
- Beaker for pouring
- or plastic bottles (I used 1 glass bottle and one pouring cup)
- Red food coloring
- Bicarbonate of soda
- Paper plate or tray – Basically something just to catch the liquid to prevent mess.
You can always find my favorite kids activity supplies here.
Please note: To make the sand mold to your required shape, mix in a little bit of water.
How to make a volcano science experiment
You can watch the video we created to show you how the experiment works.
First, we will learn how to build the volcano
Mix some red food coloring with vinegar.

Then place damp sand (add some water to the sand to make it moldable) on a tray or paper plate around an empty glass bottle/jar/beaker.

Add some bicarbonate of soda (baking soda) to the empty glass bottle using a funnel.

Now you’re baking soda volcano is ready for eruption.
DIY Volcano
Now you are going to learn how to make a volcano erupt.
Pour the red-colored vinegar into the bottle (use a funnel if you need it).

Watch the magic unfold.
When vinegar mixes with baking soda you get the eruption.

Now you have a homemade volcano eruption
Let’s learn the science behind the volcano project
The baking soda and vinegar experiment demonstrates a simple chemical reaction between an acid (vinegar, which contains acetic acid) and a base (baking soda, or sodium bicarbonate). When the two substances are combined, they react to produce carbon dioxide gas, water, and a salt.
Here’s the chemical equation for the reaction:
- Vinegar (acetic acid): CH3COOH
- Baking soda (sodium bicarbonate): NaHCO3
When vinegar (acetic acid) reacts with baking soda (sodium bicarbonate), it produces:
CH3COOH + NaHCO3 -> CH3COONa (sodium acetate) + H2O (water) + CO2 (carbon dioxide gas)
The carbon dioxide gas is what causes the fizzing and bubbling reaction you observe in the experiment. The reaction between the acid and the base releases the carbon dioxide gas, which creates bubbles and pushes the mixture upward, resembling an eruption.
This baking soda volcano is one of our favorite science activities for toddlers and preschoolers. It would be wonderful to add to a Dinosaur Theme Activities month.

I hope you learned how to make a volcano erupt with baking soda and that you try it at home or in your classroom.
The baking soda volcano activity makes a great science project for kids at home and should definitely be added to your at home science bucket list.
The volcano science experiment can also be adapted to many different themes and activities. Instead of doing a volcano theme you can incorporate the baking soda and vinegar and do Fizzing Easter Egg Dyeing .
You can find all of our Science Experiments for kids here.
Do you have a science loving kid? Here are more of my favorite science activities for kids:
- Easy Elephant Toothpaste Experiment
- Halloween Science Witch’s Brew Potions
- Pop Rocks and Soda Experiment

Have you tried the Volcano Experiment for kids before? Were your students or children as amazed as mine?
More Fun Baking Soda Science Experiments
The lemon volcano experiment is FUN!

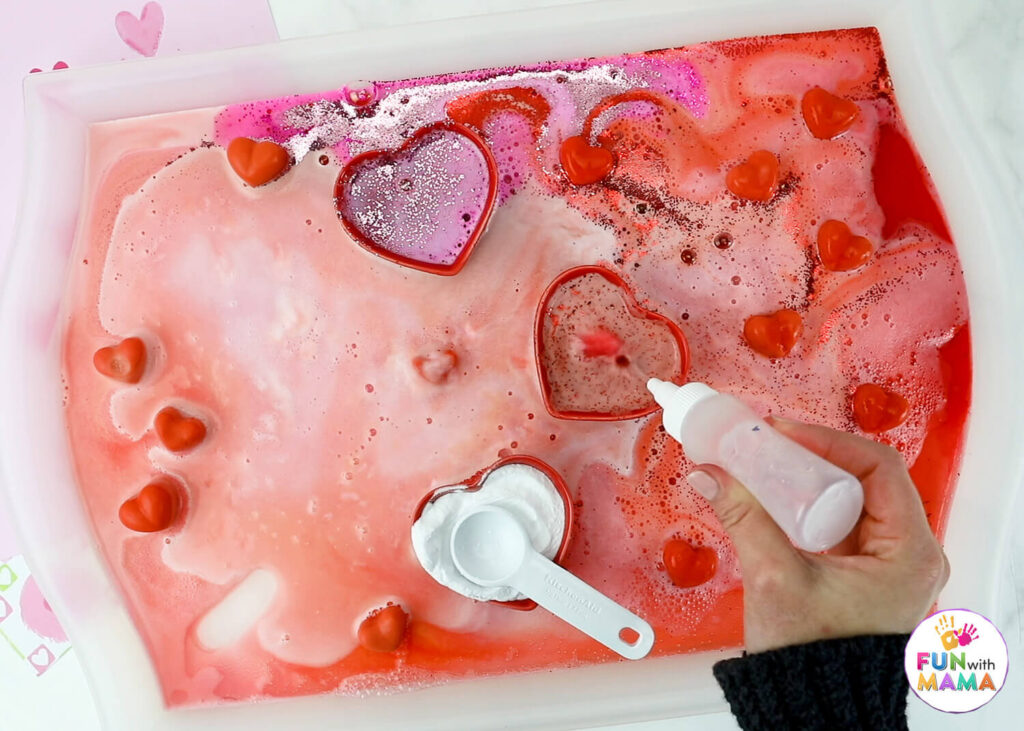
Fizzing Heart Eruptions
Check out this colorful Baking soda and vinegar reaction experiment

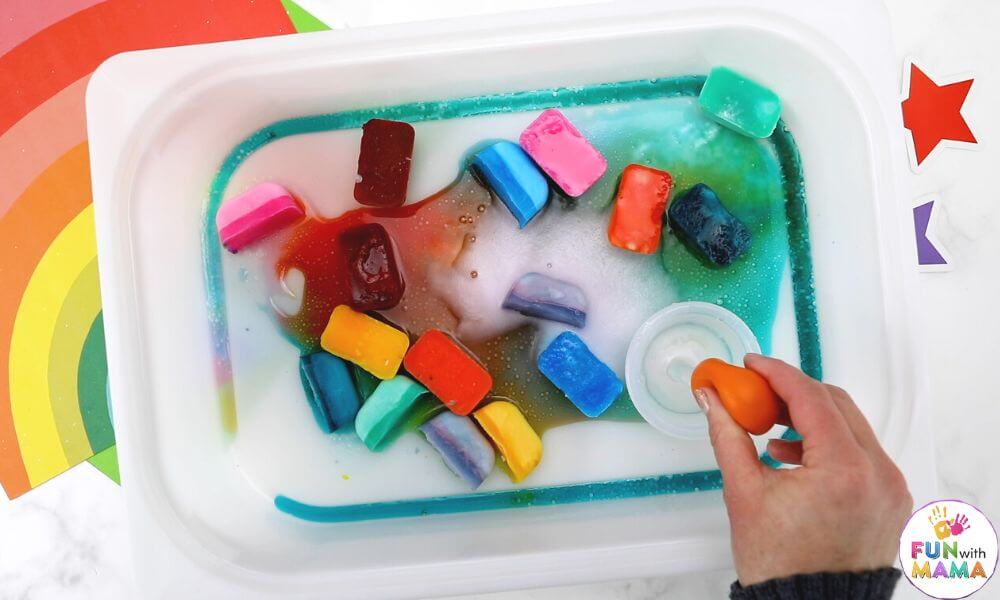
Check out the fizzing ice cubes .
Nadia is a mom of 4, with a passion for making childhood education fun through play. She encourages parents to spend quality time with their kids through fun kids activities and enjoys art, traveling, and doing activities with her children.
View all posts from this author
You May Also Enjoy These Posts:
Get easy and instant access to ALL of our printable activities and resources by joining the Fun With Mama printables club.
Get all the details and join here.
Reader Interactions

August 29, 2009 at 2:33 am
I shouldn't let the kids read over my shoulder – now they want to make one too.
August 29, 2009 at 8:51 am
This looks like so much fun! 🙂 I'll have to try it with my son!
August 29, 2009 at 10:39 am
Such a good mama to do some experimenting with your little. All I think about is M-E-S-S! That is my control freak nature, but I'm trying to get over that.
That 5th picture of your son is priceless! You can't beat that!!
August 29, 2009 at 10:59 am
that really cool!
August 31, 2009 at 2:00 pm
Fun, Fun Fun!!!
September 2, 2009 at 2:20 pm
Ooh, the famous soda and vinegar thing. That's what made me want study chemistry – too bad my parents were dead set against it. I read that this project is simpler (and less messy :)) with play-doh, but I haven't tried it out myself yet.
September 7, 2009 at 11:21 am
my son is gonna sqeal with delight if he gets to make this!
[…] in and you might see it on GMSA @ 9 a.m.!Here’s what you’ll need:This activity is courtesy of Fun with Mama.Copyright 2021 by KSAT – All rights reserved.Kaiti Blake is a child […]
Leave a Comment Cancel reply
Your email address will not be published. Required fields are marked *
This site uses Akismet to reduce spam. Learn how your comment data is processed .
Have you grabbed the latest FREE printables?

How to Make a Volcano at Home in 3 Easy Steps
By: Author Teresa
Posted on Last updated: May 26, 2021
Categories Kids Games & Activities , STEM

If you’re like me you might be a little intimidated about doing science experiments for kids at home. But it’s easier than you think. Your kids will love this simple volcano science experiment.
Follow along and learn how to make a volcano at home with baking soda and vinegar in this step by step guide. An easy Stem activity for kids when their home in summer or during school shutdowns. They will want to do it over and over again.
This post contains affiliate links. As an Amazon Associate, I earn from qualifying purchases . If you choose to buy something using my link, I earn a small commission at no extra cost to you. For more information, see my disclaimer here .

Volcano Materials & Ingredients You’ll Need

- You will need something to mix up your volcano. I suggest something clear so the kids can see the full impact of the exploding volcano. We used a spaghetti sauce jar but you could also use a clear plastic cup, water bottle or anything else you have at home.
Tip: Pick something you can throw away afterward to make clean up easy.
- A foil tray or newspaper to put under your jar. This way when the volcano explodes you have easy clean up. You could also do this out in your yard and spray it down after with a hose.
Ingredients
- Water – Fill up your container 2/3 full
- 4-5 Tbs of Baking Soda
- 1 tsp Dish Soap
- 5-6 Drops of Food Dye – any color you like
- 8 oz (1 cup) Vinegar
Step by Step Guide to Making a Volcano

Fill up your container 2/3 full of water

Add to the water – 4-5 tbs Baking Soda, 1 tsp Dish Soap and last 4-5 drops of Food Dye then stir together.
Tips: Give the kids a minute to watch the food dye mix into the water before you stir it all together. It’s pretty cool to watch the food dye in the jar.

Get the kids ready to see the explosion in this last step. Add in the 8oz of Vinegar and step back.
Yes, it’s that easy to do! When it settles pour out the mixture and do it again with a second food dye color. Kids will love watching it over and over again.
Are you ready now to do this fun Stem activity for kids at your house? Learning how to make a volcano at home is so easy and a great way to mix fun and education for your kids.
More STEM Activities
Looking for more fun STEM experiments at home? Here are some of our reader’s favorites.

Dinosaurs Frozen in Ice . It’s a simple at-home experiment with balloons, water, and small dinosaur figures. Kids will love figuring out how to melt the ice to discover the dinosaurs.
Rain Clouds in a Jar – Teach kids how rain comes from clouds with shaving cream, food dye, and water. Super easy and really cool to watch.
Ice Balloons – Cool Colored Ice Gems kids can explore. Do a fun Salt and Water Melting experiment or add them to their snow castle outdoors.
DIY Cardboard Marble Run – Make a cool Marble run with an old box and paper towel rolls for a fun STEM project at home.
If you looking for more fun STEM experiences at home we love the monthly Tech kits from Creation Crate . Each month you get all the components to create a new electronic project with video & paper instructions.
Our kids look forward to Creation Crate’s arrival every month !

Need More Fun Activities for Kids at Home?
At Happy Mom Hacks we have tons of Kids Activities for both indoors and outdoors to fend off hearing kids say the dreaded I’m Bored. Here are a few Reader Favorite Activities:
Fun Outdoor Activities for Kids with Water Toys – Cool Water Toys for Your Backyard for Toddler to 10-Year-olds.
Minute to Win It Games for Kids – Kids can play these by themselves racing the clock or against family and friends.
Fun Rainy Day Indoor Activities for Kids – Fun games to play when your stuck indoors for the day.
60 Fun & Free Things to Do with Kids Screen-Free – Entertaining activities for kids at home and in their local community.
Easy Coffee Filter Butterflies Kids Craft – Simple at-home craft for kids.
Fun Sidewalk Chalk Drawing Ideas & Shadow Art for Kids – The kids will love this fun outdoor art activity
Summer Camp at Home

Don’t stress about keeping the kids busy this summer! Plan a fun Summer Camp at Home . It’s easier than you think with our complete Summer Camp Planner . 30+ printable pages with 8 weeks of pre-planned themes, activities, schedules & more. Check it out and be ready for an unforgettable summer.
Did you enjoy this article? Become part of the Happy Mom Hacks community where we strive to make a mom’s life easier. In our weekly newsletter, we will send you new activities for kids, family travel ideas, easy weeknight meals, household hacks, and more.
Bonus , you’ll get our free printable Would You Rather Game to use as a hilarious birthday party game or fun family game night.

Follow me on Twitter , Facebook , and Instagram for kid’s activities, household hacks, family travel, and fun parenting humor to give you a laugh on your tough days.
Don’t Forget to Pin This

More From Happy Mom Hacks
Easy Family Meals & Snacks
- Easy No-Bake Energy Balls – A Perfect Quick Snack
- 25 Easy Family Dinner Ideas for Quick Weeknight Meals
- 10 Easy Rotisserie Chicken Recipes Your Family Will Love
- Sheet Pan Recipe Perfect for Weeknight Meals
- How to Make Delicious Crockpot Teriyaki Chicken
- Slow Cooker Healthy Italian Meatballs
- Quick Creamy Pesto Pasta Recipe with Sausage
Easy Ways to Clean & Organize Your Home
- 25 Clever Kitchen Organization Ideas, Hacks & Storage
- How to Declutter Your Home Stress-Free
- How to Clean a Front Loading Washing Machine
- 45 Best Cleaning Supplies at Dollar Tree
- Free Printable Ultimate Cleaning Supply List
- Easy Panty Organization for Kids School Lunch & Snacks
- How to Be Organized During the School Year With Your Kids
- Fun Age Appropriate Chore Charts with Free Printable s

Notify me of follow-up comments by email.
Notify me of new posts by email.
Get Your ALL ACCESS Shop Pass here →
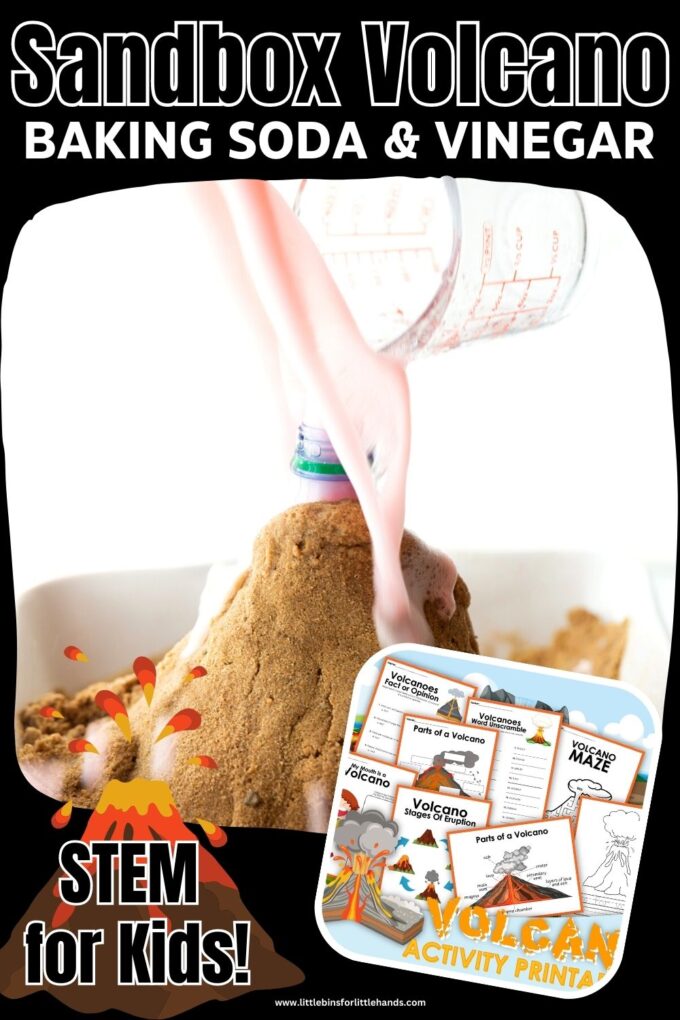
Baking Soda Vinegar Volcano For Eruption Fun
Take science outside with an easy SANDBOX VOLCANO ! When the weather is nice, try simple summer science experiments outdoors for a real hit with the kids. From pulleys to homemade ice cream, to bursting bags, this baking soda vinegar volcano is one of the coolest and easiest science activities for kids this season.
Baking Soda Volcano Experiments
We love all things that erupt and have been exploring different ways to create eruptions while having fun through play. Baking soda and vinegar science experiments are fantastic for kids of all ages !
Here are a few of our favorite volcano eruptions…
- Pumpkin Volcano
- Lemon Volcano
- Apple Volcano
- Volcano Slime
- LEGO Volcano
- Dinosaur Volcano
- Snow Volcano
- Watermelon Volcano
When the weather is nice, doing your science activities outdoors is an awesome idea! Building a sandbox volcano is an outdoor science activity with a quick clean-up.
What we love about these science activities is the extra play factor that is organically included. You can see what I mean at the end of this post.
Watch the Volcano Video
How does a volcano erupt.
Well, it’s not because of baking soda and vinegar! But it is due to escaping gasses and pressure. You can use a homemade volcano with a baking soda and vinegar chemical reaction to mimic the gas produced in a volcano. Baking soda and vinegar are the best ingredients for a simple volcano eruption!
The chemical reaction produces a gas (read more about how it works further on) which pushes the liquid up and out of the container. This is similar to an actual volcano where gas builds up underneath the earth’s surface and forces the magma up through the hole in the volcano, causing an eruption.
Some volcanoes erupt with an explosive spray of lava and ash, whereas some, like the active volcano in Hawaii, the lava flows out the opening. It all depends on the shape and the opening! The more confined space, the more explosive the eruption.
Our sandbox volcano is an excellent example of an explosive volcano. Another similar example is our Mentos and coke experiment .
Read more about the science behind baking soda and vinegar experiments .
Grab This Free Volcano Facts Pack.
Add cool volcano facts to your sandbox volcano demonstration with this free activity pack. Click here for your volcano facts pack .

What is the scientific method?
The scientific method is a process or method of research. A problem is identified, information about the problem is gathered, a hypothesis or question is formulated from the information, and the hypothesis is put to the test with an experiment to prove or disprove its validity. Sounds heavy…
What in the world does that mean?!? The scientific method should be used as a guide to help lead the process. It’s not set in stone.
You don’t need to try and solve the world’s biggest science questions! The scientific method is all about studying and learning things right around you.
As kids develop practices that involve creating, gathering data, evaluating, analyzing, and communicating, they can apply these critical thinking skills to any situation. Click here to learn more about the scientific method and how to use it.
Even though the scientific method feels like it is just for big kids…
This method can be used with kids of all ages! Have a casual conversation with younger kiddos, or do a more formal notebook entry with older kiddos!

Easy Baking Soda and Vinegar Volcano
Also, look at our salt dough volcano project as a fantastic alternative!
- sandbox with sand (try our sand slime or sand foam too)
- baking soda
- 16oz water bottle
- food coloring (optional)
You can also try adding dish soap for an even foamier fizzing eruption. Just a few drops are all that is needed.

BAKING SODA VOLCANO SET UP
STEP 1. Fill the water bottle about a third full (mix in optional food coloring) and a dd about 5 teaspoons of baking soda to it. Put the water bottle cap back on until you are ready .
STEP 2. Build a sand mountain or sand volcano around the bottle .

STEP 3. Uncap the bottle and p our a good amount, probably a cup of vinegar into the bottle .
Quick, get out of the way and watch the huge eruption!

Try These Additional Volcano Project Ideas
If you don’t want to use baking soda and vinegar, here are a few other ways to produce an eruption.
- Hydrogen Peroxide and Yeast (Elephant Toothpaste)
- Mentos and Diet Coke (Mentos Volcano)

More Fun Fizzing Experiments
There are many ways to explore fizzy reactions and not just with baking soda and vinegar experiments !
- Pop Rocks Science
- Bottle Rocket Blast Off
- Baking Soda and Vinegar Balloons
- Fizzy Paint
- Mentos and Coke
- Hatching Dino Eggs
- Lemon Volcanos

More Helpful Science Resources
Science vocabulary.
It is never too early to introduce some fantastic science words to kids. Get them started with a printable science vocabulary word list . You will want to incorporate these simple science terms into your next science lesson!
WHAT IS A SCIENTIST
Think like a scientist! Act like a scientist! Scientists like you and me are also curious about the world around them. Learn about the different types of scientists and what they do to increase their understanding of their specific areas of interest. Read What Is A Scientist
SCIENCE BOOKS FOR KIDS
Sometimes the best way to introduce science concepts is through a colorfully illustrated book with characters your kids can relate to! Check out this fantastic list of science books that are teacher approved and get ready to spark curiosity and exploration!
SCIENCE PRACTICES
A new approach to teaching science is called the Best Science Practices. These eight science and engineering practices are less structured and allow for a more free**-**flowing approach to problem-solving and finding answers to questions. These skills are critical to developing future engineers, inventors, and scientists!
Printable Science Project Pack with 52+ Experiments
Templates, instructions, observation sheets and more for over 52+ science projects and experiments. Perfect for kids in Kinderaten through Middle School.

Will this ruin the existing sand in the box? THaks!
We did not have a problem with it. If you are concerned you can scoop out the used sand or you could put a bin inside the sand box and have kids build the volcano inside it.
- Pingback: Chemistry Activities and Science Experiments for Kids
- Pingback: 33 fun summer activities for the kids
- Pingback: Fun Volcano Summer Learning Activities for Kids | Connections Academy
- Pingback: Winter Science Snow Volcano STEM Activity for Kids | Ai Nime
- Pingback: Winter Science Snow Volcano STEM Activity for Kids
Comments are closed.

Subscribe to receive a free 5-Day STEM Challenge Guide
~ projects to try now ~.


Mama's Must-Haves
Your cart is currently empty!

Volcano experiment for kids
Making a volcano experiment is a fun and easy way to teach your kids of all ages about science. All you need is baking soda, vinegar, and a little creativity! This is a great simple science experiment for kids of all ages, including pre-schoolers . And the best part is that it never gets old – You can make simple volcanoes with an empty soda bottle, or get creative and make them with dirt, sand, or snow!
Below are the steps to make your own volcano experiment at home. You can jump right to the instructions if you want .

What is a volcano experiment for kids?
This is an excellent activity for young scientists – Especially those who love dinos ! Learn why we think science for kids is so important in this post.
Essentially, it’s where you use your creativity to create a volcano base and you create a chemical reaction by mixing a baking soda slurry with vinegar. The reason there’s an eruption is that baking soda ( sodium bicarbonate ) is a base, but vinegar ( acetic acid) is an acid. First, the reaction makes carbonic acid. This is an unstable reaction , so it breaks down into a gas called carbon dioxide and water … This is the bubbly and fizzy reaction you see! The foamy bubbles are created as this reacts with the soap, making it bubble up and overflow.
Download a scientific method worksheet before starting
This is totally optional, but you may want to head over to my TpT store and download the Scientific Method worksheet for free. This way, you can emphasize key learning moments while introducing your preschooler to the scientific method. By practicing this, they will become confident in their ability to hypothesize, test, and evaluate experiments!
Plus, if you write down the step-by-step instructions and tuck this away in a folder for later, they can re-create the same activity another time.

Making a baking soda vinegar volcano: What you’ll need
I’ll list the basic ingredients and materials for a volcano, but remember – For the base, you can get as creative as you want! I’ll share some ideas for that below.
Here is everything you will need to make your own volcano experiment at home:
- 1/2 cup baking soda
- 1/4 cup warm water
- 1/2 cup white vinegar
- 1 tablespoon dish soap
- A container for the “lava” to pour out of (your base)
- A container to mix the baking soda/water/dish soap
- A spoon for mixing
Optional Ingredients:
- I usually let the kiddos add this and we come up with a number of drops that makes sense! Usually 5 or so is good
- These add a fun popping sound to the volcano! If you find some, they’re a super fun addition, but even without them this volcano science experiment is pretty cool
Do I need dish soap and food coloring?
Not at all. The food coloring just makes things more exciting. Usually, I’ll opt for red food coloring so it looks like lava pouring out of the top. But if I’m doing this with a small group then I’ll let the kiddos decide.
As for the soap, adding it increases the reaction time and creates more bubbles than without. But, that being said, I did this experiment for many years without the soap and it was just as fun!

How to make a volcano
This baking soda volcano is super easy! With only 3 supplies needed, it’s also one of my favorite science experiments. All you need to do is make a baking soda slurry then pour the vinegar in at the end and you’ll have volcano eruptions!
Instructions:
- Add all of the other ingredients before the water! You only want to put enough water that you can pour your baking soda slurry.
- Pour your slurry into the volcano base (or, if you built your base you could just put this cup right inside).
- Finally, pour in the vinegar!
- Stand back, your vinegar reaction will make your volcano erupt!
What do I need for the volcano base?
In the photo above, we went all out and made our own paper mache volcano. Am I usually this extra? Nope! But, there was a pretty intense heat wave at the time and we needed a good activity to keep us busy over the week. Making this meant we could spend lots of time designing and crafting before we actually saw an eruption.
As for the base, you can use whatever you have available! Here are some ideas to get you started though:
- Dirt/sand volcano: Next time you build a sand castle, try building a functioning volcano! Just build your base around an empty cup or soda bottle
- Playdo/plasticine volcano: Same idea – Build your base around an empty cup or empty soda bottle
- Snow volcano: So, after making a dirt volcano and graduating to the paper mache version months later, the kiddos were still excited about this well into the winter months. Naturally, we had to try to make a snow-cano too! It worked just as well as any other
- Paper mache: Again, this is very extra. But, if you want a minimum 3 day craft, it’s totally worth it! We built the base, painted it, glued on accessories like DIY trees and mini dinos, then on the final day made it erupt with the baking soda and vinegar mixture! Totally worth the wait.
What do I do when the volcano stops erupting?
Unfortunately, your carbon dioxide mixture won’t erupt forever! In fact, the eruption time is pretty short. But, the nice thing about this easy volcano experiment is it’s easy to re-make .
First, try adding vinegar to the dormant volcano. It will likely cause another eruption because there will be a leftover baking soda mixture in the bottom of the container.
Then, try adding more baking soda. You can always mix vinegar in after to use it all up, but I find that even though kiddos love watching this fun activity, they’ve usually had enough fun after a few eruptions!
Should I do this experiment outside or inside?
Volcano science should probably be an outdoors experiment if you can. Because you’ll probably add red food coloring, for example, you don’t want your counters to be left orange from a stain. And, the eruption can be pretty messy! It’s easier to deal with inside than wiping up the vinegar and baking soda from the floor.
Also, do this experiment in a well-ventilated area if you choose to stay indoors. Realistically, you could make the baking soda and vinegar volcano in a tub to contain the mess. But, since you create carbon dioxide when the vinegar reacts with the baking soda, you’ll want to avoid breathing it in.
We hope you’ve loved this easy science experiment! Kiddos love to watch the lava ooze out of their homemade volcano and love hearing the chemical reaction take place as the baking soda and vinegar erupt.
This experiment is great for children of any age because it can be as basic or as complex as you make it. Kids can choose to make a base out of an empty water bottle and simply enjoy watching the volcano erupt, or you can get super scientific about it. For example, you could make this for a science fair project where the kids go into detail about the chemical reaction happening here while comparing it to real volcanoes. Or, you can use it as an experiment during a unit where you are exploring rocks and volcanoes.
However you choose to incorporate this easy baking soda volcano into your science time, we would love to see what you created!

Other posts you may enjoy
- Lava lamp experiment
- Static electricity experiment
- Oobleck recipe
More science posts
Searching for more science experiments and science-related activities to do with your little ones? Check out this category to see all of our posts about science for kids!
Leave a Reply
Your email address will not be published. Required fields are marked *
How to Make a Lemon Volcano Science Experiment
This post may contain affiliate links.
A lemon volcano is a fantastic hands-on science experiment that brings a little zest to learning! This activity combines a simple chemical reaction with sensory play! It will excite and engage young learners while introducing them to some basic scientific principles. I love that you can bring science to life with everyday materials like lemons!

Whether you’re homeschooling, teaching in the classroom, or simply looking for a fun educational activity at home, lemon volcanoes are popular with kids of all ages. In this post, I am going to dive into the science behind it, give you some step-by-step instructions, and tell you the educational benefits of this extra fun science experiment.
The Science Behind Lemon Volcanoes
The lemon volcano is an acid-base reaction. Lemons contain citric acid, a naturally occurring weak acid. When you mix this with a base, like baking soda (sodium bicarbonate), a chemical reaction occurs. This reaction produces carbon dioxide gas, which creates the fun fizzing and bubbling effect that looks like a mini volcano erupting.

As the lemony citric acid reacts with the baking soda, carbon dioxide bubbles form and create a foamy eruption. Food coloring can be added to enhance the visual effect, making the reaction even more exciting. Add a little dish soap for an even foamier reaction!

How to Make a Lemon Volcano

Step-by-Step Instructions:

- Add Food Coloring (Optional): For a colorful volcano, drop a few drops of food coloring inside the lemon. Red, orange, or yellow work well to mimic a real volcanic eruption! We used blue because I loved the cool contrast! Use all of the colors in different sections and make a rainbow of volcanoes!
- Add Dish Soap (Also optional): To make the reaction frothier, squeeze a little dribble of dish soap on top of the lemon pulp.

Volcano Variations:
Try the experiment with a different type of citrus fruit such as limes, or grapefruit. Make an apple volcano or pumpkin volcano using baking soda and vinegar.
Educational Benefits of the Lemon Volcano Experiment

Intro to Chemical Reactions: Lemon volcanoes are a fun and easy way to introduce kids to chemical reactions. They can observe how acids (citric acid) and bases (baking soda) react to form new substances, such as carbon dioxide. This can give a foundation for understanding more complex chemistry later on.
Sensory and Hands-on Learning: We love all kinds of hands-on learning here! This activity engages many senses—sight, smell, touch, and even hearing (bubbling sounds). Involving many senses increase the learning.
Critical Thinking: You can encourage children to come up with a hypothesis and make predictions about what will happen when baking soda is added to the lemon. Will it fizz right away? Will more soap create bigger bubbles? Asking questions like this get kids thinking and helps them develop a scientist mindset! Turn it into a science fair project.
Fine Motor Skills: Working with the lemons, squeezing juice, and stirring the mixture helps young children develop fine motor skills and hand-eye coordination.
Encourages Curiosity and Exploration: Once children see their first fizzy eruption, they’re going to want to try it again. This curiosity can lead to more questions and experimentation (like with other citrus fruits!). It can really help kids develop a love for science and exploration.
Simple STEM Learning : This activity is a great introduction to basic STEM principles. It allows children to explore cause and effect, make observations, and apply basic math concepts (like measuring ingredients).
I hope you’ll give these lemon volcanoes a try! They combine science and fun, making them the perfect activity to spark curiosity and excitement in children. Whether you’re looking to enrich your homeschool curriculum or just want a fun activity for a rainy afternoon, lemon volcanoes will definitely bring some amazing smelling excitement to your day!
See More Sensory Rich Science Experiments:
Erupting Volcano Slime
Lemon Battery Experiment
How to Make an Awesome Volcano Science Project
Tapioca Pearl Sensory Play
Five Senses Activities for Kids
Former school teacher turned homeschool mom of 4 kids. Loves creating awesome hands-on creative learning ideas to make learning engaging and memorable for all kids!
Similar Posts

Halloween Math: Candy Corn Fractions

Christmas Craft: Homemade Snow Globe

Growing Mold Science Experiment for Kids

Train Chain Reactions With Dominoes
Online summer of minecraft camps.

The Great Wall of China with Rice Krispies
Leave a reply cancel reply.
You must be logged in to post a comment.
Lemons, Lavender, & Laundry
Looking for Something?
How to clean a washing machine | using vinegar & baking soda.
This post may contain affiliate links for your convenience. For more information, please visit our advertising disclosure .
Cleaning Tips
You may not think about cleaning your washing machine until you notice the dreaded “washing machine smell”, or get an error message saying there’s a problem. While cleaning a washing machine isn’t the most pleasant job, it’s fairly easy to do. This step-by-step tutorial will walk you through how to clean a washing machine ; including how to clean the washing machine filter, drum and seal. All you need is vinegar and baking soda (plus a little all-purpose cleaner).

Why Does My Washing Machine Smell?
This question is probably the number one question I get asked. Washing machines (especially f ront loading washing machines) tend to smell bad . This “washing machine odor” comes from the fact that the washing machine has an extremely tight seal (which is good because you wouldn’t want water leaking all over the floor during your washing cycle). When you tightly enclose wet clothes in a space with no air flow, you are bound to experience the smells of mildew and mold.
The other reason washing machines can smell so bad is due to the build-up of lint, hair, and laundry soap residue that builds up on the door and in the rubber seal.
The way to get rid of the washing machine smell is to clean it. This job is not pleasant, but it’s easy and requires just a few simple ingredients you probably have on hand.
What You Need to Clean A Washing Machine

Affiliate links may be used. Please see our advertising disclosure for more information .
- Vinegar (or bleach )- Vinegar is a great natural cleaner. It works well to break down hard water deposits and works to kill mold . (If you want to see how well vinegar works on mineral deposits, check out our faucets or shower head !)
- Baking Soda – Baking soda is an amazing odor-absorber, which works well when trying to remove the washing machine smell
- All Purpose Cleaner – I highly recommend using Force of Nature Cleaner when cleaning a washing machine, especially if using vinegar (vs. bleach). Force of Nature is a hospital-grade disinfectant made with vinegar, salt, and water. I have a whole review of Force of Nature Cleaner if you want more information.
- Toothbrush – An old toothbrush, or one you only use for cleaning.
- Dish Soap or Sal Suds
- Bucket – I always use an old ice cream bucket, but any gallon-size bucket will work.
How to Deep Clean A Washing Machine
Prior to cleaning a washing machine, make sure there are no clothes in it.
How to Clean A Washing Machine Filter
The first step to deep cleaning a washing machine is to clean the washing machine filter.
Warning! This process is cringe-worthy! But do not skip this step! Wanna know why?
We moved into a new house with a new (to us) washing machine, and unlike the images below, the filter was not easy to identify and access. Read: I couldn’t find it, so I didn’t clean it. After years of living in the house, our washing machine started displaying error codes pertaining to the inability to drain properly. I ignored it until I could no longer open the door without water pouring out. I knew the washing machine filter was probably plugged up with gunk, so I figured out how to get to it (under the front panel) and look what I found in the filter !!!

Huge pieces of fabric, seven coins, a key, screws, a safety pin… and more. Is this where all our lost socks end up?? No wonder my washing machine wasn’t draining!
Every washing machine is different, so the location of your filter may not be in the same place as you see in the images below, however, your instruction manual should be able to help you locate it.
Prior to starting this process it is recommended that you unplug your washing machine … just to be safe.
Of the three washing machines we’ve owned, two have a filter that looks like the one below, located in the lower left corner.

Some filters will have a hose to help drain the water prior to removing the filter, others do not. If you have a hose, secure it over a bucket (I used an ice cream bucket), remove the end-cap and allow all the water to drain. If a hose is not part of your system, you can skip this step.

The water that comes out of the hose is one of the worst smells ever! I choose to wear a mask because it is strong and indescribable. Once all the water has drained out of the hose, you can remove the filter. Place old towels underneath, because despite all the water you just drained, more may come out when removing the filter.
If you do not have a hose to drain , you can simply remove the filter. A lot of water is going to come out (and yes, it will smell awful). For the washing machine we had without the hose feature, I placed a paint tray under the filter to catch the water. I would strongly suggest placing old towels on the floor as well.
Below is the image of our washing machine filter after removal: full of hair and lint and unidentifiable globby gross stuff.

To clean the washing machine filter, use paper towels to remove all the objects and grime. (I suggest paper towels so you can simply throw it all in the trash.) Then, run the filter under warm water and scrub it with a squirt of dish soap or Sal Suds , and a toothbrush .

Once the filter has been thoroughly scrubbed, rinse and allow it to air dry; then return it to its proper place in the washing machine.
How to Clean A Washing Machine Drum
When I did my post on freshening the laundry , I discovered that vinegar and baking soda did an amazing job of ridding, not only my towels of musty odors, but the machine itself. I now use these two ingredients to clean our washing machine.
Start by filling the liquid detergent dispenser with vinegar . (Alternatively, you can use bleach, which is a stronger cleaner, however, DO NOT mix bleach and vinegar together!)

My washer has a setting called “Tub Clean”, so I just push the button and let the washing machine clean itself.
If you do not have a “Tub Clean” setting, run a normal cycle with hot water.

Once the cycle is complete, add baking soda to the powder soap dispenser and run a “quick clean cycle”.
Once the cycle is complete, spray the washing machine drum with * Force of Nature Cleaner and allow to air dry.
*The reason I recommend Force of Nature over any other cleaner is due to its natural ingredients (water, salt and vinegar). Despite only using these 3 ingredients, it is powerful enough to be labeled as a hospital-grade disinfectant that kills mold , which you need in a washing machine that’s prone to odors! (You can read my full review of Force of Nature cleaner here .)

How to Clean A Washing Machine Seal & Door
The last step in deep cleaning a washing machine is to clean the rubber seal and door. These two areas are most prone to mold and mildew. Not only that, they can trap soap residue, which attracts lint and hair. Over time this can impact the integrity of the seal. I (again) recommend using Force of Nature Cleaner for this job, but you can also use a DIY All Purpose Cleaner if you choose; just note that it will not disinfect or kill mold.
Grab your cleaner and spray down the rubber seal, using your fingers to pull the sides for a thorough cleaning. Then use paper towels to wipe the seal clean.

Repeat this same process for the washing machine door. Spray and wipe clean, paying particular attention to the bottom of the door that seems to be more prone to build-up.

You are done! Your washing machine is clean!
To reduce the potential for future mold and mildew smells, keep the washing machine door open when not in use. This helps dry things out, thus reducing moisture that mold and mildew love so much.
Common Questions About How to Clean A Washing Machine
How often should i clean my washing machine.
I recommend cleaning your washing machine every 3 months or so. This helps avoid a clogged filter and reduces the amount of lint and hair that get trapped in the rubber seal.
Is Bleach or Vinegar Better for Cleaning A Washing Machine?
As mentioned above, you can use either vinegar or bleach to clean a washing machine. Both have their pros and cons. Vinegar is a natural product that works well to break down hard water build-up, but it does not have the same disinfecting properties of bleach; however vinegar is better at killing mold . Bleach is a strong chemical cleaner that can actually disinfect your washing machine, which may help with washing machine odors. The choice is yours. If you are looking for more natural ways to clean and want to reduce mold spores, vinegar is a great option. If you are looking to disinfect the inner workings of your washer, bleach may be better for you.
Can I Clean My Washing Machine with Vinegar & Baking Soda At the Same Time?
It is interesting that so many people still recommend combining vinegar and baking soda together in order to clean. When vinegar and baking soda are combined, we know there’s a fun reaction (Yay for 4th grade volcano science projects!), but what is left behind is salt, water, and carbon dioxide. Everything that made these two products work as a cleaner are lost in that chemical reaction. Therefore, clean the washer with the vinegar first and then the baking soda; don’t combine them.
Love it? Pin it!

September 10, 2024 at 10:29 PM
Hi. Just an FYI: bleach does NOT kill mold. Vinegar does. This is why the “Force of Nature” cleaner kills mold.
Leave a Reply Cancel reply
Your email address will not be published. Required fields are marked *
Save my name, email, and website in this browser for the next time I comment.
Affiliate Statement & Your Privacy
As an Amazon Associate, I earn from qualifying purchases. To learn more about earnings made from the affiliate links used on our site, please see our advertising disclosure .
Your privacy is important to us. Please review our updated privacy policy here .
Privacy Overview
| Cookie | Duration | Description |
|---|---|---|
| cookielawinfo-checkbox-analytics | 11 months | This cookie is set by GDPR Cookie Consent plugin. The cookie is used to store the user consent for the cookies in the category "Analytics". |
| cookielawinfo-checkbox-functional | 11 months | The cookie is set by GDPR cookie consent to record the user consent for the cookies in the category "Functional". |
| cookielawinfo-checkbox-necessary | 11 months | This cookie is set by GDPR Cookie Consent plugin. The cookies is used to store the user consent for the cookies in the category "Necessary". |
| cookielawinfo-checkbox-others | 11 months | This cookie is set by GDPR Cookie Consent plugin. The cookie is used to store the user consent for the cookies in the category "Other. |
| cookielawinfo-checkbox-performance | 11 months | This cookie is set by GDPR Cookie Consent plugin. The cookie is used to store the user consent for the cookies in the category "Performance". |
| viewed_cookie_policy | 11 months | The cookie is set by the GDPR Cookie Consent plugin and is used to store whether or not user has consented to the use of cookies. It does not store any personal data. |
IMAGES
VIDEO
COMMENTS
1 cup (8 oz) of Vinegar to start with per eruption…then they'll be asking for more 🙂. Location: an area with pea gravel, sand, or dirt. Start off by combining the "base ingredients.". Put the water inside of the plastic cup. Fill it about 2/3 full. Add the baking soda, dish soap, and washable paint.
To start, place a tiny paper cup into the hole at the top of the plastic volcano mold. 2. Once your volcano is set up, pour 1 to 2 teaspoons of baking soda into the paper cup. 3. Next, add about a half cup of vinegar into a plastic measuring cup. 4. Add a few squirts of dish soap to the vinegar solution. 5.
Updated on November 19, 2019. The baking soda and vinegar volcano is a fun chemistry project you can do to simulate a real volcanic eruption or as an example of an acid-base reaction. The chemical reaction between baking soda (sodium bicarbonate) and vinegar (acetic acid) produces carbon dioxide gas, which forms bubbles in dishwashing detergent.
Fill the plastic water bottle about halfway full with baking soda. Add a squirt or two of dish soap to the bottle. Pile the sand up around the plastic water bottle to make it look like a volcano. Be sure to leave the mouth of the bottle open and unobstructed. Measure out ½ cup of vinegar. Add a drop or two of red food coloring to the vinegar.
Make the Chemical Volcano. Start by making the cone of your baking soda volcano by mixing 6 cups flour, 2 cups salt, 4 tablespoons cooking oil, and 2 cups of water. The resulting mixture should be smooth and firm (add more water if needed). Stand the soda bottle in the baking pan and mold the dough around it to form a volcano shape.
Mix 1 cup of vinegar, 1 cup of warm water, a teaspoon of dishwashing detergent, and a few drops of food coloring. Add this mixture to the bottle in your volcano. In a clean plastic cup, combine 1/ ...
Download Article. 1. Add 2 tbsp (28.8 g) of baking soda and 1/2 tsp (3 g) of salt to a cup. Use a larger plastic cup or a glass jar so you can build the volcano around the cup. Make sure the baking soda and salt are at the bottom of the cup in an even layer.
These activities are designed to be carried out by children working with a parent, guardian or other appropriate adult. The adult involved is fully responsible for ensuring that the activities are carried out safely. Easy volcano experiment using a baking soda and vinegar to make the volcano erupt. Make a papeir mache volcano, modroc or sand ...
Empty 2 liter soda bottle . Instructions: NOTE: This should be done outside due to the mess. Combine the vinegar, water, dish soap and 2 drops of food coloring into the empty soda bottle. Use a spoon to mix the baking soda slurry until it is all a liquid. Eruption time! … Pour the baking soda slurry into the soda bottle quickly and step back!
2. Prepare your crater. Cut off the top of the paper cup so it's only about 0.5 inches (1-2 cm) tall. Place the paper cup at the center of your piece of paper and trace around the bottom to make a circle. The circle and the cup represent the crater inside your volcano. Tape the cup to the piece of cardboard or a cookie sheet.
Add 1/4 cup of baking soda to a bowl. Make 1 bowl for each color you want to do. 2. Add a drop of food coloring into a tablespoon of water. We made red, yellow and blue primary colors so we could mix them together to make secondary colors. 3. Add the food colored water to your baking soda and mix. 4.
Here's how you can do it. Step 1: First, place an empty plastic bottle in a mound of sand. Step 2: Use a funnel to add some baking soda to the bottle. Step 3: Mix some food coloring and vinegar together and pour this mixture inside the bottle and watch your volcano erupt! Mini Volcanoes.
Mix vinegar, dish soap, a few drops of water, and a few drops of red food coloring in a plastic cup. Add 1 teaspoon ARM & HAMMER Baking Soda into a small, empty plastic cup. Place this cup into the volcano crater. Quickly pour vinegar mixture into the ARM & HAMMER Baking Soda cup in the crater. Enjoy the "lava" as the volcano erupts.
In a bowl, combine the bicarbonate of soda and washing up liquid. Add the water and mix thoroughly. Pour this mixture into your volcano. 7. In a cup, mix together the vinegar and food colouring. 8. When you're ready, pour the vinegar into the bottle with the bicarbonate. Wait for it to erupt and watch how the lava flows.
liquid dishwashing detergent. red or orange food coloring. baking soda. vinegar. Pour warm water into the volcano until it is 1/2 to 3/4 of the way full. Add several drops of food coloring. Add a squirt of detergent. This helps the 'lava' foam up and flow. Add a couple of spoonfuls of baking soda.
Let's learn the science behind the volcano project. The baking soda and vinegar experiment demonstrates a simple chemical reaction between an acid (vinegar, which contains acetic acid) and a base (baking soda, or sodium bicarbonate). When the two substances are combined, they react to produce carbon dioxide gas, water, and a salt.
Try your hand at a DIY kitchen science experiment! Inspired by POMPEII: THE EXHIBITION, I cover all you need to make a classic baking soda and vinegar volcan...
STEP 1: First, you will want to whip up a batch of our salt dough. 2 cups all-purpose bleached flour. 1 cup of salt. 1 cup of warm water. Combine all the dry ingredients in a bowl and form a well in the center. Add the warm water to the dry ingredients and mix until it forms a dough.
Step 2. Add to the water - 4-5 tbs Baking Soda, 1 tsp Dish Soap and last 4-5 drops of Food Dye then stir together. Tips: Give the kids a minute to watch the food dye mix into the water before you stir it all together. It's pretty cool to watch the food dye in the jar.
STEP 1. Fill the water bottle about a third full (mix in optional food coloring) and a dd about 5 teaspoons of baking soda to it. Put the water bottle cap back on until you are ready. STEP 2. Build a sand mountain or sand volcano around the bottle. STEP 3. Uncap the bottle and p our a good amount, probably a cup of vinegar into the bottle.
In this quick and easy video you will learn make a volcano erupt with baking soda and vinegar. This is a fun and exciting science experiment that explores an...
Erupting volcano science experiment is such a classic and a great one to support teaching in chemical reactions. Now we show you just how you can do it yours...
This baking soda volcano is super easy! With only 3 supplies needed, it's also one of my favorite science experiments. All you need to do is make a baking soda slurry then pour the vinegar in at the end and you'll have volcano eruptions! Instructions: In a small container, mix the baking soda, food coloring, dish soap, and water with a spoon.
Volcano Variations: Try the experiment with a different type of citrus fruit such as limes, or grapefruit. Make an apple volcano or pumpkin volcano using baking soda and vinegar. Educational Benefits of the Lemon Volcano Experiment. Intro to Chemical Reactions: Lemon volcanoes are a fun and easy way to introduce kids to chemical reactions. They ...
When vinegar and baking soda are combined, we know there's a fun reaction (Yay for 4th grade volcano science projects!), but what is left behind is salt, water, and carbon dioxide. Everything that made these two products work as a cleaner are lost in that chemical reaction. Therefore, clean the washer with the vinegar first and then the ...