
- Science Notes Posts
- Contact Science Notes
- Todd Helmenstine Biography
- Anne Helmenstine Biography
- Free Printable Periodic Tables (PDF and PNG)
- Periodic Table Wallpapers
- Interactive Periodic Table
- Periodic Table Posters
- Science Experiments for Kids
- How to Grow Crystals
- Chemistry Projects
- Fire and Flames Projects
- Holiday Science
- Chemistry Problems With Answers
- Physics Problems
- Unit Conversion Example Problems
- Chemistry Worksheets
- Biology Worksheets
- Periodic Table Worksheets
- Physical Science Worksheets
- Science Lab Worksheets
- My Amazon Books

Make Hot Ice From Baking Soda and Vinegar

Hot ice is another name for sodium acetate (CH 3 COONa or NaOAc). It is the sodium salt of acetic acid, which is the key component of vinegar. Hot ice gets its name from the way it solidifies. A solution of sodium acetate supercooled below its melting point suddenly crystallizes. Heat is released and the crystal resemble ice so… “hot ice.” All you need to make sodium acetate and crystallize it into hot ice is baking soda and vinegar. It’s a great chemistry demonstration because it illustrates chemical reactions, supercooling, crystallization, and exothermic processes . From start to finish, the project takes less than an hour. Once you have the sodium acetate, you can melt and crystallize it over and over again.
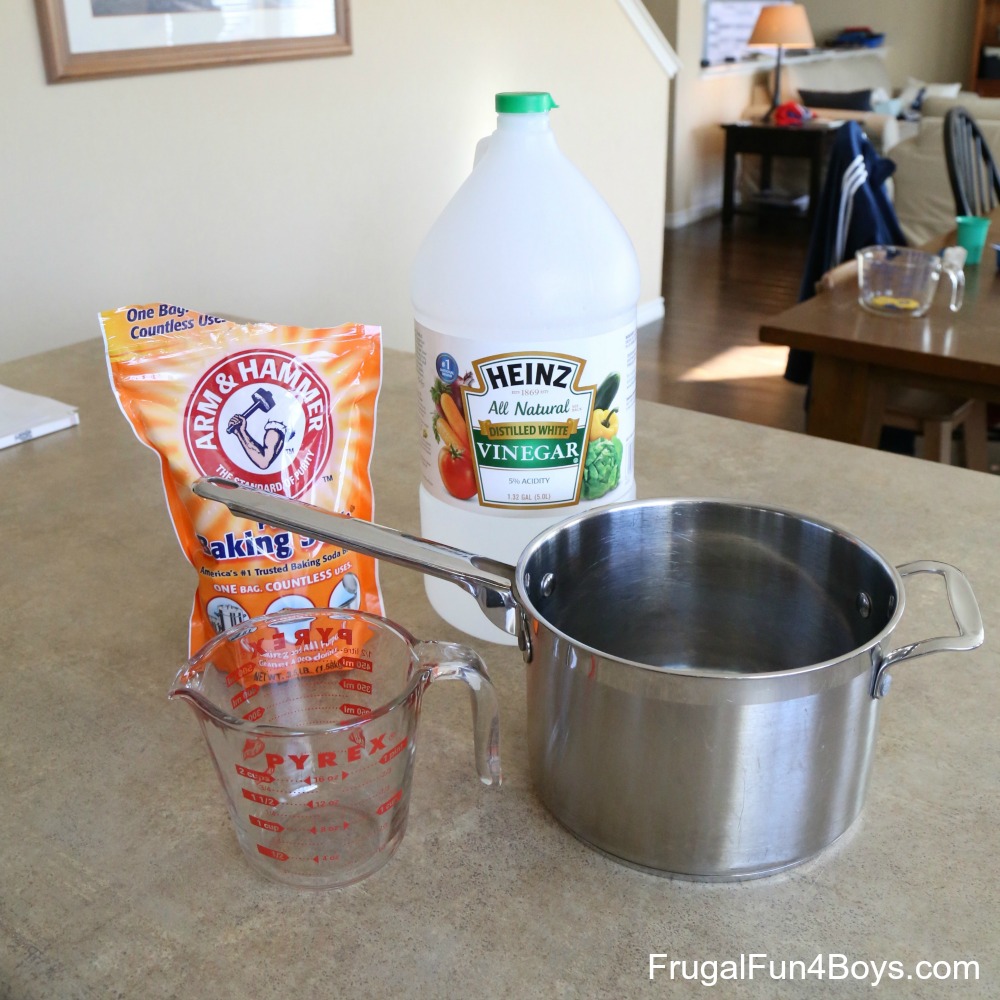
You only need two ingredients, plus a pan and stove:
- 1 liter Vinegar (weak acetic acid)
- 4 tablespoons Baking soda (sodium bicarbonate)
The quantities of baking soda and vinegar are not critical so long as all of the baking soda dissolves. If measuring the ingredients isn’t an option, just dissolve baking soda in vinegar until no more dissolves, filter off the liquid using a coffee filter or paper towel to remove any solids, and proceed from there.
Be sure to use plain white (clear) vinegar and not cider, red wine, or some other colored vinegar. You can substitute sodium carbonate (washing soda) or sodium hydroxide (caustic soda or lye) for the baking soda. If you have access to pure sodium acetate (inexpensive online), you can skip the procedure to make it and go directly to the step for re-using it.
- The first step is reacting the baking soda and vinegar . Stir baking soda into vinegar a little at a time. If you add it all at once, you’ll basically get the classic baking soda and vinegar volcano and could overflow your pan! The reaction between baking soda and vinegar produces sodium acetate, water, and carbon dioxide gas: Na + [HCO 3 ] – + CH 3 –COOH → CH 3 –COO – Na + + H 2 O + CO 2 However, at this point there’s too much water for the sodium acetate to crystallize.
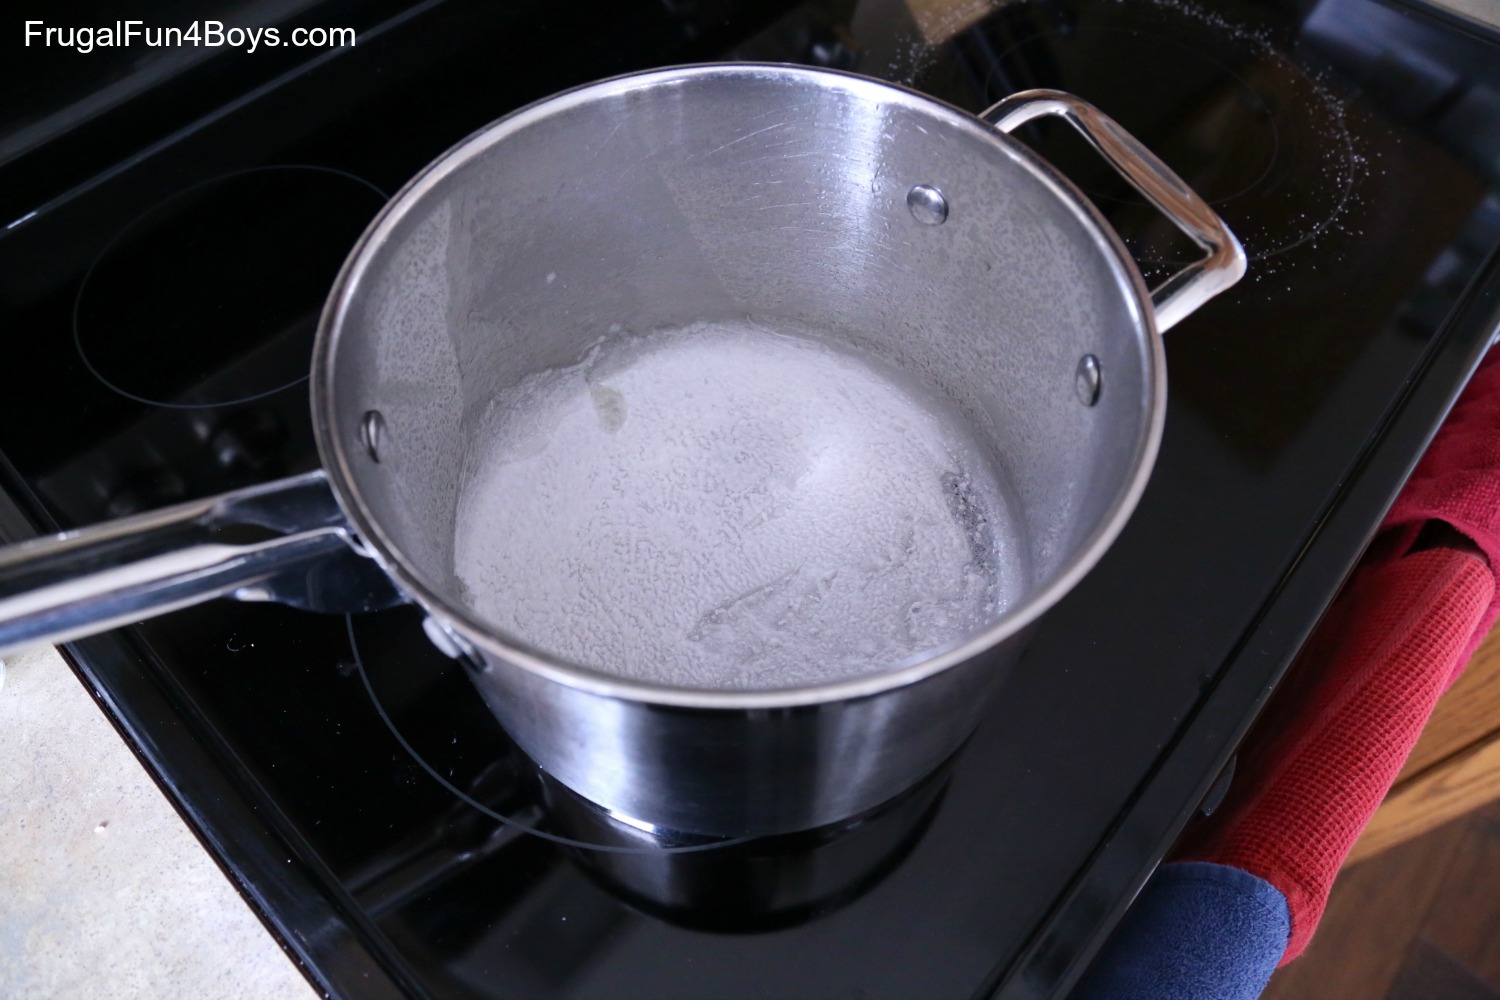
- Next, concentrate the solution by boiling it. It took me about an hour at medium heat to reduce the volume from a liter to about 100-150 milliliters. Don’t use high heat because you may get discoloration (golden or brown). The discoloration doesn’t ruin the sodium acetate, but the hot ice will look a bit like you made it from yellow snow. You’ll know you’ve boiled off enough water when a crystalline skin starts to form on the surface of the liquid.
- Once you see a skin, immediately remove the pan from the heat. Carefully pour the liquid into a clean container and cover the new container with plastic wrap or a lid to prevent further evaporation. You should get crystals in the pan, which you can use as seed crystals for activities, but the liquid in the new container should not contain any crystals. If you do have crystals, stir in a very small volume of water or vinegar to dissolve the crystals. If the entire solution crystallizes, add more water and go back to the stove to boil it down again.
- Place the covered container of sodium acetate solution in the refrigerator to chill it. It’s also fine to let the solution cool to room temperature on its own, but this takes longer. Either way, reducing the temperature produces a supercooled liquid. That is, the sodium acetate remains liquid below its freezing point.
Hot Ice Activities
Solidification of sodium acetate is the basis for one type of hot pack , but it’s also great for crystallization demonstrations. Three popular activities are the “sea urchin,” “flower,” and “tower.”
- Sea Urchin : Pour the cooled liquid into a clear container. Use a toothpick or bamboo skewer to scrape a few sodium acetate crystals from the pan used to make the solution. Dip the toothpick into the liquid so the tip with crystals are in the middle of the container. Needle-like crystals immediately grow out from the center. Also, crystallization releases heat as chemical bonds form to make the solid. The final structure resembles a spiny sea urchin.
- Flower : Pour the cooled sodium acetate liquid into a flat dish (preferably a dark-colored one). Scrape one or more crystals from the pan and drop them onto the liquid. The crystals act as seeds . The hot ice crystals spread out radially and form structures that resemble flowers.
- Tower : Place a few crystals onto a surface. Slowly pour the liquid onto the crystals. The hot ice solidifies as you pour the liquid, forming a tower (or whatever shape you can manage).
Re-Using Hot Ice
Save the solid sodium acetate so you can use it again without going through the whole baking soda-and-vinegar process. Simply dissolve the hot ice in water and boil off the smaller amount of excess water.
Safety Information
Sodium acetate is a safe, non-toxic chemical, so it’s perfect for chemistry demonstrations. It is used as a food additive to enhance flavor and is a key ingredient in some chemical hot packs. The heat released by hot ice crystallization of a refrigerated solution doesn’t present a burn hazard. However, making hot ice from baking soda and vinegar does involve boiling liquid on a stove, so adult supervision is required. If you use sodium hydroxide in place of baking soda, heed the cautions on the product label.
- ChemEd Xchange (2019). “ Crystallization of Supersaturated Sodium Acetate – Demonstration .”
- Clayden, Jonathan; Greeves, Nick; Warren, Stuart; Wothers, Peter (2001). Organic Chemistry (1st ed.). Oxford University Press. ISBN 978-0-19-850346-0.
- Seidell, Atherton; Linke, William F. (1952). Solubilities of Inorganic and Organic Compounds . Van Nostrand.
Related Posts
- PRO Courses Guides New Tech Help Pro Expert Videos About wikiHow Pro Upgrade Sign In
- EDIT Edit this Article
- EXPLORE Tech Help Pro About Us Random Article Quizzes Request a New Article Community Dashboard This Or That Game Happiness Hub Popular Categories Arts and Entertainment Artwork Books Movies Computers and Electronics Computers Phone Skills Technology Hacks Health Men's Health Mental Health Women's Health Relationships Dating Love Relationship Issues Hobbies and Crafts Crafts Drawing Games Education & Communication Communication Skills Personal Development Studying Personal Care and Style Fashion Hair Care Personal Hygiene Youth Personal Care School Stuff Dating All Categories Arts and Entertainment Finance and Business Home and Garden Relationship Quizzes Cars & Other Vehicles Food and Entertaining Personal Care and Style Sports and Fitness Computers and Electronics Health Pets and Animals Travel Education & Communication Hobbies and Crafts Philosophy and Religion Work World Family Life Holidays and Traditions Relationships Youth
- Browse Articles
- Learn Something New
- Quizzes Hot
- Happiness Hub
- This Or That Game
- Train Your Brain
- Explore More
- Support wikiHow
- About wikiHow
- Log in / Sign up
- Education and Communications
- Science Experiments
How to Make Hot Ice
Last Updated: January 15, 2023 Fact Checked
This article was reviewed by Anne Schmidt . Anne Schmidt is a Chemistry Instructor in Wisconsin. Anne has been teaching high school chemistry for over 20 years and is passionate about providing accessible and educational chemistry content. She has over 9,000 subscribers to her educational chemistry YouTube channel. She has presented at the American Association of Chemistry Teachers (AATC) and was an Adjunct General Chemistry Instructor at Northeast Wisconsin Technical College. Anne was published in the Journal of Chemical Education as a Co-Author, has an article in ChemEdX, and has presented twice and was published with the AACT. Anne has a BS in Chemistry from the University of Wisconsin, Oshkosh, and an MA in Secondary Education and Teaching from Viterbo University. There are 8 references cited in this article, which can be found at the bottom of the page. This article has been fact-checked, ensuring the accuracy of any cited facts and confirming the authority of its sources. This article has been viewed 874,040 times.
How can ice be hot? When it's not ordinary ice. Using the same ingredients as a baking soda volcano, [1] X Research source you can create sodium acetate. By cooling this below its freezing point, you get a liquid that's ready to freeze at the slightest trigger. In the process of forming a solid crystal, it releases a burst of heat. And that's how you get "hot ice."
Making Sodium Acetate At Home

- Do not use a copper pot.

- You cannot use baking powder, which contains other chemicals that interfere with the process.

- This measurement assumes you're using 5% acetic acid, which is a common concentration for commercial vinegar. This doesn't need to be a precise measurement, though.

- If it does get very brown and cloudy, add a bit more vinegar and boil again.
- The sodium acetate starts out as "sodium acetate trihydrate," meaning it contains water. Once all the water around it is gone, those water molecules start to evaporate and the sodium acetate becomes "sodium acetate anhydrous," meaning "without water."

- It's a good idea to add 1 or 2 tablespoons (15–30 mL) of vinegar. The vinegar will help keep the solution in its aqueous state, instead of forming that crust again.

- If the liquid freezes during this stage, there might be a solid piece of crystal in it, or some other impurity. Add more vinegar, return to the stovetop, and try again. This is a difficult process, so it's rare that you'll get it on your first try.

- If this does not happen, there is a problem with your solution. Add more vinegar and boil again — or try the more reliable store-bought method below.
Using Store-Bought Sodium Acetate

- Sodium acetate is also sold as "sodium acetate anhydrous," and some vendors do not specify which form they mean. The instructions below cover both forms.

- If the sodium acetate does not melt, you've bought sodium acetate anhydrous. To turn it into sodium acetate trihydrate, add hot water while it's still in the boiling water bath. It will take about 2 mL water for every 3 grams of sodium acetate to fully dissolve the substance.
- Don't use all of your sodium acetate. You'll need a little for later.

- Other impurities can trigger the freezing if they happen to be the right shape. This means you can sometimes trigger it by touching it with a toothpick or your finger, but solid sodium acetate is the only reliable way.
Expert Q&A

- You can melt the solid "hot ice" and repeat the show by cooling it again. You can melt it easily in the microwave, since you no longer need to boil away any water. Thanks Helpful 4 Not Helpful 1
- You can make ice sculptures if you pour the solution onto a pinch of the solid crystals. The solution will turn into a solid when it comes in contact with the crystals, and will continue to solidify while you pour. The ice will soon tower up! Thanks Helpful 1 Not Helpful 1
- The home-made hot ice is more difficult to use and gives less impressive results than the store-bought method. If you have any problems with it, your best bet is to add more vinegar, boil away the water, and try again. Thanks Helpful 0 Not Helpful 0

- Do not touch the solution until it's cooled! Thanks Helpful 45 Not Helpful 13
Things You'll Need
- Sodium acetate trihydrate (or white vinegar and baking soda)
- Medium to large pot (steel or Pyrex)
- Clean container
- Ice bath (or refrigerator)
You Might Also Like

- ↑ http://www.rsc.org/learn-chemistry/resource/res00002026/bubble-volcanoes?cmpid=CMP00006775
- ↑ http://smile.cosi.org/cooking-with-chemistry-teacher-packet-and-classroom-activities.pdf#page=10
- ↑ https://youtu.be/g584hrAIMKc?t=40
- ↑ https://youtu.be/AedL_NCv1Pw?t=82
- ↑ https://www.raisingmemories.com/2014/05/homemade-hot-ice-sodium-acetate.html
- ↑ https://youtu.be/pzHiVGeevZE?t=60
- ↑ https://www.fleet.org.au/blog/hot-ice/
- https://www.raisingmemories.com/2014/05/homemade-hot-ice-sodium-acetate.html
About This Article

To make hot ice, combine baking soda and white vinegar in a large steel pot. When the mixture stops fizzing, put the pot on a stovetop and bring the mixture to a boil. Right when a crusty film starts to form on top of the mixture, turn the stovetop off. Scrape off the powdery crystals on the side of the pot with a spoon and put them in a separate container. Then, transfer the liquid mixture into a heat-resistant container, seal it shut, and chill it in an ice bath for 15 minutes. Finally, sprinkle some of the powdery crystals into the mixture to create hot ice! If you want to learn how to use store-bought sodium acetate for hot ice from our Biochemistry Ph.D. co-author, keep reading! Did this summary help you? Yes No
- Send fan mail to authors
Reader Success Stories
Tajinder Singh
Nov 25, 2016
Did this article help you?
Damien Dempsey
Nov 9, 2017
Ayush Goyal
Sep 12, 2016
Oct 5, 2017

Featured Articles

Trending Articles

Watch Articles

- Terms of Use
- Privacy Policy
- Do Not Sell or Share My Info
- Not Selling Info
wikiHow Tech Help Pro:
Level up your tech skills and stay ahead of the curve

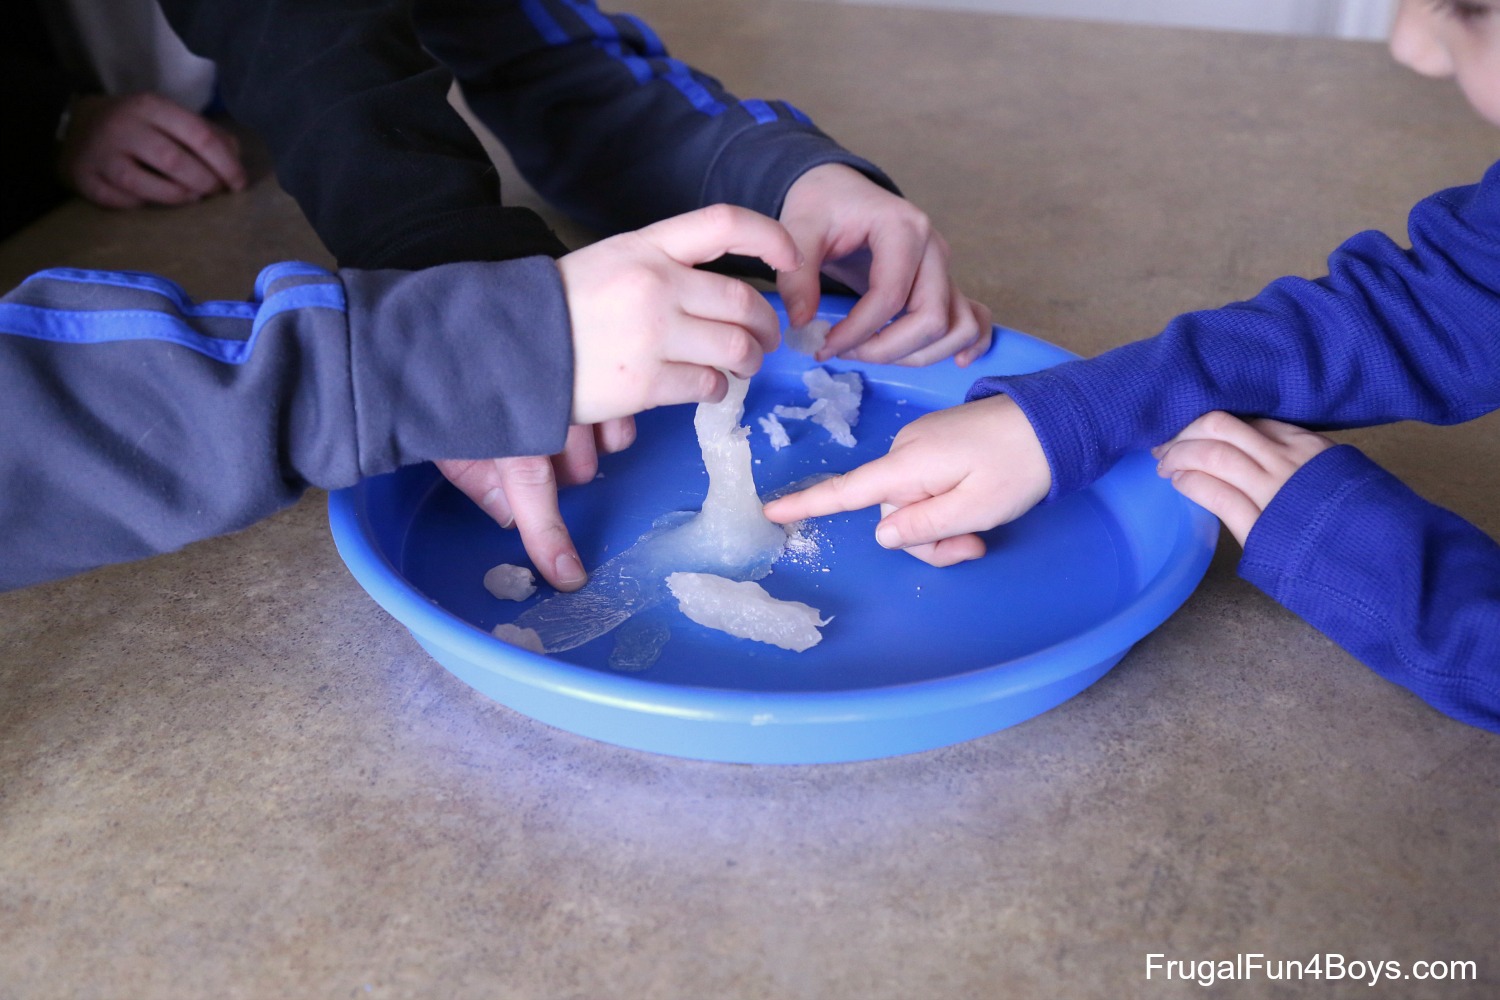
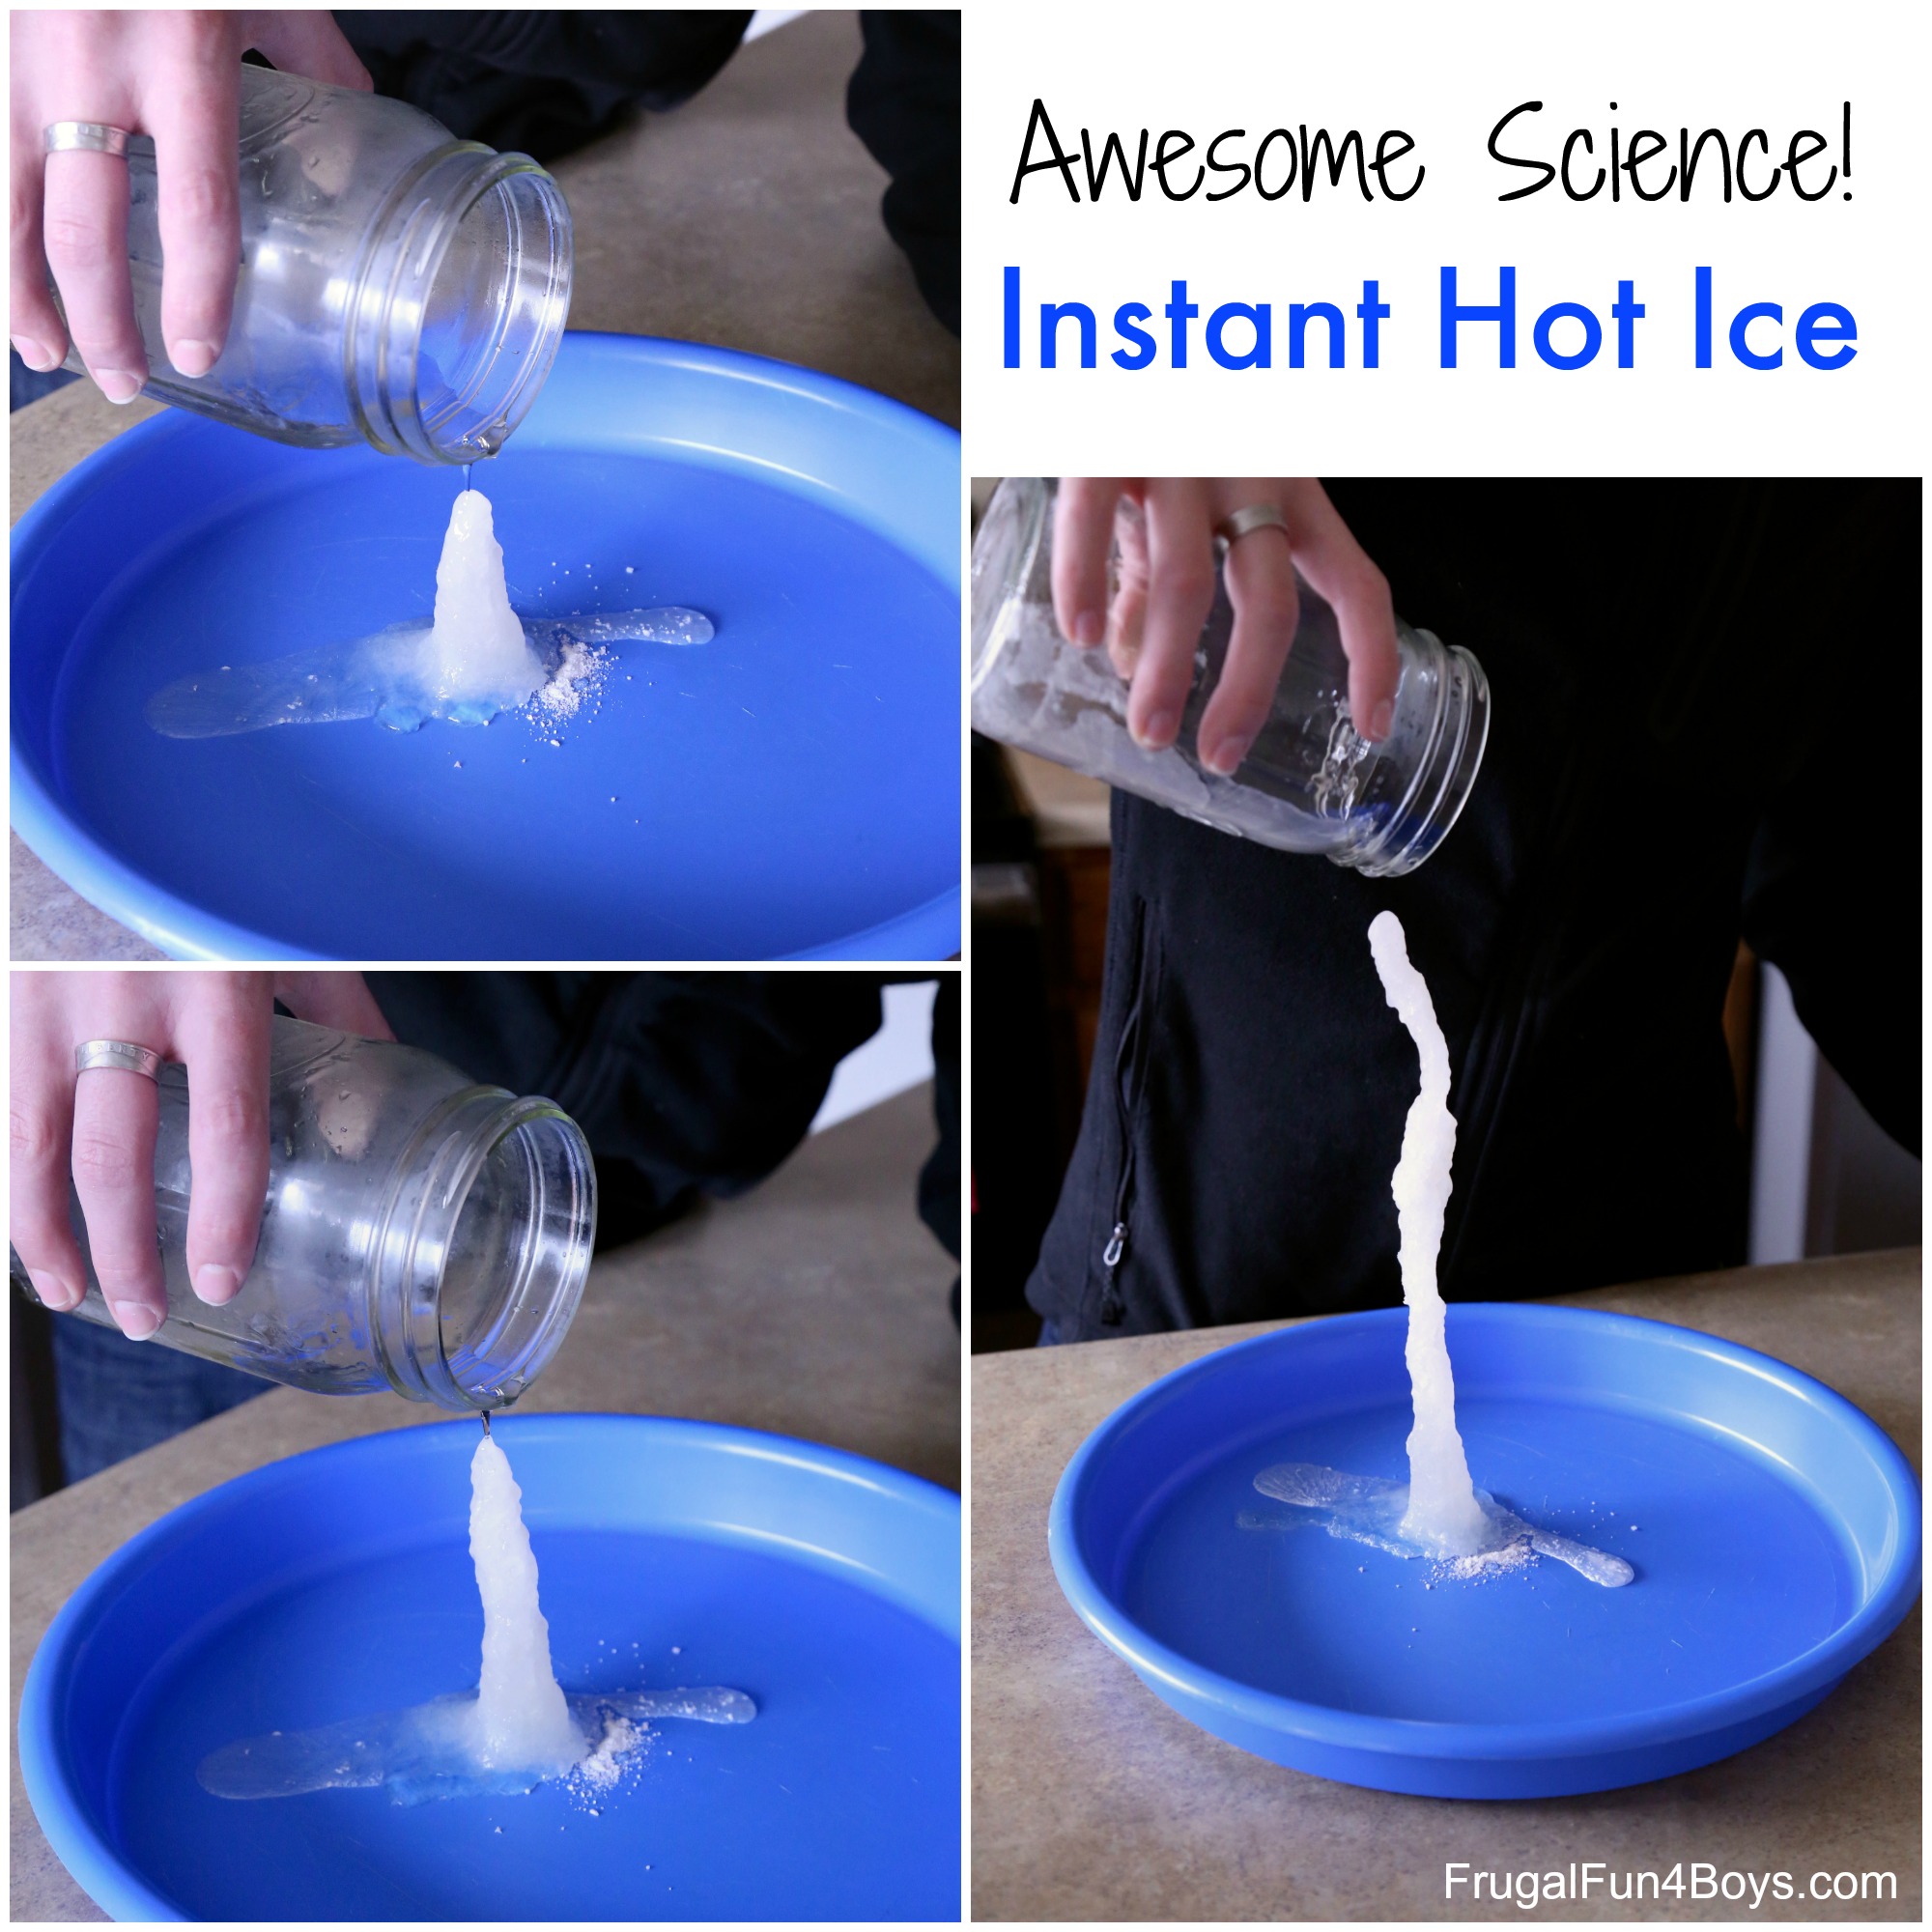
Awesome Science Experiment: Make Hot Ice with Baking Soda and Vinegar
January 20, 2018, 23 comments, join the conversation, categories/tags:, ages 5-7 ages 8-10 stem activities science, want these great ideas sent right to your inbox sign up for the newsletter..
Here’s a fun science experiment that will definitely get a “wow” from the kids. Combine baking soda and vinegar to make sodium acetate, or hot ice! It crystalizes instantly when you pour it, allowing you to create a tower of crystals. Since the process of crystallization is exothermic, the “ice” that forms will be hot to the touch. Science is so cool!

Making hot ice is a simple process, and you probably have everything you need on hand. You’ll need a couple of hours, though, so keep that in mind.
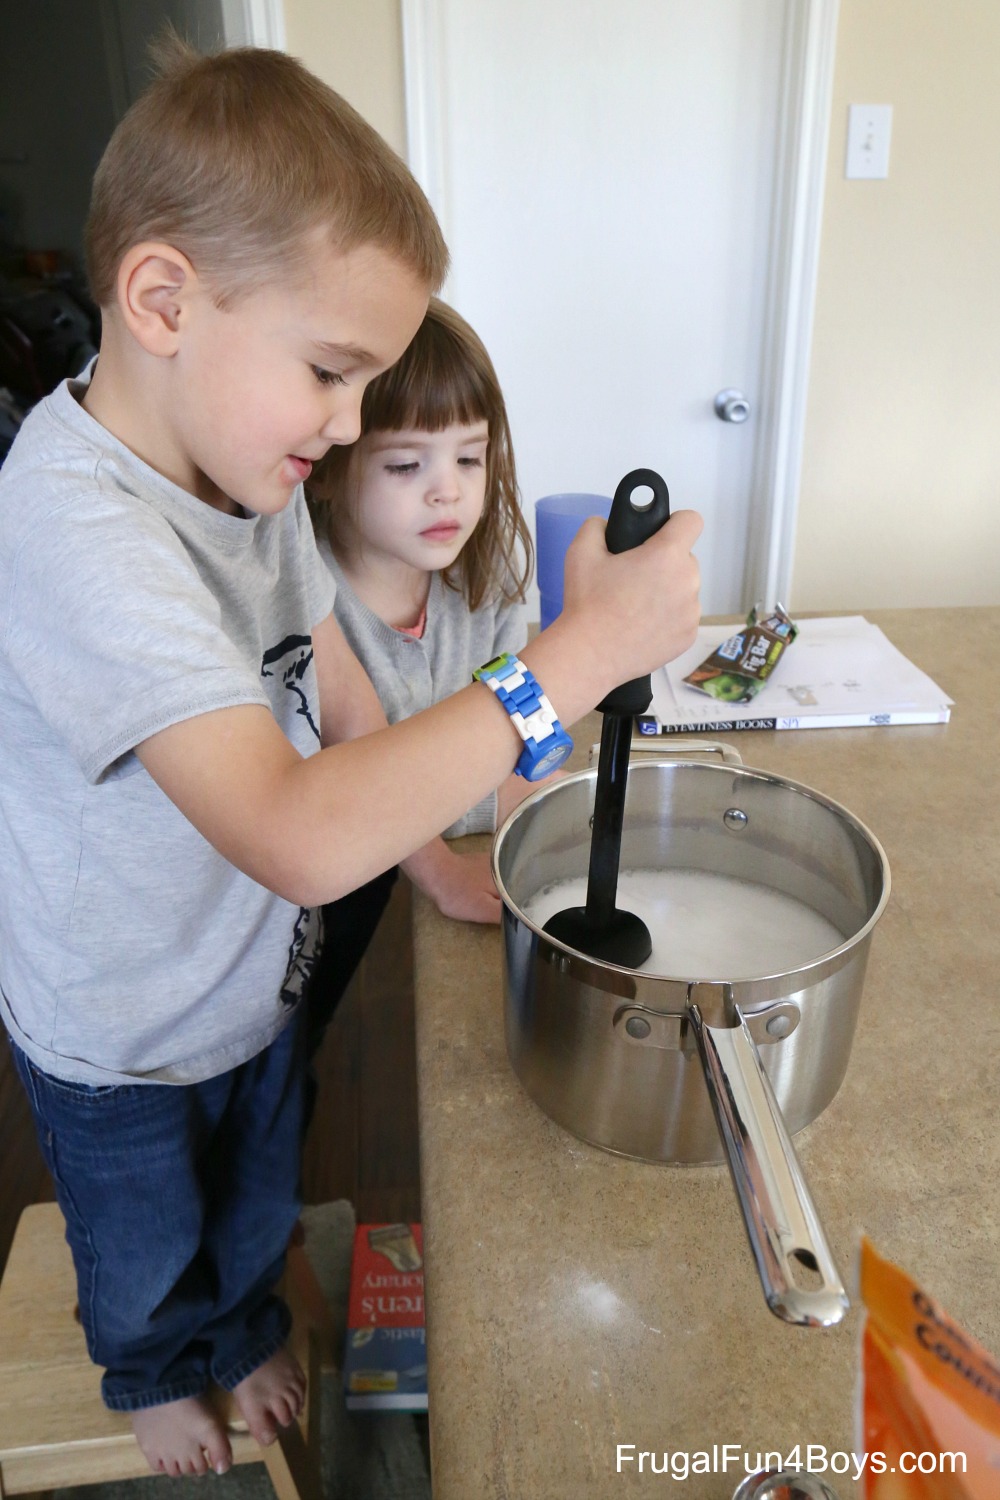
Step 1: Combine 4 cups of vinegar and 4 tablespoons of baking soda in a pot. Before we did this experiment, I read instructions for hot ice on a few different websites. I decided to use the amounts given on Playdough to Plato . Add the baking soda a little at a time so that when it fizzes it won’t overflow over the edges of your pot!
Janie and Jonathan were quite impressed with this step.
Step 2: You have now made sodium acetate! (As well as carbon dioxide – it was given off in the reaction, which created all that fizzing.) You’ll need to boil the solution, though, to reduce the amount of water so that it is concentrated enough to form crystals.
Cook your solution over low to medium heat for about an hour. You want to reduce it down to 1 cup or less.
Now, the stuff I read online said that crystals would start to form around the edge of the pan. This is important because you’ll need a few crystals as “seeds” to start the crystallization process. Well, our solution never formed crystals while it was cooking. When it was down to 3/4 cup, I finally stopped boiling it.
Step 3: Pour your sodium acetate into a glass container and put it in the refrigerator for 30 to 45 minutes.
We did this, and while it was in the refrigerator, I scraped some of the dried solution off the sides of the pot, hoping that it would work as the crystals needed to start the reaction.
It didn’t work. Boo. We poured the solution over the pan scrapings, and nothing happened.
We tried putting it in the refrigerator for awhile longer. Still nothing.
But, this experiment is very forgiving! I left the solution on the counter and came back to it the next day. I decided to boil it a little more – maybe it wasn’t concentrated enough. And we had never seen any crystals form in the pan. After about 10 more minutes of boiling, there still weren’t any crystals on the edges of the pan, but I decided that the solution was reduced down so far that we just had to stop.
As soon as I poured the solution out of the pan and into a glass jar, the remaining liquid in the bottom of the pan crystallized instantly! So I knew we were getting somewhere!
This time, I put the solution in the freezer for about 20 minutes. Much faster.
Step 4: Pour the cooled solution onto a few crystals that you scraped from the pan.
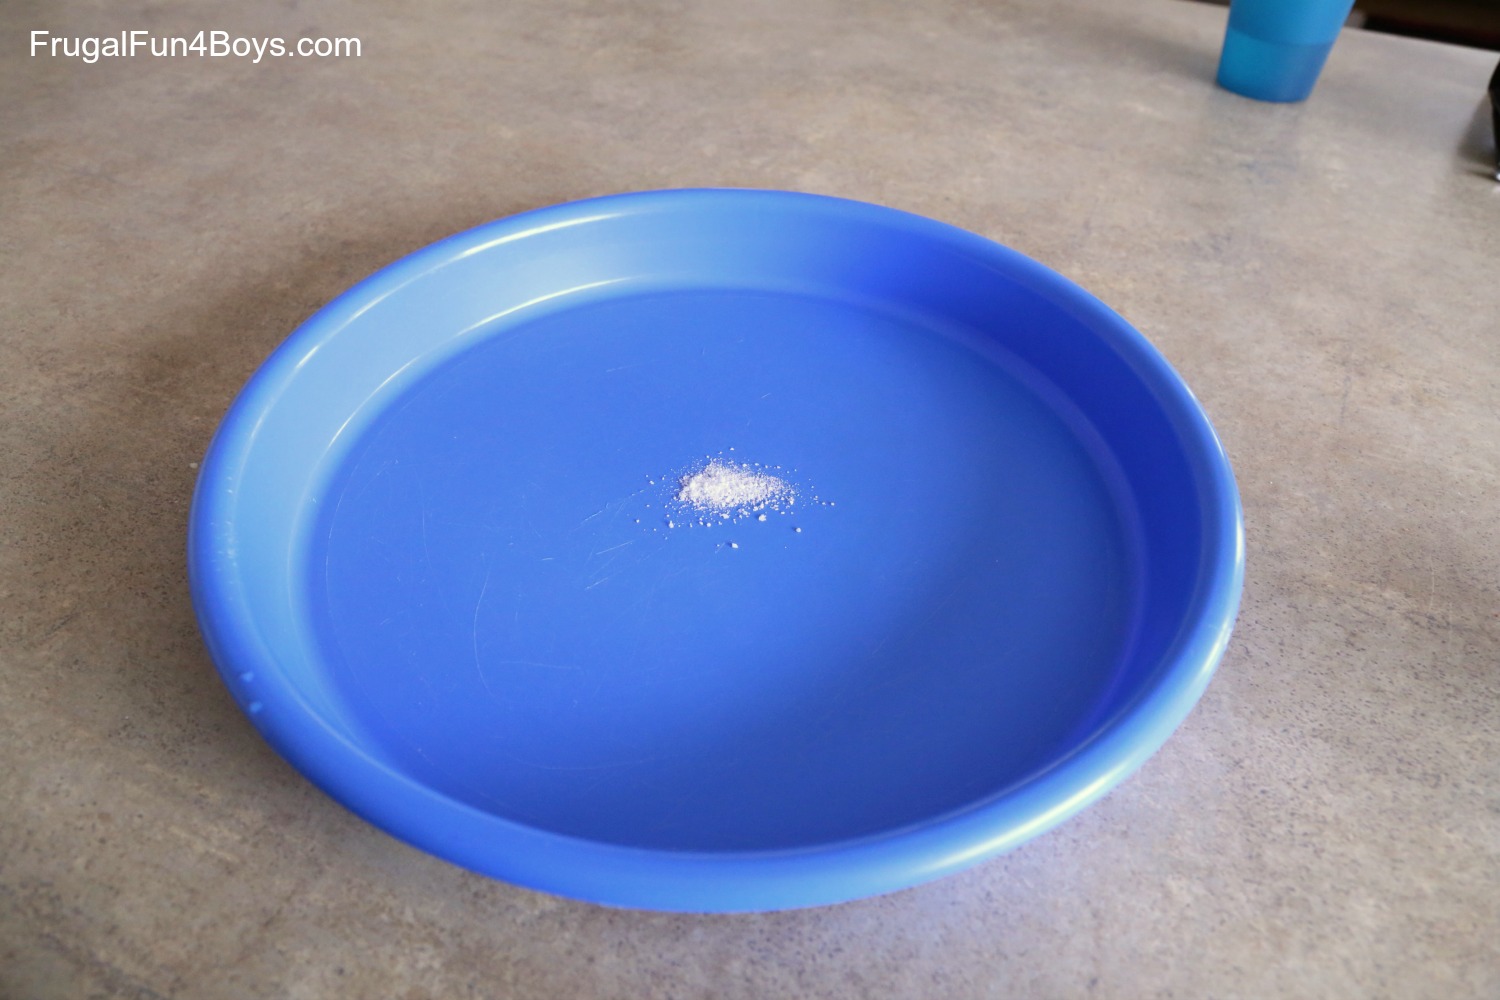
I scraped off some crystals from the bottom of the pan and put them in a plastic tray.
Then Aidan poured the solution very slowly onto the crystals.
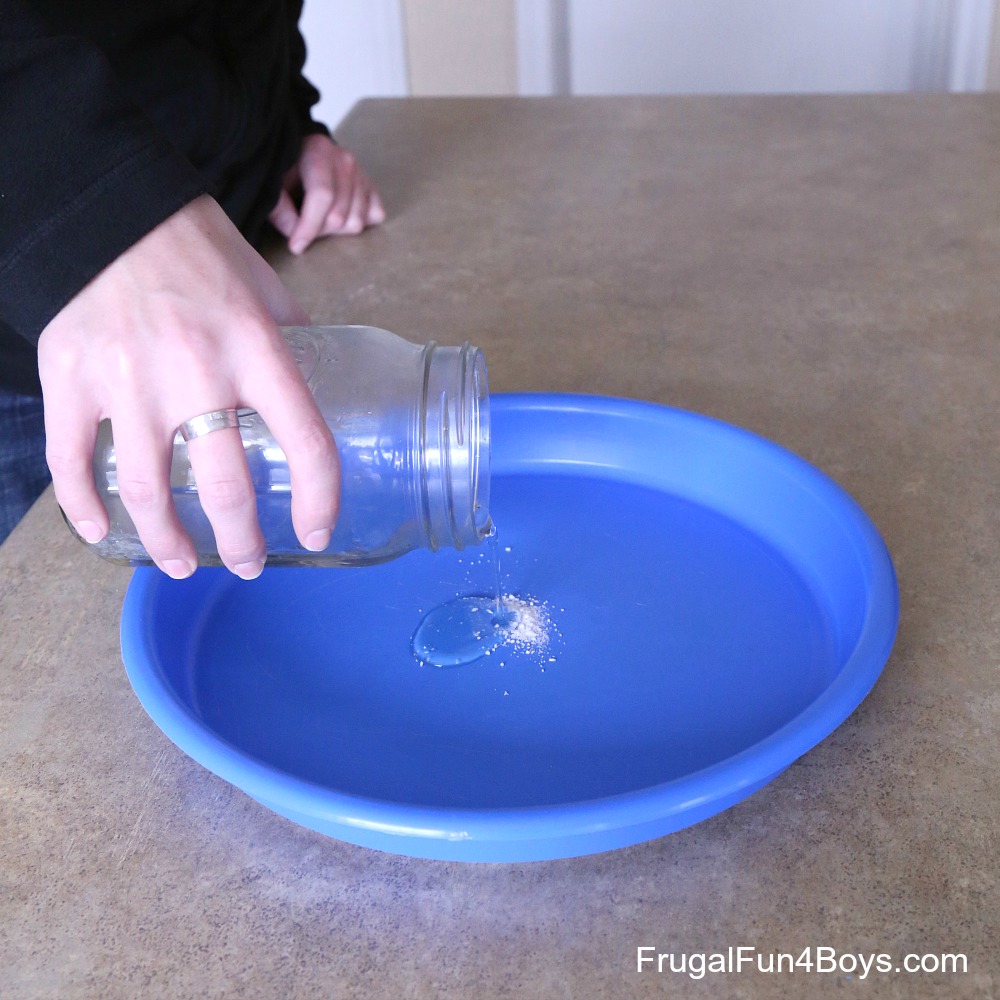
The first little bit took a few seconds to crystallize… but it DID!
He kept pouring, a little at a time…
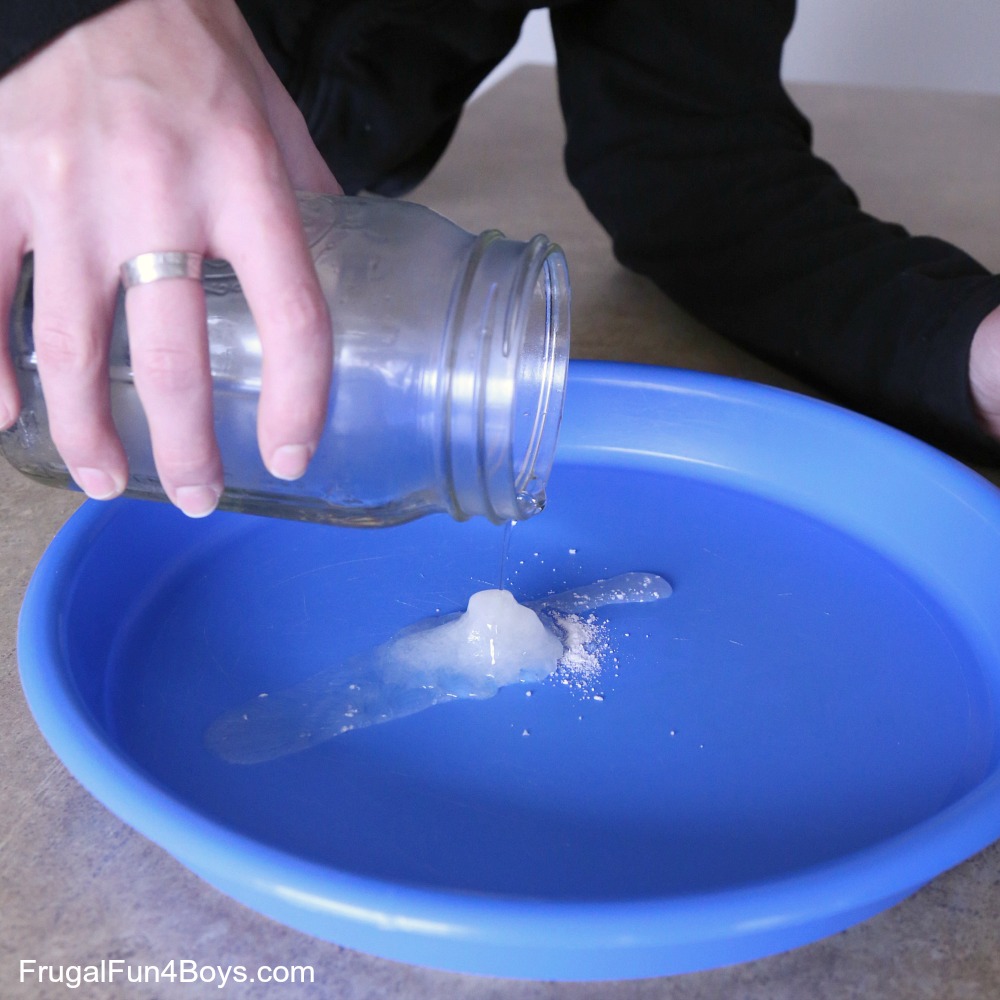
If you pour too quickly, the crystals will spread out horizontally. So we went nice and slow.
It was so fun to watch! By the end, Aidan was pouring just a drop at a time, and we could actually watch each drop piling up on top of the tower of hot ice.
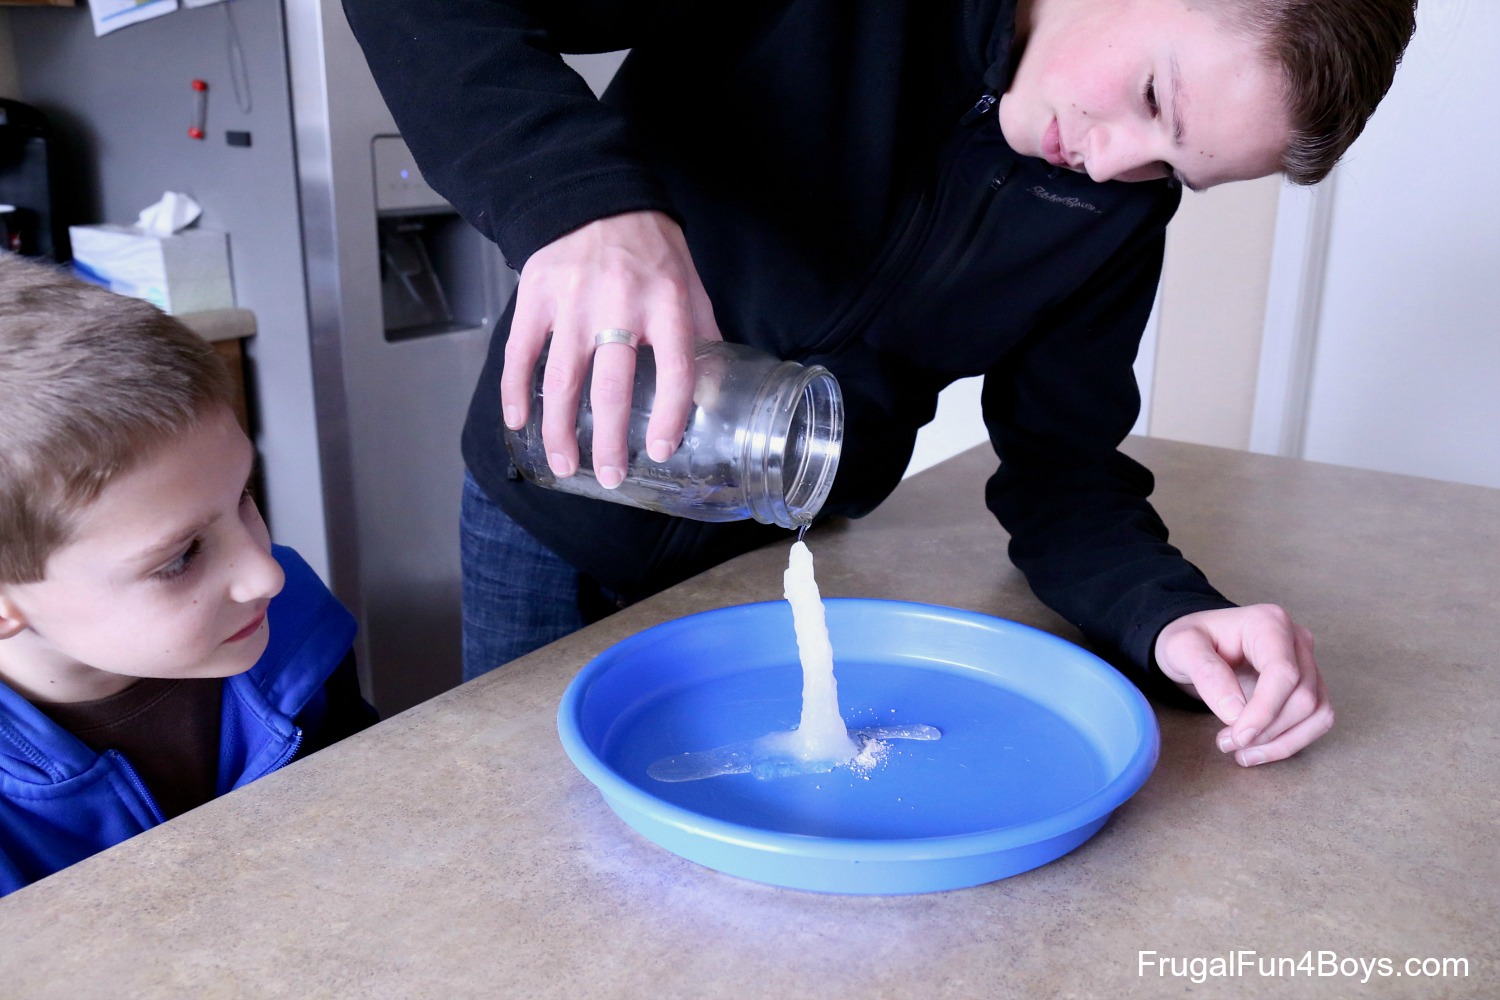
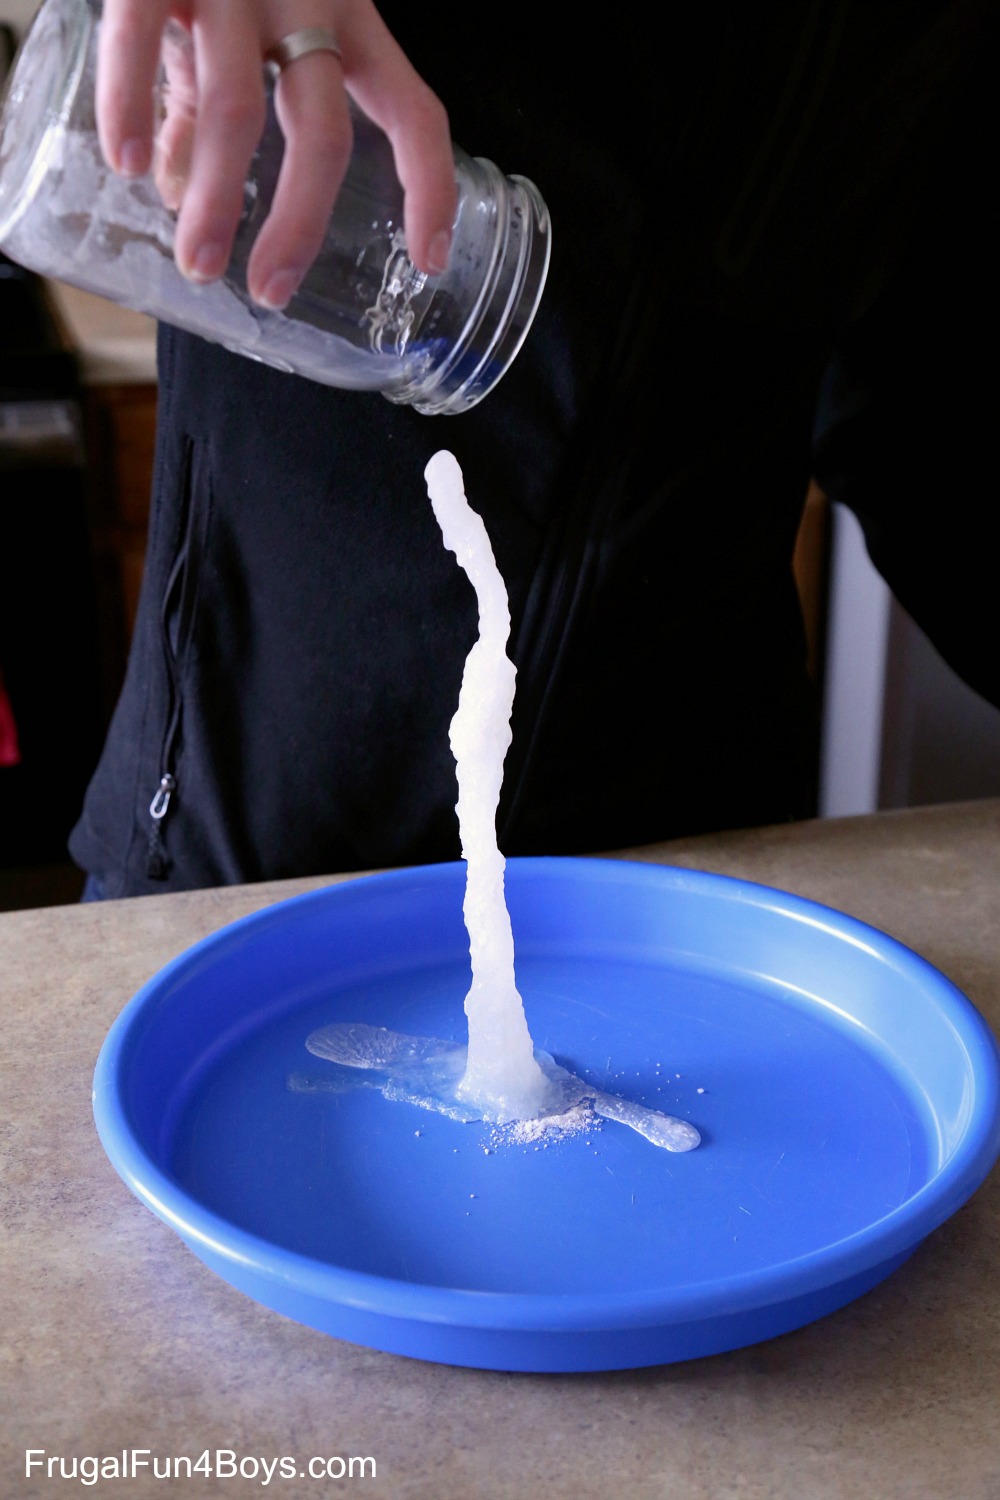
We didn’t get a chance to measure our final tower, but it was impressive!
Why does this work?
The sodium acetate solution contains water. We reduced the amount of water in the solution by boiling it, but there is still water in there. The water molecules keep the sodium acetate from forming crystals. Well, crystals may start to form, but as a few molecules join together, the water molecules pull them apart again.
When we cooled the solution, we were able to bring the sodium acetate down to a temperature lower than the point at which it would normally become a solid. This word for this is supercooled.
By the way, we think of melting and freezing points mainly in reference to water, but all substances have a melting/freezing point. For example, copper remains a solid until it reaches 1,984 degrees Fahrenheit!
Back to the sodium acetate… The crystals in the tray provided a starting point for crystals to grow in the solution, called a nucleation site. This gave the sodium acetate the push it needed to crystallize!
The directions on Instructables said to filter the solution to get rid of any impurities that might inhibit the crystallization process. We didn’t do that step, and it turned out fine.
The crystallization process gives off heat, so the hot ice is hot to the touch! Not hot enough to burn, though. We all had fun touching it!
Our tower was pretty flimsy and broke quickly, but we had a great time with this science experiment. If you want to repeat the process, you can melt the crystals down into a liquid again, cool it again, and make another tower!
Also, I was a little worried about our pot, but it was super easy to clean. The sodium acetate dissolves easily and rinses right off.
Have fun with science!
23 Comments
Anne-line feb 1, 2018.
How strong (%) was your vinegar?
william Oct 30, 2018
this is so cool i wated to try sence i was 5
islam Feb 7, 2018
what is he adding on it water or vinegar ?
Sarah Feb 7, 2018
He is pouring sodium acetate, which we made by combining baking soda and vinegar. We boiled it down to make it more concentrated.
Bobbie Feb 7, 2018
I absolutely loved science & chemistry in school & this experiment is one I've never seen. I enjoyed your post so much that I thoroughly read the entire thing (I'll admit I skim through a lot of other sites posts) & am super excited to try this with my grandkids. Thank-you for detailing everything, even the difficulties. I feel very confident going into this experiment. And since I just found your site I look forward to perusing the rest of your site.
Mohamed Borhami Feb 8, 2018
Hi Sara , you are amazing , wonderfull , i have a chemistry graduate , but you can simplify science to kids its perfect i 'm following your site ,and pass what you did to my grandson , my daughter follow the homeschooling with the kids and i know how the effort and responsibility , but she was happy as she add one day a week for free activities, go on and good luck .
Marlene Manning Feb 9, 2018
Hi Sara, I am a science relief teacher from Australia and was wondering if you can make the solution at home, carry it to school in a cooler bag, pop it in the fridge at school to use with different classes?
Sarah Feb 11, 2018
Hmmm, now that's a good question! You can definitely make the solution ahead of time. What I don't know is whether you would need to heat it at school for a few minutes, then cool it to get it to the supercooled state. You might want to test it out first!
Shana Fordahl Mar 20, 2018
I want to try this with my STEAM club at school but I too would need to cool it at home and bring it later. Did you try it. Did it work?
SuperDan Sep 7, 2018
You'll have to refreeze in. If that doesn't work, Reboil it back onto liquid, 5hen refreeze. That should do it.
Linda Feb 2, 2021
Heat it at(before) school and let it come to room temperature. It will work that way. A microwave or hotplate will work to heat it.
Lorraine Feb 19, 2018
Thank you for sharing! I plan to make this with my grandson today, would you happen to know if any type of vinegar can be used? Seems all I have on hand is red wine vinegar ?
It is all 5 percent acetic acid.
Amanda Feb 24, 2018
Ahhh, what do I keep doing wrong? We have had 3 goes at this and the coolest thing I can do is make it freeze in the bowl as soon as I "disturb" it. Which is actually quite cool and my boys love it but we can't get it to the state of being able to pour it and watch it freeze!
Add a little more water if it does this and it should become a solution. You may have to heat it a little.
Pamela Apr 21, 2018
This was so awesome, I love watching kids get involved in things like this, great kids and I love seeing parents that are spending time with there kids to teach them things like this. Keep learning kids science is so awesome. This was very impressive. Thanks, Pamela
Carolyn Apr 26, 2018
Thanks for sharing this and the science behind it! It really helped explain the process. My 5th grader would like to try to do the boil-ahead idea and bring it to school after - I'd also love to hear if that worked for anyone. :)
By the way, I've assumed that this is the same process as what's in those "heat packs" sold for health needs and such - but they activate with a click of a metal disk. Any idea what that disk is??
Kelly Jun 12, 2018
It took me 5 attempts to get this right but once I did, WOW! It is so exciting to see those crystals form :)
Sam Mar 16, 2020
Hi Kelly, I’m trying to get this to work, but each batch I make fails. What did you change to make yours work? Thx Sam
Hena Jose Jun 29, 2018
Really good one. well explained. surely will try
Lisa Jul 18, 2018
I wasn't able to get this to work. Our solution turned slightly brownish as it simmered and we were not able to get it to freeze to the crystals we got off the bottom of the pan.
Should the solution be cool when you pour it?, cold? slightly warm?.....
We are trying again!
Looks so cool...my boys are excited to see if we can get it to work this time.
Tara Aug 7, 2018
Did the vinegar and baking soda dissolve together? We tried it and it was a bunch of mush and didn't even pour. Are we supposed to stir as it cooks?
Jo Sep 21, 2018
My son is doing this for school so do you think you can leave the liquid overnight?
Sarah Sep 24, 2018
Yes, but... he may need to heat the liquid again and then cool it rapidly in order to get the crystals to form. The supercooled state of the liquid seems to be important for forming the crystals. I would definitely test it first before taking it to school!
gdgkufgdiyv Nov 12, 2018
Barb jan 24, 2019.
Very interesting! I am wondering how much of the 'crystals' that recipe of 4 cups/4tbsp made? Approximately? I'm hoping to use it in the 'still solution state' for the making of a mordant for fabric (long story)
Crystal Apr 26, 2020
My Boys and I tried this today. We had to boil a second time to get Crystals. After cooling the liquid when we went to pour crystals formed instantly in the jar, then all of The solution crystallized before we could add it to the plate! Still cool!
Mariska Bishop May 6, 2020
This experiment is cool
Meredith Wagoner Jul 7, 2020
This one didn't work for us. The solution turned into a sludgy consistency when we put it into the fridge. Any idea where we might have gone wrong? I'd love to try it again. And thank you for including your process- super helpful!
Elliot Driver Dec 7, 2020
I am making this for class can i cool it and un cool it to bring it to school or does it need to stay cooled .
Tammie Niffenegger Feb 21, 2021
You are making a supersaturated solution. The water is holding more sodium acetate than normal. This is because the solution was made at a high temperature which holds holds alot of sodium acetate, but when cooled the molecules slow and cannot hold the sodium acetate. So ANY disturbance will cause it to crystallize. When you heat it back up you are redissolving it. This is the same reaction as whats in the REUSABLE clear handwarmers that you boil to used again.
Kiki Apr 27, 2021
What happens if there are no crystals at the bottom of the pan?
LaVerne Apr 3, 2022
My grandson found this experiment on tou tube but it lack the depth of instruction and we did not get the required outcome. I told my grandson I think it has to be hot and after reading your post we realized the video skipped the boiling processed. It went drom disaolving the baking soda to pouring it in the glass and wait for the crystallization to happen. Thank goodness we didn't throw the concoction away so we can see if it still works
Post a Comment
How to Make Hot Ice From Vinegar and Baking Soda
Categories STEM Activities
Kids will love this wacky edition of winter science experiments ! Hot ice is a novelty any time of year. Learn the no-fail way for how to make hot ice here!
We watch a lot of science-themed YouTube videos, so of course, when we saw this video, we knew we had to try and make our own hot ice.
We thought the hot ice science experiment would be easy, but it turns out, there is a trick to it!

How to Make Hot Ice
Making hot ice isn’t difficult, but if you don’t follow the steps correctly, your project will be messed up and you will have to start over.
You want to get it right the first time because this experiment takes MASSIVE amounts of vinegar.
Add this experiment to your list of classic science fair projects to try.
Hot Ice Materials
You’ll need these materials to make hot ice!
- Baking soda
- Aluminum foil
- Rubbing alcohol
- Safety goggles
- Latex gloves

What You Need for a Science Fair
You’ll want to have these supplies on hand before doing your science fair project. Shop the included Amazon storefronts to make things easier and don’t forget to download the free science fair planning checklist before getting started!

Science Fair Project Planning
When you’re planning your project, you want to keep everything organized. Click the image below to get my free science fair project checklist so you can start organizing your project from the start.
You may also want to check out this list of science fair project research supplies.
Supplies for a Science Fair Project
There are so many supplies for science fair projects that are individual to each project, but if you want a general list of possible supplies and inspiration for your project, check out my selection of science fair experiment supplies on Amazon.
Supplies for a Science Fair Presentation
Your science fair presentation is important! It should look presentable and eye-catching. Check out this list of my favorite science fair presentation supplies.
How to do the Hot Ice Experiment With Baking Soda and Vinegar
Wear gloves and eye protection when doing this experiment to keep safe.
To make hot ice, you must boil vinegar and baking soda.
Mix 6 cups of vinegar and 6 tablespoons of baking soda in a pot. Add the baking soda slowly, because you don’t want too big of a reaction. This will create sodium acetate, which can eventually form crystals.
Your experiment might not work the first time (ours didn’t) so keep trying!
We used about a gallon of vinegar before we finally got the experiment to work. We felt like real scientists having to work so hard to make something happen!
Now, boil your sodium acetate mixture down until there is only about 1-2 cups left. Keep the heat as low as you can, otherwise it will turn yellow.

We boiled our vinegar too hot, so our ice turned a bit yellow. That doesn’t affect results, but it does make it look less like ice.
Our crystals finally formed after boiling our fifth batch.
Put your reduced mixture in the refrigerator for about 45 minutes to encourage crystals to form. You may not be able to see them until you pour off the liquid.

Save the liquid for later!
Rinsing the crystals with rubbing alcohol will get rid of some of the yellow color (but not all).
Can you believe this started as six cups of vinegar?
You’ll want to be careful when moving the mixture from the refrigerator to where you plan to pour it out, because if you bump it too much, it could harden in the cup.

Place a few of the crystals on a plate to “seed” your hot ice structures.

Let the kids pour out the vinegar mixture and watch it harden right before your eyes! Pour very carefully to stack the crystals.
After pouring it out, the kids can shape it and play in it safely ( wear latex gloves for maximum protection).
Next time, we’ll try making a giant batch for even more hot ice fun!
More Winter Science Experiments
Burning Ice Science Experiment
How to Make a Magnifying Glass from Ice
How to Make Frost
Galaxy Snow Experiment
Share this project with a friend!
- Skip to primary navigation
- Skip to main content
- Skip to primary sidebar

- FREE Experiments
- Kitchen Science
- Climate Change
- Egg Experiments
- Fairy Tale Science
- Edible Science
- Human Health
- Inspirational Women
- Forces and Motion
- Science Fair Projects
- STEM Challenges
- Science Sparks Books
- Contact Science Sparks
- Science Resources for Home and School
The illusion of Hot Ice
March 20, 2012 By Emma Vanstone 9 Comments
We love a science experiment that seems like a magic trick , and this activity is one of the best. We’re going to find out how to make hot ice .
Imagine saying to people, ‘I can make hot ice!’ They wouldn’t believe you would they?
As far as science theory goes, they shouldn’t, we know that in order for ice to exist, it has to be at 0 o C and that when heated it melts.
Note – this activity does not make ice, just something that resembles ice. It is NOT edible, so please discard the solution when you have finished experimenting.
How to make hot ice
To make hot ice, you will need
1 litre of acetic acid (white vinegar)
4 tablespoons of bicarbonate of soda ( baking soda )
Hob to heat the mixture
Pour the white vinegar into the pan.
Carefully add the bicarbonate of soda, half a tablespoon at a time and stir the mixture until it has all dissolved.
The baking soda and vinegar will fizz as they react together, which is why you need to add the baking soda slowly. You have now made a solution called sodium acetate . Carbon dioxide gas is also given off.
Simmer the solution on the hob until it has reduced to about 100ml. This should take about one hour. The solution is now supersaturated!
Once the mixture has reduced down, pour it into a jug, cover it and place it in a fridge to cool for 1 hour.
Once cooled, you can pretend the liquid is water to your friends and pour it out onto a surface. It should begin to crystallise straight away, forming towers of ‘ice’. It looks and feels hot because the reaction gives off heat. It is exothermic .

The great thing is you can remelt the ‘icicles’ to reuse when you want to perform the trick again! We put the jug in the microwave for 40 seconds to dissolve the crystals and then placed it back in the fridge for an hour.
If pouring isn’t working, try warming up your finger and gently touching the surface of the liquid. It should start to crystallise from your finger and spread outwards.

How does hot ice work ?
S odium acetate exists as a supercool liquid in the fridge, meaning that it is in liquid form below its usual freezing point . As soon as it is disturbed, it starts to crystallise. The crystallisation is an exothermic reaction which is why we call it hot ice!
Sodium acetate usually freezes at 54 o C, but as you have seen can exist in the supercool form below that temperature.
Uses of sodium acetate
- Sodium acetate is used in heat packs and hand warmers. Heating pads usually have a metal disc in them, which, when clicked, starts the crystallisation process, releasing heat. Hand warmers can usually be reused by boiling the pouch to melt the contents.
- As a flavouring in food.

Last Updated on March 15, 2023 by Emma Vanstone
Safety Notice
Science Sparks ( Wild Sparks Enterprises Ltd ) are not liable for the actions of activity of any person who uses the information in this resource or in any of the suggested further resources. Science Sparks assume no liability with regard to injuries or damage to property that may occur as a result of using the information and carrying out the practical activities contained in this resource or in any of the suggested further resources.
These activities are designed to be carried out by children working with a parent, guardian or other appropriate adult. The adult involved is fully responsible for ensuring that the activities are carried out safely.
Reader Interactions
March 30, 2012 at 12:08 pm
Very cool kitchen chemistry!
April 01, 2012 at 10:02 pm
This is neat – I bet my kids would get a kick out of it! Thanks for the idea!
April 02, 2012 at 1:25 pm
That really is cool. Congrats on being nominated in the Schooldays category of the Mads. *bows out gracefully* 😉
April 04, 2012 at 12:50 pm
Thank you, stiff competition! 🙂
April 05, 2012 at 8:49 pm
Thank you…I’m sure there is no need to bow out though. xx
May 15, 2017 at 12:53 pm
April 06, 2012 at 1:57 am
What a fun “trick”! Thank you for sharing at Sharing Saturday!! I hope you will share with us again this week!
March 20, 2013 at 2:56 pm
That is so cool…. 😀
Leave a Reply Cancel reply
Your email address will not be published. Required fields are marked *
Hot Ice Science Experiment
You won’t believe how easy it is to whip up this hot ice science experiment! Just like all of our favorite science projects for kids , you just need a few simple supplies from your pantry: vinegar, baking soda and water.
The prep is quick and simple but the results are pure magic! Your kids are going to want to repeat this science experiment over and over again.
Grab 30 easy-to-follow science experiments kids will beg to repeat (plus a no prep science journal to keep track of their results!) in our shop !

Getting Ready
To prep the science experiment, I gathered a few common supplies:
- 4 cups of white vinegar (acetic acid)
- 4 tablespoons of baking soda (sodium bicarbonate)
- A glass measuring cup or mason jar (make sure it’s heat safe glass)
Making Hot Ice
After I collected the supplies, my kids measured 4 cups of vinegar and poured it into a medium-sized pot.
Then they took turns adding 4 tablespoons of baking soda (one tablespoon at a time) to the pot.
The sodium bicarbonate (baking soda) and acetic acid (vinegar) fizzed like crazy forming sodium acetate.
NOTE: The key is to add the baking soda slowly so it doesn’t erupt over the edges of your pot.

Next, we stirred the mixture until all the baking soda dissolved and stopped fizzing.
Then we slowly boiled the solution over medium-low heat for a little over an hour to remove the extra water.
The solution reduced by about 75% so there was just 3/4 cup remaining. I could see white powdery crystals forming on the sides of the pot near the top of the solution when the solution.
NOTE: If you boil your solution at a higher temperature it may turn yellow-brownish but don’t worry, the experiment will still work!
Next, I poured the concentrated sodium acetate into a glass pyrex measuring cup and placed it in the fridge to cool and scraped a little bit of the dried sodium acetate powder off the inside of the pot to use later.
After about 30-45 minutes, the solution was cool enough to turn into ice.
I grabbed my glass dish and placed a small pile of the sodium acetate powder from the pot in the center. This would act as a seed for the crystals to start forming.

I very carefully took the cooled solution out of the fridge because any bump could start the crystallizing process.
I began pouring the solution very slowly into the pan and crystals began instantly forming.

We all gasped, it was like magic!
As soon as the clear liquid hit the plate white crystals would form like tiny fireworks. I continued to pour and the liquid crystallized forming a solid as soon as it touched the growing “ice”.

The kids wanted a really tall crystal tower so I poured as slowly as I could.
It kept growing…

and growing.
In the end it was over 6 inches tall!

Of course we all just had to touch it. It was hard like ice but was hot!
NOTE: This form of sodium acetate while non-hazardous can irritate skin and eyes just like vinegar can. So be careful when handling the crystal. Both of my kiddos ended up crumbling the crystal and didn’t have any reaction but I imagine it wouldn’t feel too good if your kiddo had a cut on his/her hands.

Once you are done creating and exploring the crystallized salt you can remelt it to use again and again.
We ended up repeating the experiment a few more times and every time the cooled solution was ready, the kids came running with excitement!
- After explaining nucleation, ask your students if they can think of any other processes that begin with nucleation. (Hint: rock candy, borax crystals, clouds and carbon dioxide bubbles in soda.)
- Ask students if they can think of other reactions that release heat like hand warmers and burning candles.
- Try adding a drop of food coloring to see if you can make colored crystals.

The Science Behind Hot Ice
The sodium acetate solution in the refrigerator is what is called a supercooled liquid . That means the sodium acetate is in liquid form below its usual melting point.
Once you touch, bump, or add a small crystal that is not liquid, crystallization will begin and the liquid will change to a solid.
When the molecules in the solute (sodium acetate) are in a solution, they normally are surrounded by a solvent (in this case water molecules).
Occasionally, a few solute molecules will bump into each other and stick together for a little while but they will eventually break apart.
If enough solute molecules stick together, they can overcome the forces in the solvent that would normally break the solute molecules apart.
When that happens, the clump of solute molecules serves as a seed (or nucleation site) for other solute molecules to cling to so the crystallization process can take off again.
The sodium acetate powder we placed on the plate acted as a nucleation site for the dissolved sodium acetate in the solutions.
The crystallizing sodium acetate releases energy in the form of heat and is an example of an exothermic process. Sodium acetate is often used in hand warmers as it release heat when crystallizing!
More Simple Science Kids Will Love
Inspire kids to LOVE science with 30 more jaw dropping experiment!
Similar Posts

Easter Egg Math Facts Activity

Boys’ Bathroom Signs: Be a Bathroom Superhero

Editable Name Games

Summer Goals Writing Activity
Beginning sounds board games.

100th Day of School Activities
40 comments.
- Pingback: Awesome Science Experiment: Make Hot Ice with Baking Soda and Vinegar
- Pingback: Crystals, Rock Candy, and Hot Ice – International Falls Public Library
- Pingback: School’s Out for Summer: Tips to Keeping Your Kids Active – 4-C
- Pingback: 18 Supercool Science Experiments with Ice
- Pingback: School’s Out for Summer: Tips to Keeping Your Kids Active - 4-C
- Pingback: Preschool Science - Simple School Source
Comments are closed.
This only happens twice a year! Become a VIP Science of Reading Formula member.
Get Hot Ice Help
- Chemical Laws
- Periodic Table
- Projects & Experiments
- Scientific Method
- Biochemistry
- Physical Chemistry
- Medical Chemistry
- Chemistry In Everyday Life
- Famous Chemists
- Activities for Kids
- Abbreviations & Acronyms
- Weather & Climate
- Ph.D., Biomedical Sciences, University of Tennessee at Knoxville
- B.A., Physics and Mathematics, Hastings College
Several of you have written in asking for help with your homemade hot ice or sodium acetate. Here are the answers to the most common hot ice questions as well as advice on how to fix the usual problems making hot ice.
What Is hot ice?
Hot ice is a common name for sodium acetate trihydrate.
How Do I Make Hot Ice?
You can make hot ice yourself from baking soda and clear vinegar. I've got written instructions and a video tutorial to show you how to do it.
In the lab, you could make hot ice from sodium bicarbonate and weak acetic acid (1 L 6% acetic acid, 84 grams sodium bicarbonate) or from acetic acid and sodium hydroxide (dangerous! 60 ml water, 60 ml glacial acetic acid , 40 g sodium hydroxide ). The mixture is boiled down and prepared the same as the homemade version.
You can also buy sodium acetate (or sodium acetate anhydrous) and sodium acetate trihydrate. Sodium acetate trihydrate can be melted and used as-is. Convert sodium acetate anhydrous to sodium acetate trihydrate by dissolving it in water and cooking it down to remove the excess water.
Can I Substitute Baking Powder for the Baking Soda?
No. Baking powder contains other chemicals which would act as impurities in this procedure and prevent the hot ice from working.
Can I Use Another Type of Vinegar?
No. There are impurities in other types of vinegar which would prevent the hot ice from crystallizing. You could use dilute acetic acid instead of vinegar.
I Can't Get the Hot Ice to Solidify. What Can I Do?
You don't have to start from scratch! Take your failed hot ice solution (won't solidify or else is mushy) and add some vinegar to it. Heat the hot ice solution until the crystal skin forms, immediately remove it from heat, cool it at least down to room temperature , and initiate crystallization by adding a small quantity of the crystals that formed on the side of your pan (sodium acetate anhydrous). Another way to initiate crystallization is to add a small amount of baking soda , but if you do that you will contaminate your hot ice with sodium bicarbonate. It's still a handy way to cause crystallization if you don't have any sodium acetate crystals handy, plus you can remedy the contamination by adding a small volume of vinegar afterward.
Can I Re-Use the Hot Ice?
Yes, you can re-use hot ice. You can melt it on the stove to use it again or you can microwave the hot ice.
Can I Eat Hot Ice?
Technically you can, but I wouldn't recommend it. It is not toxic, but it is not edible.
You Show Glass and Metal Containers. Can I Use Plastic?
Yes, you can. I used metal and glass because I melted the hot ice on the stove. You could melt the hot ice in a microwave using a plastic container.
Are Containers Used to Make Hot Ice Safe to Use for Food?
Yes. Wash the containers and they will be perfectly safe to use for food.
My Hot Ice Is Yellow or Brown. How Do I Get Clear/White Hot Ice?
Yellow or brown hot ice works... it just doesn't look that much like ice. The discoloration has two causes. One is overheating your hot ice solution. You can prevent this type of discoloration by lowering the temperature when you heated the hot ice to remove the excess water. The other cause of discoloration is the presence of impurities. Improving the quality of your baking soda ( sodium bicarbonate ) and acetic acid (from the vinegar) will help prevent discoloration. I made my hot ice using the least expensive baking soda and vinegar I could buy and managed to get white hot ice, but only after I lowered my heating temperature, so it's possible to get decent purity with kitchen ingredients.
- 10 Chemistry Questions You Should Be Able to Answer
- What Is the Boiling Point of Water?
- Which Is Faster: Melting Ice in Water or Air?
- Can You Cool a Room By Opening the Refrigerator?
- How Smoke Machines Work
- How to Set Up Distillation Apparatus
- Resources for Finding Answers to Chemistry Questions
- Snowflake Chemistry - Answers to Common Questions
- Examples of Physical Changes
- Understanding Endothermic and Exothermic Reactions
- How to Convert Between Degrees Fahrenheit and Celsius
- Examples of Physical Changes and Chemical Changes
- What Happens When You Touch Dry Ice?
- Carbon Dioxide Molecular Formula
- What Is a Crystal?
- How to Pass Chemistry Class
- STEM InSIGHT
- STEM Ambassadors
- « STEM@Home
- Nature & Environment
- Community & Heritage
- Environment
- Ambassadors@Work
- Career Talks

Hot Ice Crystal Towers
Secondary | Materials | Views: 65112
Did you Know?
- Sodium acetate or hot ice is an amazing chemical you can prepare yourself from baking soda and vinegar. You can cool a solution of sodium acetate below its melting point and then cause the liquid to crystallize.
- The crystallization is an exothermic process, so the resulting ice is hot.
- Solidification occurs so quickly you can form sculptures as you pour the hot ice.
Health and Safety: This experiment involves boiling solutions. Please take care when doing so and ensure you have adult supervision.
You will Need:
- 4 tablespoons of baking soda
- 1 litre clear vinegar
The concepts it illustrates are:
- Supercooling
- Crystallisation
- Exothermic Chemical Reactions
What to Do:
- In a saucepan, add baking soda to the vinegar, a little at a time and stirring between additions. The baking soda and vinegar react to form sodium acetate and carbon dioxide gas. If you don’t add the baking soda slowly, you’ll essentially get a baking soda and vinegar volcano, which would overflow your container.
- You’ve made the sodium acetate, but it is too dilute to be very useful, so you need to remove most of the water. Here is the reaction between the baking soda and vinegar to produce the sodium acetate: Na + [HCO 3 ] – + CH 3 –COOH → CH 3 –COO – Na + + H 2 O + CO 2
- Boil the solution to concentrate the sodium acetate. You could just remove the solution from heat once you have 100-150 ml of solution remaining, but the easiest way to get good results is to simply boil the solution until a crystal skin or film starts to form on the surface. This should take about an hour on the stove over medium heat. If you use lower heat you are less likely to get yellow or brown liquid, but it will take longer. Some discolouration is normal.
- Once you remove the sodium acetate solution from heat, immediately cover it to prevent any further evaporation. Pour the solution into a separate container and cover with plastic wrap. You should not have any crystals in your solution. If you do have crystals, stir a very small amount of water or vinegar into the solution, just sufficient to dissolve the crystals.
- Place the covered container of sodium acetate solution in the refrigerator to chill and await the amazing results!
« Back
Making Hot Ice
Water solidifies or turns to ice at zero degrees centigrade. This experiment makes something that looks just like ice but forms at room temperature and gives off heat. The experiment involves heating solutions on the cooker hob – be very careful, and ask an adult to help if necessary.
Making Sodium Acetate
Pour the solution into a very clean jam jar and cover it, and allow it to cool. This is a supersaturated sodium acetate solution. A saturated solution is one that contains as much of a substance that can be normally dissolved in it at room temperature; a supersaturated solution is made by dissolving in more of the substance, usually by heating the solution.
The hot ice can be melted on the cooker or in the microwave and reused – do this very carefully, as it will become hot.
What Is Sodium Acetate Used For?
Leave a reply cancel reply, what colour is the sky, make a vacuum cleaner, related posts, how to shrink polyester, a bending bone, the science of making butter.

Introduction: Hot Ice

Sodium acetate or hot ice is an amazing chemical you can prepare yourself from baking soda and vinegar. You can cool a solution of sodium acetate below its melting point and then cause the liquid to crystallize. The crystallization is an exothermic process, so the resulting ice is hot. Solidification occurs so quickly you can form sculptures as you pour the hot ice.
Step 1: Chemicals Reuired

>4 tablespoon Baking soda
>500 ml Vinegar
>2 ml Water
Step 2: Materials Required

>steel vessel
>transparent container
>measuring cup
Step 3: Measure 500ml of Vinegar

I am using a 100 ml measuring cup .
Transfer this vinegar into a vessel.
Step 4: Add Baking Soda to Vinegar

The baking soda and vinegar react to form sodium acetate and carbon dioxide gas.
If you don't add the baking soda slowly, you'll essentially get a baking soda and vinegar volcano, which would overflow your container.
Step 5: Heat the Solution

You've made the sodium acetate, but it is too dilute to be very useful, so you need to remove most of the water.Here is the reaction between the baking soda and vinegar to produce the sodium acetate:
Na+[HCO3]– + CH3–COOH → CH3–COO– Na+ + H2O + CO2
Since the reaction itself produces water as a byproduct there is no need to add water but if the content get thicken add 2 ml water.
Heat the mixture and stir constantly for some time.
Set the soultion to cool down and left unagitted.

Once you remove the sodium acetate solution from heat, immediately cover it to prevent any further evaporation.
Pour the solution into a separate container.
I covered the container with foil paper.
Step 7: Look Out for Results

Remove the solution from the refrigerator after cooling the solution for 30 minutes .
Insert any foreign object which would agitate the solution .
The sodium acetate will crystallize within seconds, working outward from where you agitated the solution .

Participated in the Baking Soda Challenge 2017
Recommendations

Farm to Table Contest

Woodworking Contest

Water Contest

- Chemical Reactions
- Home Science Videos
How to make Hot Ice at home – Amazing Science Experiment
Sodium acetate or hot ice is an amazing chemical you can prepare yourself from vinegar and baking soda. You can cool a solution of sodium acetate below its melting point and then cause the liquid to crystallize. The crystallization is an exothermic process, so the resulting ice is hot. Solidification occurs so quickly you can form sculptures as you pour the hot ice.

Here is the reaction between the baking soda and vinegar to produce the sodium acetate:
Na+[HCO3]– + CH3–COOH → CH3–COO– Na+ + H2O + CO2
Discover real scientist in you with Sparklab! -The next generation chemistry app which provides innovative ways to learn chemistry for free in Augmented and Virtual Realities!
Download application: https://play.google.com/store/apps/details?id=ge.arx.sparklab.android
RELATED ARTICLES MORE FROM AUTHOR

Guess the Object – Everyday Objects In Macro

Aluminum and Mercury Reaction

5 Amazing and Easy Science Experiments you can do at home
This can be a bit of a tricky experiment, but when it works, it’s fantastic! Combine vinegar and baking soda to make ‘hot ice’. Warning: boiling water involved #adultsupervision
What you need:
Vinegar, baking soda, saucepan, jug, bowl
What to do:
- Put 4 cups (1 L) of white vinegar into a saucepan. Then slowly add 3 tablespoons (60 mL) of baking soda, not letting the pot bubble over.
- Heat the saucepan on the stove and boil the solution. You want to remove most of the water from the mixture, until the solution is reduced to about 100 mL. This may take about an hour. It is ready when a thin crystal film starts to form on the surface of the liquid. If this film starts to form and you have too much liquid, add extra vinegar to react with excess baking soda.
- As soon as the solution is ready, pour it into an empty jug, cover it to prevent further evaporation, and put it in the fridge to cool to room temperature or below (which should take about an hour). The solution should be clear and might be yellow. If there are crystals in the jug, they should be removed or dissolved before cooling. Stirring or adding a tiny bit of extra vinegar can help dissolve crystals while the solution is still hot.
- As the saucepan cools, the residue left on the bottom should crystallise. Scrape out the crystals and put them in a dish or container for later use.
- Put a single crystal in the bottom of a dish. Carefully take the jug and slowly pour it onto the crystal. The solution should spontaneously crystallise. If you pour slowly and carefully you can make a tower.
- Once the solution has crystallised, it can be melted by heating it in the microwave, preferably in a covered container to prevent evaporation. The liquid can then be cooled and you can continue to play around with crystallisation.
- This experiment involves boiling water and using a stove. Adult supervision is required.
- The substance produced, sodium acetate, is not toxic, although it isn’t edible and is mildly alkaline. Avoid getting it in your eyes. Wash your hands and equipment after use.
Troubleshooting
- If the solution remains liquid and does not crystallise, it may need to be boiled down further. Adding a bit of extra vinegar might also help, especially if it fizzes when you add the vinegar (indicating unreacted baking soda).
- If you get a sludge, add more vinegar to dissolve it and try boiling down again.
- Avoid getting any dust in your solution, as it could cause spontaneous crystallisation when you cool it.
- It may help to test the solution by pouring a small portion into a spoon and adding a crystal to that spoon before attempting to use the whole solution.
The science behind it
Vinegar is a mixture of acetic acid and water. Baking soda is also called sodium carbonate, which is a base. When you mix baking soda and vinegar together, the acid and base react, creating carbon dioxide, water, and sodium acetate. The carbon dioxide creates fizz and bubbles away, leaving behind a mixture of sodium acetate and water. When you boil the mixture, you remove the water but not the sodium acetate, which increases the concentration of sodium acetate in this mixture. Here we make sodium acetate trihydrate (which has three parts water for each part sodium acetate), which at room temperature likes to form solid crystals. The crystals will dissolve in water, which is why we have to boil away all the excess water. Sodium acetate trihydrate melts above 58 degrees Celsius, which means it is a liquid when it is hot. If you remove all the water you get anhydrous sodium acetate, which forms a white powder rather than crystals. Some may have formed on the side of the saucepan during boiling. When you cool the sodium acetate trihydrate in the fridge, it remains a liquid despite being below its freezing point. This phenomenon is supercooling. The liquid is trying to freeze, but whenever a tiny microscopic crystal forms spontaneously it usually dissolves again before it can grow bigger. If a larger crystal (or any suitable disturbance) is added, this seeds the crystallisation and allows the whole solution to crystallise. When the crystals form they are warm to the touch. This is because the crystallisation is exothermic, meaning it releases energy in the form of heat. Sodium acetate trihydrate is used in heat packs. The liquid sodium acetate is supercooled in the fridge. A metal disk is pushed to cause crystallisation, which releases heat. The heat pack can then be ‘recharged’ by heating it to melt the sodium acetate then cooling it in the fridge, and the heat pack can be reused.
Back to Home Science activities.
—this homescience activity written by FLEET PhD candidate Bernard Field , Monash
admin 31 Oct 2020 Home Science , Physics at random
Hot Ice For Summer

Creating Hot Ice: A Great STEM Experiment For Summer
There’s a Dad joke waiting in this project. Make sure to grab it while you can!
“Son, it’s been so hot this summer that even the ICE is hot!”
You can buy ice in the supermarket but hot ice you’ll have to make yourself. Making hot ice is an easy fun experiment three to eight-year-old kids can try with ingredients you have at home. It takes about 1-2 hours to conduct the experiment. Your children will be amazed as the “ice” forms yet isn’t cold at all!
Hot ice is used in hand warmers, heating pads, for a buffer in laboratory settings, and for pickling and tanning of food. It’s chemical name is sodium acetate.
You also may be interested in:
- Kiwi Co Reviews
- Fireproof Balloon Science Experiment
- Dancing Raisins
Supplies Needed
- A heat safe measuring jar or glass cup
- 4 Cups of white vinegar which is acetic acid
- 4 Tablespoons of baking soda which is sodium bicarbonate
- Hot plate
- A spoon or spatula
- A pot or saucepan (do not use a copper pot)
What Mystery Are We Solving?
Make hot ice and when you put your hand in the liquid the hot ice is formed around your fingers. It looks like your fingers are frozen, but it is hot to the touch.
How does to everyday ingredients create ice that is hot to the touch ? Isn’t ice supposed to be cold?
Safety Issues
Although young kids can create their own hot ice, adult supervision is recommended when the liquid is boiled.
Hot ice isn’t the same as dry ice! Dry ice may cause severe burns when touched but hot ice is mostly harmless. For some people, hot ice may irritate skin and eyes in the same manner vinegar would.
How To Make Hot Ice
- Pour 4 cups of white vinegar into the saucepan or pot.
- Slowly add 4 tablespoons of baking soda a little at a time to the vinegar. The liquid fizzes when the baking soda is added. Stir with the spoon to mix the two ingredients as you add the baking soda.
- Wait for the fizzing to stop before you continue.
- Place the pot on the hot plate and boil at medium heat until the fluid evaporates and you’re left with a dry sol vent . It should take about 30 -60 minutes for all the liquid to disappear.
- When the liquid starts forming a crusty film on the surface, turn the heat down immediately to prevent it forming a thick crust. (Scrape some of the crystals off the side of the pot to use later)
- If the solution is brown and cloudy, add more vinegar. Boil again.
- Break up the lumps in the powder solution.
- Place the powder in the glass container with a lid and add water until it dissolves into a liquid. (66 g of water for every 100 g of powder) Cover with the lid to prevent more evaporation.
- Place the glass jar in a container with ice water to cool down. It takes about 15 minutes. You may also cool it in the fridge , but it will take longer than the ice water.
- When you put your hand in the glass jar, the hot ice forms crystals around your hand and it is frozen to the touch.
What Just Happened Here?
The chemical reaction is also exothermically creating the hot feeling when touching the ice.
The physical change is noticeable when the liquid mixture releases gas and changes into a solid form. When water is added the powder dissolves.
The solution is a supercooled liquid that stays liquid when cooled down below its freezing point in the ice water.
The unstable supersaturated liquid will freeze forming crystals at the slightest trigger when adding some of the crystals to the solution. For a cool effect dip your fingers into the liquid . Crystallization forms at the nucleation site whe n solute molecules that bump into each other overcome the power of the sol vent that keeps molecules apart .
More Resources
https://www.wikihow.com/Make-Hot-Ice
https://www.youtube.com/watch?v=XiAv9GE_2o4
https://www.playdoughtoplato.com/kids-science-experiment-hot-ice/
https://www.thoughtco.com/hot-ice-or-sodium-acetate-607822
Retha Groenewald is a professional writer working for FractusLearning. When not working with Fractus, she is web copywriter for the Christian market. Her writing is featured at Christian Web Copywriter and at Writing That Breathes Life.
Leave a Reply Cancel reply
Your email address will not be published. Required fields are marked *
This site uses Akismet to reduce spam. Learn how your comment data is processed .
In order to continue enjoying our site, we ask that you confirm your identity as a human. Thank you very much for your cooperation.
British Science Week: Home science experiment – making hot ice
by How It Works Team · 14/03/2016
With this experiment, we will show that a substance could be created that was a liquid at room temperature but, when it was disturbed, would immediately crystallise and form what is known as hot ice.
Hot ice is an amazingly cool substance and the ingredients required are easy to obtain. However, it is difficult to make, and you probably won’t get it right on your first attempt, but don’t give up hope. You can either re-melt any failed hot ice or start again, making sure to follow the method carefully.
This is a great experiment to do at home and an even better one to do at school. You can directly see the effects of crystallisation and there’s plenty of science embedded into the fun of seeing hot ice in action. If you do replicate our experiment, make sure you send us some photos on Facebook or Twitter so we can see how it went!
You will need
1 litre of clear vinegar 4 tablespoons of baking soda Steel saucepan Container
Hot ice experiment – step 1
First, a litre of clear store-bought vinegar must be measured out. This must be clear, as brown vinegar contains impurities that will prevent the experiment from working. Next, you need to add about three to four tablespoons of baking soda (sodium bicarbonate) to the vinegar. This has to be done slowly, as the reaction can make the liquid explode over the side of the container. Stir this until all the baking soda is dissolved and then put the mixture on to the hob to boil.
Hot ice experiment – step 2
You need to get rid of about 90% of the liquid, so leave it to boil for over 30 minutes. You’ll start to notice a white substance on the side of the pan. This is sodium acetate, and a bit of this needs to be saved for later use. Eventually, a crust (sodium acetate anhydrous) will begin to form on the liquid. At this point, take it off the boil and transfer it into a container. This must be immediately covered to prevent the substance crystallising. You then need to cool it, so place it in an ice bath for 15 minutes or a fridge for a bit longer.
Hot ice experiment – step 3
The liquid needs to cool below room temperature. This makes it into a supercool liquid that will exhibit the characteristics of hot ice. Once it’s cooled, you can take the lid off and put some of the white sodium acetate collected earlier in the liquid.
Hot ice experiment – step 4
The points where sodium acetate is introduced will begin to crystallise. After a few seconds the entire liquid will appear to freeze. However, when touched, the substance is hot and not cold because the process of crystallisation here is exothermic, so heat is given off as the liquid solidifies. So, what’s happened in this experiment?
Hot ice experiment – conclusion
Almost every substance has a freezing point, but for something to solidify the molecules must rearrange from a liquid to a solid or crystal arrangement. However, hot ice, or sodium acetate trihydrate, is a supercool liquid where the molecules do not rearrange until they are disturbed, in this case by introducing sodium acetate. Hot ice melts at 58 degrees Celsius and is a crystalline solid at room temperature, allowing this effect to be produced as the baking soda and vinegar are heated. The unarranged molecular structure results in the occurrence of this crystallisation effect. You can re-use your hot ice by adding vinegar until the solid crystals are fully dissolved and repeating our method again.
Hot ice equation
Discover more amazing science in the latest issue of How It Works. It’s available from all good retailers, or you can order it online from the ImagineShop . If you have a tablet or smartphone, you can also download the digital version onto your iOS or Android device. To make sure you never miss an issue of How It Works magazine, make sure you subscribe today !
Plus, make sure you also check out our digital-only specials, such as Explore Mars , A Guide To The Galaxy and Earthquakes , available to download onto your digital device now!
How to make invisible ink
How to bend water
How to make a magnet
Enter our latest competition

Competition
Closed: Win a pair of AR glasses worth £449!
- Next story Celebrate British Science Week with 10% off How It Works products
- Previous story How do cash machines work?
Get the new issue

On sale now
Follow How It Works on twitter
Fast facts on instagram (@howitworksmag).
- Quick Order
- Your Cart ( )
- Distillation Supplies
- General Chemicals
- Herbal Extraction Chemicals
- Patina Chemicals
- Electrode Strips
- Microscope Specimen Stains
- pH Indicators
- Chemistry How To's and Glossary
- Periodic Table / the Elements
- Corning PYREX brand Glassware
- Plastic Polypropylene Beakers
- Pyrex® Beakers
- Borosilicate Beakers
- Borosilicate Beaker Mugs
- Parafilm M Laboratory Film
- Glass Dropper Bottles
- Wash Bottles
- Amber Glass Bottles
- Clear Glass Bottles
- HDPE Plastic Bottles
- LDPE Polyethylene Squeeze Bottles
- CoolJarz™ Poly Jar
- Centrifuge Tubes
- Distillation
- Borosilicate Erlenmeyer Flasks
- PYREX® Erlenmeyer Flasks
- PYREX® Filter Flasks
- Borosilicate Florence/Boiling Flasks
- Borosilicate Volumetric Flasks
- Borosilicate Filter Flasks
- Distillation Flasks, 24/40 Joints
- Glass Funnels
- Plastic Funnels
- Büchner Funnels
- Separatory Funnels
- Metal Funnels
- Class A Graduated Glass Cylinders
- Student Plastic PP Graduated Cylinders
- Pipettes, Bulbs and Pumps
- Glass Stir Rods
- Test Tube Accessories
- PYREX Test Tubes
- Borosilicate Test Tubes
- Glass Tubing
- Glass Vials, Clear and Colored
- Plastic Vials
- Glass Dropper Vials, Clear and Colored
- Watch Glasses
- Anatomy Demonstration
- Assay - Crucibles, Cupels and Casseroles
- Burners & Burner Stands
- Cleaning & Disinfecting
- Culture Media Supplies
- Dissecting Supplies
- Filter Paper
- Filtering Kit
- Filter Aids
- Lab Stands - Scissor Jack
- Lab Tools - Assists
- Magnetic Stir Bars
- Hotplates & Stirrers
- Mortars with Pestles
- Pipets and Droppers
- Rubber Stoppers, Solid & 1-Hole
- Rubber Stoppers, Septa
- Silicone Stoppers
- Thermometers, Lab
- Clear Tubing, PVC & Tygon
- Amber Latex Tubing
- Silicone Tubing
- Vacuum Tubing
- Vacuum Supplies
- Lab Safety Gloves
- Lab Safety Goggles
- Laser Beam Pointers
- Microscopes & Magnifiers
- Prepared Slide Sets
- Microscope Supplies
- Specimen Stains
- pH & Chlorine Testing
- pH Meter, pH Buffers
- Refractometers
- Ultraviolet Lamps
- Ultraviolet Lamp Accessories
- Science Mugs & Tumblers
- Fidget & Desktop Toys
- Science Kits
- Science Amusements
- Crazy Aaron's Thinking Putty
- Gift Ideas $1 to $20
- Gift Ideas $21 to $40
- Gift Ideas Mugs & Tumblers
- Inventory Clearance
- Food Chemistry
- Crystal Growing
- Patinas for Metal Artists
- Laboratory Procedures
- Photo Processes and Formulas
- Weather - Air Pressure and Humidity
Step by step how to make Instant Hot Ice with Sodium Acetate!
YOU NEED...
- 170g of Sodium Acetate Trihydrate .
- Water (tap is fine).
- Small sauce pot.
- 50ml or larger Graduated Cylinder .
- Medicine Dropper .
- Glass or 150ml Beaker (well cleaned).
- Scale (that can measure in grams).
- Refrigerator space.
PREPARING THE "HOT ICE"...
1) Measure out 30 mL of water (approximately 1 fluid ounce) and pour into a small stove-top pot. Weigh out 170 grams of Sodium Acetate Trihydrate and dump into the pot. Stir the water and sodium acetate trihydrate together to wet the dry flakes.
2) Put the sauce pot over medium heat on a stove and immediately begin to stir the mixture. Keep stirring constantly to avoid burning until the entire mixture turns into a liquid. This may take 10 to 15 minutes.
3) Once the mixture is all liquid with none, or almost none, of the dry sodium acetate still visible, pour the liquid into a clean glass or beaker large enough to hold all of the liquid. Leave any solids behind in the pot if there are any remaining.
4) Put the glass in the refrigerator to cool down. Do not shake or disturb the cooling solution. Check your solution after about five minutes of cooling.
NEXT, EVALUATE YOUR PROGRESS.. .
- If you see long thin crystals forming from the sides and bottom of the glass, or a thin layer of white crystals forming on the top of the liquid your ratio of sodium acetate is not quite right yet! (IF THIS IS NOT THE CASE SKIP TO PART C) .
- Take the glass out of your refrigerator and reheat in your pot while stirring to redissolve any solids. Add one to two drops of water. Pour the solution back into your clean glass and return it to the refrigerator to cool. Check again in five minutes and hopefully move on to part C.
- If you see a clear solution, with or without a thin transparent skin on the surface, your ratio of water to sodium acetate trihydrate is just about perfect. If you have a thin transparent skin on the surface, add a very small amount of water one drop at a time to the glass. Take note of how the skin disappears with just a drop or two of water. Once the skin has disappeared, continue letting the glass cool in the refrigerator.
FINAL PROCESS...
5) Continue checking on your cooling solution every five minutes and make adjustments as necessary according to step four. Wait about 15 to 20 minutes until the outside of the glass feels like it is about room temperature. If there are no signs of any solid material in the glass you are now ready to trigger the hot ice exothermic (release of heat) reaction!
6) Drop a small flake of dry sodium acetate trihydrate into the glass and observe the immediate crystallization that takes place! If nothing happens, or you get a slushy solid, your soultion does not contain enough sodium acetate. Add 10g of dry sodium acetate and remix over heat. Start over at step two.
Author - D. Bieniulis for The Science Company® Lakewood, Colorado

Unlocking the Mysteries of Hot Ice: The Magic of Sodium Acetate Trihydrate
Table of contents.
In the world of science and wonders, there’s a peculiar phenomenon that captivates both the mind and the senses, often dubbed as “hot ice.” This paradoxical term might conjure images of ice cubes emanating steam or a block of ice too hot to touch. However, the reality is even more fascinating, and it involves a compound known as sodium acetate trihydrate. Let’s embark on a journey to unravel the mysteries of hot ice, transforming complex scientific principles into an engaging narrative accessible to all.
The Enigma of Hot Ice
At first glance, the term “hot ice” seems like an oxymoron. How can something be hot and icy at the same time? The answer lies in a unique chemical process that defies our traditional understanding of states of matter. Unlike regular ice, which is simply water frozen into a solid state, hot ice is the result of a crystallization process involving sodium acetate trihydrate. This compound has the extraordinary ability to exist as a liquid at room temperature and then instantly solidify into a crystal-like structure when triggered, releasing heat in the process.
Sodium Acetate Trihydrate: The Star Ingredient
To delve into the realm of hot ice, one must first become acquainted with its main protagonist: sodium acetate trihydrate. Sodium acetate is a salt derived from acetic acid (the main component of vinegar) and sodium carbonate (baking soda). When these two substances react, they form sodium acetate, water, and carbon dioxide. The “trihydrate” part refers to the three water molecules that are chemically bonded to each sodium acetate molecule, a key factor in its intriguing properties.
How to Make Sodium Acetate at Home
Creating sodium acetate trihydrate at home is simpler than you might think, requiring only vinegar and baking soda. Here’s a basic outline:
- Combine Ingredients : Mix one part baking soda with two parts vinegar. The reaction will bubble and fizz as carbon dioxide is released.
- Evaporate the Mixture : Heat the solution gently to evaporate most of the water, leaving behind a concentrated solution of sodium acetate.
- Cool Down : Allow the solution to cool slowly, and if done correctly, crystals will start forming.
The Fascinating Process of Forming Hot Ice
The true magic happens when you trigger the crystallization of supersaturated sodium acetate trihydrate. A supersaturated solution is one that has been cooled down so slowly that the liquid contains more dissolved sodium acetate than it would normally be able to hold at that temperature. This unstable situation is just waiting for an opportunity to release energy and transition to a more stable state.
Triggering Crystallization
A small disturbance, such as introducing a small crystal of sodium acetate or even just tapping the container, can initiate crystallization. The solution rapidly transforms into solid crystals, and in doing so, it releases latent heat. This exothermic process is what gives “hot ice” its name—the resulting crystal formation is warm to the touch!
Applications of Hot Ice
Beyond its captivating demonstrations in science classes and online videos, hot ice has practical applications too:
- Reusable Hand Warmers : Hot ice is used in reusable hand warmers. Triggering crystallization releases heat, providing warmth. These can be reset by heating them in boiling water until all crystals dissolve back into liquid form.
- Medical Therapy Packs : Similar to hand warmers, hot ice can be used in therapy packs for muscle relief or medical treatments requiring heat application.
- Food Preservation : Sodium acetate is sometimes used in food preservation for its antimicrobial properties.
The Science Behind Hot Ice
Understanding hot ice involves delving into concepts of supersaturation, nucleation, and exothermic reactions:
- Supersaturation refers to a state where a solution contains more dissolved material than it could under normal circumstances.
- Nucleation is the initial step in the formation of crystals, requiring a nucleus around which material can accumulate.
- Exothermic reactions are chemical reactions that release energy by light or heat.
Making Science Accessible Through Hot Ice
Hot ice exemplifies how complex scientific principles can be demonstrated and understood through simple experiments. It serves as a bridge connecting theoretical chemistry with tangible experiences, making learning engaging and fun. By exploring phenomena like hot ice, we can inspire curiosity and foster a love for science among people of all ages.
In essence, hot ice is not just a scientific curiosity; it’s a gateway into understanding the intricate dance of molecules and reactions that shape our world. It reminds us that science is not confined to laboratories and textbooks but is all around us, waiting to be discovered.
Hot ice stands at the intersection of chemistry and wonder, offering both an intriguing spectacle and insightful lessons about physical states and chemical reactions. By demystifying this phenomenon through simple experiments with sodium acetate trihydrate, we not only satisfy our curiosity but also ignite a passion for exploring the marvels of science in everyday life.
As we continue our journey through the vast landscape of scientific knowledge, let us cherish these moments of discovery that remind us of the joy inherent in learning and understanding the world around us. Hot ice isn’t just a chemical oddity—it’s a testament to human ingenuity and the endless quest for knowledge.
Back To Blog Posts

Mini Physics
As the Administrator of Mini Physics, I possess a BSc. (Hons) in Physics. I am committed to ensuring the accuracy and quality of the content on this site. If you encounter any inaccuracies or have suggestions for enhancements, I encourage you to contact us . Your support and feedback are invaluable to us. If you appreciate the resources available on this site, kindly consider recommending Mini Physics to your friends. Together, we can foster a community passionate about Physics and continuous learning.
Leave a Comment Cancel reply
This site uses Akismet to reduce spam. Learn how your comment data is processed .
“Hot ice” experiment
How to make hot ice at home
Have you ever seen how a salt heater works? You just press it - and the capsule with fluid heats up and turns solid! Strangely enough, this heater works by using ice - only hot ice.
Safety precautions
- Be careful when working with heating devices.
- Observe safety rules when working with these substances: wear protective gloves, glasses and mask.
Warning! Only under adults supervision.
Reagents and equipment:
- baking soda (sodium bicarbonate, 77 g);
- 9% solution of acetic acid (662 ml);
- water (51 ml);
- glass container;
Step-by-step instructions
Sprinkle baking soda into the saucepan and pour vinegar over it. Stir thoroughly. Put the resulting solution on the hot plate and evaporate until it turns dry, and try to break up the lumps of the resulting powder . Then put the powder in the glass container, add water and heat in a water bath until it dissolves completely. Move the resulting solution to the beaker and allow to cool. Touch with your finger. Observe the formation of crystals and the release of heat.
Processes description
In the reaction of acetic acid and sodium bicarbonate, sodium acetate forms. It has a very interesting property–it dissolves in its own crystallized water when heated. A saturated solution forms, which when it cools is very unstable and crystallizes from any impact, for example the touch of a finger.
However, in our experiment we dried the sodium acetate out completely, so it was easier to calculate the amount of water needed. This is so crystal hydrate forms–a solid salt with water molecules in a crystal lattice. For every 100 g of sodium acetate , around 66 g of water is required.
NaHCO₃ + CH₃COOH = CH₃COONa + CO₂ + H₂O
CH₃COONa•3H₂O(solid) = CH₃COONa(solution)

Dozens of experiments you can do at home
One of the most exciting and ambitious home-chemistry educational projects The Royal Society of Chemistry
Your browser is not supported
Sorry but it looks as if your browser is out of date. To get the best experience using our site we recommend that you upgrade or switch browsers.
Find a solution
- Skip to main content
- Skip to navigation
- Back to parent navigation item
- Collections
- Sustainability in chemistry
- Simple rules
- Teacher well-being hub
- Women in chemistry
- Global science
- Escape room activities
- Decolonising chemistry teaching
- Teaching science skills
- Get the print issue
- RSC Education

- More navigation items
Related video

Creating a supersaturated gas evolving oscillator

Demonstrate intermolecular forces with colourful separations

Demonstrating the importance of surface area to rates of reaction

The reaction between sodium and chlorine

Shocking revelations 2: neutralisation reactions
By Declan Fleming 2013-07-01T00:00:00+01:00
- No comments
Produce attractive stalagmite formulations in the lab
Hand warmers containing a liquid in a flexible plastic shell with a small, curved metal disc are commonplace. The warmer is activated by inverting the disc, which presents nuclei to support the formation of crystals from a supersaturated solution. Needles propagate out from the nucleation site and within a matter of seconds the contents have solidified. The process is exothermic, generating heat.
This effect can be reproduced in the lab to offer more control over the process and produce attractive stalagmite formations. 1

Source: © Declan Fleming
- 125 g sodium ethanoate-3-water (sodium acetate-3-water)
- Watch glass
- 250 cm 3 beaker
- Stirring rod
- Bunsen burner
- Tripod
Preparation
Weigh 125 g of the sodium ethanoate into the beaker and add 12.5 cm 3 of water. Place the beaker onto a tripod and gauze over a Bunsen burner and heat gently, stirring until the solid has completely dissolved. Place the watch glass over the top of the beaker to minimise evaporation and prevent dust particles getting in, which can nucleate the solution prematurely. Allow the solution to cool to room temperature.
In front of the audience
Firstly, allow some students to examine the watch glass and confirm to other observers that it is at room temperature. Place a small crystal of the original sodium ethanoate on the watch glass and begin dripping the solution from the beaker onto it. The solution will crystallise immediately allowing you to build stalagmites. When you pass the watch glass around for students to examine, they will be able to feel the heat of crystallisation.
The process happens so quickly that if you are holding the spout of your beaker near the watch glass in an attempt to pour accurately, you can find that the crystals will race back up the drip to the spout, causing your stock solution to crystallise in the beaker.
Storage tip
A small Pyrex reagent bottle with a screw cap could be used instead of a beaker to store your solution. This is a more convenient way to store the solution over long periods and the contents can easily be redissolved by placing in a boiling water bath with the cap removed.
Teaching goal
I use this demonstration when developing students' ideas of particle models, particularly with respect to heating and cooling curves and changes of state. While the demonstration is technically crystallisation from a supersaturated solution, it is useful as a model for freezing. There are many videos on YouTube showing the freezing of supercooled water but it is not trivial to produce a sample on demand for use in front of a class, 2 so this demonstration provides a suitable alternative.
The key idea to stress here is that bond formation is an exothermic process. Many students will think that as a liquid turns to a solid it will get cooler because 'ice is colder than water'. With a clearer idea of the energy changes involved, they are in a better position to explain why pure substances do not change temperature during a change of state.
The nucleation concept does not appear on science curricula but there are plenty of associated phenomena suitable for exploration in a science club.
The nucleation of bubbles of dissolved gas can be demonstrated by the addition of raisins to carbonated water that proceed to 'dance' up and down as bubbles form and release from their surface. Despite being less dramatic than the Mentos/cola fountain, at this scale it is clearer to see that as the raisins are dropped in, they trap bubbles of air on their surface and these established bubbles are easier to enlarge with dissolved gas than initiating a new smaller bubble. The formation of streams of bubbles in champagne flutes also presents a particularly elegant way to examine this process. The use of champagne here is optional!
This resistance to the formation of small bubbles explains the 'bumping' seen in liquids heated in organic practical work and stories of scalds received from sticking a spoon into liquids superheated in household microwave ovens.
Sodium ethanoate is an irritant: wear safety spectacles.
1 This experiment is based on demonstration 14 in Classic chemistry demonstrations.
2 Peter Wothers was able to show this in front of a live audience only with the help of some assistants at the 2012 Royal Institution Christmas Lectures. The demonstration of supercooled water can be seen at http://bit.ly/12RcTvR , starting at 07:40.
- Rates of reaction
- Structure and bonding
- Thermodynamics
Latest videos

Research scientist, microplastics

Non-burning paper: investigate the fire triangle and conditions for combustion
2024-06-10T05:00:00Z
By Declan Fleming

Cosmetics, technical services chemist

Illustrate polymer properties with a self-siphoning solution
2024-04-22T05:38:00Z

Demonstrate concentration and density with a transition metal colloid cell
2024-02-19T10:06:00Z

Quality officer, genomics research
Related articles.

Magical demonstrations
2016-12-22T10:25:00Z By Neil Monteiro
Neil Monteiro shows how taking lessons from magicians can make your demos come alive

What’s the world’s strongest glue?
2024-07-19T05:32:00Z By Kit Chapman
Find out about the world’s stickiest glue and how adhesives bond things together

New method grows larger diamonds
2024-05-31T08:24:00Z By Nina Notman
Use this real-world context when teaching about giant covalent structures
No comments yet
Only registered users can comment on this article., more exhibition chemistry.

2024-06-10T05:00:00Z By Declan Fleming
Use this reworking of the classic non-burning £5 note demonstration to explore combustion with learners aged 11–16 years

2024-04-22T05:38:00Z By Declan Fleming
Demonstrate the tubeless siphon with poly(ethylene glycol) and highlight the polymer’s viscoelasticity to your 11–16 learners

2024-02-19T10:06:00Z By Declan Fleming
Boost 11–14 learners’ understanding of diffusion and transition metal chemistry
- Contributors
- Print issue
- Email alerts
Site powered by Webvision Cloud
BREAKING: Hawaii's largest power company and other defendants agree to a $4 billion settlement with victims of Maui's wildfires
Melting ice is slowing Earth's spin, shifting its axis and even influencing its inner core, research shows

Climate change is altering the Earth to its literal core, new research suggests.
As polar and glacial ice melts because of global warming, water that was once concentrated at the top and the bottom of the globe is getting redistributed toward the equator. The extra mass around Earth’s middle slows its rotation, which in turn has a lengthening effect on our days .
A new study offers more evidence of that dynamic and further suggests that changes to the planet’s ice have been profound enough to affect the Earth’s axis — the invisible line at its center around which it rotates. Together, those shifts are causing feedback beneath the surface, affecting the fluids that move around in Earth’s molten core.
The findings were published in two journals, Nature Geoscience and Proceedings of the National Academy of Sciences, over the last week.
The studies, along with similar research published in March , suggest that humans have tinkered with foundational elements of the planet’s physical properties — a process that will continue until some time after global temperatures stabilize and the melting of ice sheets reaches an equilibrium.
“You can add Earth’s rotation to this list of things humans have completely affected,” said an author of the two new studies, Benedikt Soja, an assistant professor of space geodesy at ETH Zurich in Switzerland.
The alteration to Earth’s spin is significant enough that it could one day rival the influence of tidal forces caused by the moon, Soja said — if carbon emissions continue at extreme levels.
In general, the speed of Earth’s spin depends on the shape of the planet and where its mass is distributed — factors governed by several counteracting forces.
Scientists often offer a comparison to a figure skater twirling on ice: When skaters spin with their arms outstretched, their rotation will be slower. But if skaters’ arms are kept in tight, they spin faster.
Somewhat similarly, the friction of ocean tides from the moon’s gravitational pull slows the Earth’s rotation. Historically, that has had the largest influence on the planet’s rate of spin, Soja said.
Meanwhile, the slow rebound of the Earth’s crust in some high-latitude regions after the removal of Ice Age glaciers works in the opposite direction, speeding up the planet’s spin.
Both of those processes have long been predictable influences on the Earth’s angular velocity.
But now, rapid ice melt due to global warming is becoming a powerful new force. If humans continue to pollute the planet with carbon emissions, Soja said, the influence of ice loss could overtake the moon’s effect.
“In the worst scenarios, then yeah, climate change would become the most dominant factor,” he said.

An important fourth factor influencing Earth’s spin is the motion of fluid within its core. Scientists have long understood that that can accelerate or slow the planet’s rotation — a trend that can shift over 10- to 20-year intervals. Right now, the core is temporarily causing the Earth’s spin to speed up slightly, counteracting the slowing due to climate change. Climate change appears to be affecting Earth’s core, as well, as a result of melting ice and shifts in the planet’s rotational axis.
The researchers behind the new study built a 120-year model of polar motion, or how the axis shifts over time. They found that changes in the distribution of mass on the planet due to melting ice likely contributed to small fluctuations in polar motion.
Soja estimated that climate change was most likely responsible for 1 meter of change over 10 years.
The research further suggests that the movement of molten rock inside the Earth adjusts to the changes in its axis and rate of spin — a feedback process in which Earth’s surface influences its interior.
“The rotation changes slightly, and that, we believe, can indirectly have an effect on the core,” Soja said. “This is something which is not very easy or not possible to measure directly because we cannot go down there.”
The findings have implications for how humans keep time and for how we position satellites in space.
“If you want to fly a new mission to Mars, for example, we really need to know how the state of the Earth is exactly in space, and if that changes we might actually make a navigation error or a mistake,” Soja said.
A 1-meter change to Earth’s axis, for example, could mean a spacecraft misses its target by 100 or 1,000 meters when it reaches Mars.
As for timekeeping, research published in March suggested that climate change has delayed the need to add a “negative leap second” to Coordinated Universal Time to keep the world’s clocks in line with Earth’s rotation.
Duncan Agnew, a geophysicist at the Scripps Institution of Oceanography at the University of California, San Diego, who led that earlier study, said the new research “meshes very well” with his work.
“It extends the result further into the future and looks at more than one climate scenario,” Agnew said, adding that although Soja and his co-authors took a different approach, they reached a result similar to his.
“Multiple discoveries are almost the rule in science — this is yet another case,” Agnew said.
Thomas Herring, a professor of geophysics at the Massachusetts Institute of Technology, who was not involved in either study, said the new research may indeed offer insight into how changes on Earth’s surface can influence what’s going on inside.
“For the feedback between surface processes and the core, I find that plausible,” Herring said in an email, explaining that “large scale” processes at the surface can “penetrate to the fluid core.”
Evan Bush is a science reporter for NBC News.
A rare form of ice at the center of a cool new discovery about how water droplets freeze
Ice is far more complicated than most of us realize, with over 20 different varieties known to science, forming under various combinations of pressure and temperature. The kind we use to chill our drinks is known as ice I, and it's one of the few forms of ice that exist naturally on Earth. Researchers from Japan have recently discovered another type of ice: ice 0, an unusual form of ice that can seed the formation of ice crystals in supercooled water.
The formation of ice near the surface of liquid water can start from tiny crystal precursors with a structure similar to a rare type of ice, known as ice 0. In a study published this month in Nature Communications, researchers from the Social Cooperation Research Department "Frost Protection Science," at the Institute of Industrial Science, The University of Tokyo showed that these ice 0-like structures can cause a water droplet to freeze near its surface rather than at its core. This discovery resolves a longstanding puzzle and could help redefine our understanding of how ice forms.
Crystallization of ice, known as ice nucleation, usually happens heterogeneously, or in other words, at a solid surface. This is normally expected to happen at the surface of the water's container, where liquid meets solid. However, this new research shows that ice crystallization can also occur just below the water's surface, where it meets the air. Here, the ice nucleates around small precursors with the same characteristic ring-shaped structure as ice 0.
"Simulations have shown that a water droplet is more likely to crystallize near the free surface under isothermal conditions," says lead author of the study Gang Sun. "This resolves a longstanding debate about whether crystallization occurs more readily on the surface or internally."
Ice 0 precursors have a structure very similar to supercooled water, allowing water molecules to crystallize more readily from it, without needing to directly form themselves into the structure of regular ice. The tiny ice 0 precursors are formed spontaneously, as a result of negative pressure effects caused by the surface tension of water. Once crystallization begins from these precursors, structures similar to ice 0 quickly rearrange themselves into the more familiar ice I.
Senior author, Hajime Tanaka stresses the wide-ranging implications of this study, noting that, "The findings regarding the mechanism of surface crystallization of water are expected to contribute significantly to various fields, including climate studies and food sciences, where water crystallization plays a critical role."
A more detailed understanding of ice and how it forms can give invaluable insight into a variety of areas of study. This work may have particular importance in meteorology, for example, where ice formation via ice 0-like precursors may have a much more noticeable effect in small water droplets like those found in clouds. Understanding ice can have benefits in technology too, from food sciences to air conditioning.
- Nature of Water
- Spintronics
- Nuclear Energy
- Sports Science
- Transportation Science
- Engineering
- Materials Science
- Sedimentary rock
- Soap bubble
- Nanoparticle
- Global warming
- Surface tension
Story Source:
Materials provided by Institute of Industrial Science, The University of Tokyo . Note: Content may be edited for style and length.
Journal Reference :
- Gang Sun, Hajime Tanaka. Surface-induced water crystallisation driven by precursors formed in negative pressure regions . Nature Communications , 2024; 15 (1) DOI: 10.1038/s41467-024-50188-1
Cite This Page :
Explore More
- Half a Billion-Year-Old Spiny Slug
- Rising Earth in Antarctica: Sea Level Rise
- Origins of the Moon's Tenuous Atmosphere
- Sea Level Changes Shaped Early Life On Earth
- What Gave the First Molecules Their Stability?
- Fossil Shows How Penguins' Wings Evolved
- Global Warming and Rising Sea Levels
- Shifts in Vital Pacific Arctic Fisheries
- DNA Replication: Humans and Baker's Yeast
- Boosting Solar Cell Efficiency and Durability
Trending Topics
Strange & offbeat.
Suggested Searches
- Climate Change
- Expedition 64
- Mars perseverance
- SpaceX Crew-2
- International Space Station
- View All Topics A-Z
Humans in Space
Earth & climate, the solar system, the universe, aeronautics, learning resources, news & events.

NASA Scientists on Why We Might Not Spot Solar Panel Technosignatures

NASA Embraces Streaming Service to Reach, Inspire Artemis Generation

Hubble Spies a Diminutive Galaxy
- Search All NASA Missions
- A to Z List of Missions
- Upcoming Launches and Landings
- Spaceships and Rockets
- Communicating with Missions
- James Webb Space Telescope
- Hubble Space Telescope
- Why Go to Space
- Commercial Space
- Destinations
- Living in Space
- Explore Earth Science
- Earth, Our Planet
- Earth Science in Action
- Earth Multimedia
- Earth Science Researchers
- Pluto & Dwarf Planets
- Asteroids, Comets & Meteors
- The Kuiper Belt
- The Oort Cloud
- Skywatching
- The Search for Life in the Universe
- Black Holes
- The Big Bang
- Dark Energy & Dark Matter
- Earth Science
- Planetary Science
- Astrophysics & Space Science
- The Sun & Heliophysics
- Biological & Physical Sciences
- Lunar Science
- Citizen Science
- Astromaterials
- Aeronautics Research
- Human Space Travel Research
- Science in the Air
- NASA Aircraft
- Flight Innovation
- Supersonic Flight
- Air Traffic Solutions
- Green Aviation Tech
- Drones & You
- Technology Transfer & Spinoffs
- Space Travel Technology
- Technology Living in Space
- Manufacturing and Materials
- Science Instruments
- For Kids and Students
- For Educators
- For Colleges and Universities
- For Professionals
- Science for Everyone
- Requests for Exhibits, Artifacts, or Speakers
- STEM Engagement at NASA
- NASA's Impacts
- Centers and Facilities
- Directorates
- Organizations
- People of NASA
- Internships
- Our History
- Doing Business with NASA
- Get Involved
NASA en Español
- Aeronáutica
- Ciencias Terrestres
- Sistema Solar
- All NASA News
- Video Series on NASA+
- Newsletters
- Social Media
- Media Resources
- Upcoming Launches & Landings
- Virtual Events
- Sounds and Ringtones
- Interactives
- STEM Multimedia

MESSENGER – From Setbacks to Success
What’s New With the Artemis II Crew

Food in Space

NASA Offers Virtual Activities for 21st Northrop Grumman Resupply Mission
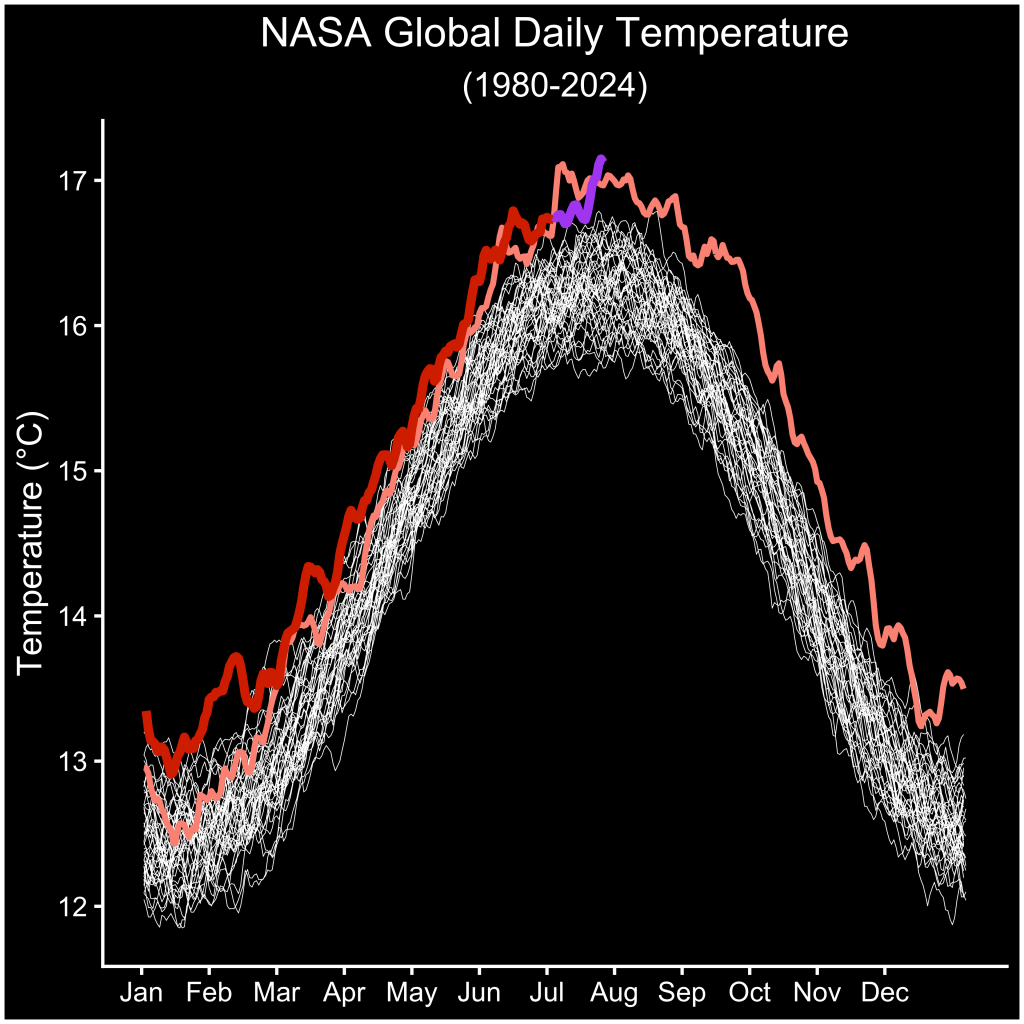
NASA Data Shows July 22 Was Earth’s Hottest Day on Record

NASA Returns to Arctic Studying Summer Sea Ice Melt

Watch Carbon Dioxide Move Through Earth’s Atmosphere

Amendment 37: DRAFT F.11 Stand-Alone Landing Site-Agnostic Payloads and Research Investigations on the Surface of the Moon released for community comment.

August’s Night Sky Notes: Seeing Double

Repair Kit for NASA’s NICER Mission Heading to Space Station

LIVE: NASA is with you from Oshkosh

NASA Streams First 4K Video from Aircraft to Space Station, Back

NASA Ames to Host Supercomputing Resources for UC Berkeley Researchers

Former Space Communications, Navigation Interns Pioneer NASA’s Future

NASA Releases First Integrated Ranking of Civil Space Challenges

Three NASA Interns Expand Classroom Access to NASA Data

NASA Johnson Dedicates Dorothy Vaughan Center to Women of Apollo

NASA’s First-Ever Quantum Memory Made at Glenn Research Center

A Picture-Perfect Portrait: Eliza Hoffman’s Take on Dorothy Vaughan

There Are No Imaginary Boundaries for Dr. Ariadna Farrés-Basiana

Astronauta de la NASA Frank Rubio

Diez maneras en que los estudiantes pueden prepararse para ser astronautas

Charles G. Hatfield
Earth science public affairs officer, nasa langley research center.
What happens in the Arctic doesn’t stay in the Arctic, and a new NASA mission is helping improve data modeling and increasing our understanding of Earth’s rapidly changing climate. Changing ice, ocean, and atmospheric conditions in the northernmost part of Earth have a large impact on the entire planet. That’s because the Arctic region acts like Earth’s air conditioner.
Much of the Sun’s energy is transported from tropical regions of our planet by winds and weather systems into the Arctic where it is then lost to space. This process helps cool the planet.
The NASA-sponsored Arctic Radiation Cloud Aerosol Surface Interaction Experiment (ARCSIX) mission is flying three aircraft over the Arctic Ocean north of Greenland to study these processes. The aircraft are equipped with instruments to gather observations of surface sea ice, clouds, and aerosol particles, which affect the Arctic energy budget and cloud properties. The energy budget is the balance between the energy that Earth receives from the Sun and the energy the Earth loses to outer space.
To view this video please enable JavaScript, and consider upgrading to a web browser that supports HTML5 video
“More sea ice makes that air conditioning effect more efficient. Less sea ice lessens the Arctic’s cooling effect,” says Patrick Taylor, a climate scientist at NASA’s Langley Research Center in Hampton, Virginia. “Over the last 40 years, The Arctic has lost a significant amount of sea ice making the Arctic warm faster. As the Arctic warms and sea ice melts, it can cause ripple effects that impact weather conditions thousands of miles away, how fast our seas are rising, and how much flooding we get in our neighborhoods.”
As the Arctic warms and sea ice melts, it can cause ripple effects…thousands of miles away.

Patrick Taylor
NASA Climate Research Scientist
The first series of flights took place in May and June as the seasonal melting of ice started. Flights began again on July 24 during the summer season, when sea ice melting is at its most intense.
“We can’t do this kind of Arctic science without having two campaigns,” said Taylor, the deputy science lead for ARCSIX. “The sea ice surface in the spring was very bright white and snow covered. We saw some breaks in the ice. What we will see in the second campaign is less sea ice and sea ice that is bare, with no snow. It will be covered with all kinds of melt ponds – pooling water on top of the ice – that changes the way the ice interacts with sunlight and potentially changes how the ice interacts with the atmosphere and clouds above.”
Sea ice and the snow on top of the ice insulate the ocean from the atmosphere, reflecting the Sun’s radiation back towards space, and helping to cool the planet. Less sea ice and darker surfaces result in more of the Sun’s radiation being absorbed at the surface or trapped between the surface and the clouds.
Understanding this relationship, and the role clouds play in the system, will help scientists improve satellite data and better predict future changes in the Arctic climate.
“This unique team of pilots, engineers, scientists, and aircraft can only be done by leveraging expertise from multiple NASA centers and our partners,” said Linette Boisvert, cryosphere lead for the mission from NASA’s Space Flight Center in Greenbelt, Maryland. “We gathered great data of the snow and ice pre-melt and at the onset of melt. I can’t wait to see the changes at the height of melt as we measure the same areas covered with melt ponds.”
NASA partnered with the University of Colorado Boulder for the ARCSIX mission, and the research team found some surprises in their early data analysis from the spring campaign. One potential discovery is something Taylor is calling a “sea ice sandwich”, when a younger layer of sea ice is caught in between two layers of older sea ice. Scientists also found more drizzle within the clouds than expected. Both observations will need further investigating once the data is fully processed.

“A volcano erupted in Iceland, and we believe the volcanic aerosol plume was indicated by our models four days later,” Taylor said. “Common scientific knowledge tells us volcanic particles, like ash and sulfate, would have already been removed from the atmosphere. More work needs to be done, but our initial results suggest these particles might live in the atmosphere much longer than previously thought.”
Previous studies suggest that aerosol particles in clouds can influence sea ice melt. Data collected during ARCSIX’s spring flights showed the Arctic atmosphere had several aerosol particle layers, including wildfire smoke, pollution, and dust transported from Asia and North America.
“We got everything we hoped for and more in the first campaign,” Taylor added. “The data from this summer will help us better understand how clouds and sea ice behave. We’ll be able to use these results to improve predictive models. In the coming years, scientists will be able to better predict how to mitigate and adapt to the rapid changes in climate we’re seeing in the Arctic.”
ESPO.NASA.gov
AIR.LARC.NASA.gov
NASA.gov/Earth
Related Terms
- Airborne Science
- Goddard Space Flight Center
- Ice & Glaciers
- Langley Research Center
- Wallops Flight Facility
Explore More
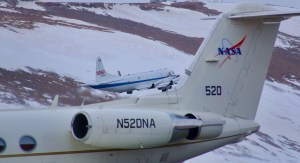
NASA Mission Flies Over Arctic to Study Sea Ice Melt Causes
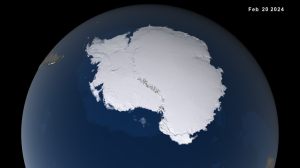
Antarctic Sea Ice Near Historic Lows; Arctic Ice Continues Decline
NASA Ice Scientists Take Flight from Greenland to Study Melting Arctic Ice
share this!
July 29, 2024
This article has been reviewed according to Science X's editorial process and policies . Editors have highlighted the following attributes while ensuring the content's credibility:
fact-checked
trusted source
NASA returns to Arctic to study summer sea ice melt
by Charles G. Hatfield, NASA

What happens in the Arctic doesn't stay in the Arctic, and a new NASA mission is helping improve data modeling and increasing our understanding of Earth's rapidly changing climate. Changing ice, ocean, and atmospheric conditions in the northernmost part of Earth have a large impact on the entire planet. That's because the Arctic region acts like Earth's air conditioner.
Much of the sun's energy is transported from tropical regions of our planet by winds and weather systems into the Arctic where it is then lost to space. This process helps cool the planet.
The NASA-sponsored Arctic Radiation Cloud Aerosol Surface Interaction Experiment (ARCSIX) mission is flying three aircraft over the Arctic Ocean north of Greenland to study these processes. The aircraft are equipped with instruments to gather observations of surface sea ice, clouds, and aerosol particles , which affect the Arctic energy budget and cloud properties. The energy budget is the balance between the energy that Earth receives from the sun and the energy the Earth loses to outer space.
"More sea ice makes that air conditioning effect more efficient. Less sea ice lessens the Arctic's cooling effect," says Patrick Taylor, a climate scientist at NASA's Langley Research Center in Hampton, Virginia.
"Over the last 40 years, The Arctic has lost a significant amount of sea ice making the Arctic warm faster. As the Arctic warms and sea ice melts, it can cause ripple effects that impact weather conditions thousands of miles away, how fast our seas are rising, and how much flooding we get in our neighborhoods."
The first series of flights took place in May and June as the seasonal melting of ice started. Flights began again on July 24 during the summer season, when sea ice melting is at its most intense.
"We can't do this kind of Arctic science without having two campaigns," said Taylor, the deputy science lead for ARCSIX. "The sea ice surface in the spring was very bright white and snow covered. We saw some breaks in the ice.
"What we will see in the second campaign is less sea ice and sea ice that is bare, with no snow. It will be covered with all kinds of melt ponds—pooling water on top of the ice—that changes the way the ice interacts with sunlight and potentially changes how the ice interacts with the atmosphere and clouds above."
Sea ice and the snow on top of the ice insulate the ocean from the atmosphere, reflecting the sun's radiation back towards space, and helping to cool the planet. Less sea ice and darker surfaces result in more of the sun's radiation being absorbed at the surface or trapped between the surface and the clouds.
Understanding this relationship, and the role clouds play in the system, will help scientists improve satellite data and better predict future changes in the Arctic climate.
"This unique team of pilots, engineers, scientists, and aircraft can only be done by leveraging expertise from multiple NASA centers and our partners," said Linette Boisvert, cryosphere lead for the mission from NASA's Space Flight Center in Greenbelt, Maryland.
"We gathered great data of the snow and ice pre-melt and at the onset of melt. I can't wait to see the changes at the height of melt as we measure the same areas covered with melt ponds."
NASA partnered with the University of Colorado Boulder for the ARCSIX mission, and the research team found some surprises in their early data analysis from the spring campaign.
One potential discovery is something Taylor is calling a "sea ice sandwich," when a younger layer of sea ice is caught in between two layers of older sea ice. Scientists also found more drizzle within the clouds than expected. Both observations will need further investigating once the data is fully processed.
"A volcano erupted in Iceland, and we believe the volcanic aerosol plume was indicated by our models four days later," Taylor said. "Common scientific knowledge tells us volcanic particles, like ash and sulfate, would have already been removed from the atmosphere. More work needs to be done, but our initial results suggest these particles might live in the atmosphere much longer than previously thought."
Previous studies suggest that aerosol particles in clouds can influence sea ice melt. Data collected during ARCSIX's spring flights showed the Arctic atmosphere had several aerosol particle layers, including wildfire smoke, pollution, and dust transported from Asia and North America.
"We got everything we hoped for and more in the first campaign," Taylor added. "The data from this summer will help us better understand how clouds and sea ice behave. We'll be able to use these results to improve predictive models. In the coming years, scientists will be able to better predict how to mitigate and adapt to the rapid changes in climate we're seeing in the Arctic."
Provided by NASA
Explore further
Feedback to editors

Study yields new insights into the link between global warming and rising sea levels
7 hours ago

Coinfecting viruses obstruct each other's cell invasion

Scientists discuss why we might not spot solar panel technosignatures

BNP-Track algorithm offers a clearer picture of biomolecules in motion

New compound found to be effective against 'flesh-eating' bacteria
8 hours ago

Not the day after tomorrow: Why we can't predict the timing of climate tipping points

Scientists pin down the origins of the moon's tenuous atmosphere

Solving the doping problem: Enhancing performance in organic semiconductors
11 hours ago

Genetic signatures of domestication identified in pigs and chickens
12 hours ago

Potential terrorists can be identified from social media posts, new research shows
Relevant physicsforums posts, m 2.9 earthquake, lake michigan, 39 km ese of sturgeon bay, wisconsin.
2 hours ago
The Secrets of Prof. Verschure's Rosetta Stones
Aug 1, 2024
New Paper in Nature Communications models the AMOC
Jul 31, 2024
Hydrothermal explosion versus phreatic eruption?
Jul 25, 2024
Scientists have discovered “dark oxygen” being produced in the deep ocean, apparently by lumps of metal on the seafloor
Jul 23, 2024
Should We Be Planting More Trees?
Jul 22, 2024
More from Earth Sciences
Related Stories

NASA mission flies over Arctic to study sea ice melt causes
May 31, 2024

NASA Langley researchers are heading to the Arctic. Here's why that matters.
May 27, 2024

Five things to know about how NASA's tiny twin polar satellites will study the Arctic and Antarctic
May 15, 2024

Research shows blowing snow contributes to Arctic warming
Sep 4, 2023

Twin NASA satellites are ready to help gauge Earth's energy balance
May 30, 2024

NASA launches second small climate satellite to study Earth's poles
Jun 5, 2024
Recommended for you

Scientists find a human 'fingerprint' in the upper troposphere's increasing ozone
15 hours ago

More microbes found that break down the carbon-fluorine bonds found in some unsaturated PFAS
13 hours ago

Retreating Andean rocks signal the world's glaciers are melting far faster than predicted, report scientists

Study shows link between asymmetric polar ice sheet evolution and global climate
Let us know if there is a problem with our content.
Use this form if you have come across a typo, inaccuracy or would like to send an edit request for the content on this page. For general inquiries, please use our contact form . For general feedback, use the public comments section below (please adhere to guidelines ).
Please select the most appropriate category to facilitate processing of your request
Thank you for taking time to provide your feedback to the editors.
Your feedback is important to us. However, we do not guarantee individual replies due to the high volume of messages.
E-mail the story
Your email address is used only to let the recipient know who sent the email. Neither your address nor the recipient's address will be used for any other purpose. The information you enter will appear in your e-mail message and is not retained by Phys.org in any form.
Newsletter sign up
Get weekly and/or daily updates delivered to your inbox. You can unsubscribe at any time and we'll never share your details to third parties.
More information Privacy policy
Donate and enjoy an ad-free experience
We keep our content available to everyone. Consider supporting Science X's mission by getting a premium account.
E-mail newsletter
IMAGES
VIDEO
COMMENTS
Hot ice is another name for sodium acetate (CH 3 COONa or NaOAc). It is the sodium salt of acetic acid, which is the key component of vinegar. Hot ice gets its name from the way it solidifies. A solution of sodium acetate supercooled below its melting point suddenly crystallizes. Heat is released and the crystal resemble
2. Place in a boiling water bath. Place the sodium acetate in a steel or Pyrex container, then place that container in a pot of boiling water. It should melt to pure liquid sodium acetate trihydrate, or "hot ice." If the sodium acetate does not melt, you've bought sodium acetate anhydrous.
Here's a fun science experiment that will definitely get a "wow" from the kids. Combine baking soda and vinegar to make sodium acetate, or hot ice! It crystalizes instantly when you pour it, allowing you to create a tower of crystals. Since the process of crystallization is exothermic, the "ice" that forms will be hot to the touch.
To make hot ice, you must boil vinegar and baking soda. Mix 6 cups of vinegar and 6 tablespoons of baking soda in a pot. Add the baking soda slowly, because you don't want too big of a reaction. This will create sodium acetate, which can eventually form crystals. Your experiment might not work the first time (ours didn't) so keep trying!
How to make hot ice. Pour the white vinegar into the pan. Carefully add the bicarbonate of soda, half a tablespoon at a time and stir the mixture until it has all dissolved. The baking soda and vinegar will fizz as they react together, which is why you need to add the baking soda slowly. You have now made a solution called sodium acetate.
To prep the science experiment, I gathered a few common supplies: 4 cups of white vinegar (acetic acid) 4 tablespoons of baking soda (sodium bicarbonate) A pot. A glass measuring cup or mason jar (make sure it's heat safe glass) A dish. A spoon.
The discoloration has two causes. One is overheating your hot ice solution. You can prevent this type of discoloration by lowering the temperature when you heated the hot ice to remove the excess water. The other cause of discoloration is the presence of impurities. Improving the quality of your baking soda ( sodium bicarbonate) and acetic acid ...
The crystallization is an exothermic process, so the resulting ice is hot. Solidification occurs so quickly you can form sculptures as you pour the hot ice. Health and Safety: This experiment involves boiling solutions. Please take care when doing so and ensure you have adult supervision. You will Need:
A similar experiment is included in the MEL Chemistry subscription.For cool and safe experiments to do at home sign up to MEL Science here: http://bit.ly/2wO...
How to create it, fix it, and use it. All methods from baking soda and vinegar to laboratory synthesis are shown. The basis for hot ice is sodium acetate trihydrate, which is heated above its melting point and then cooled below its melting point so it's supercooled. It's still liquid and quickly solidifies when a seed crystal is introduced.
This might take about an hour. Don't use too high a temperature; this will make the solution go brown or yellow. Stir the crystals that have formed on the surface back in and take the pan off the heat. If the crystals won't redissolve, add a tiny amount of water or vinegar. Pour the solution into a very clean jam jar and cover it, and allow ...
Sodium acetate or hot ice is an amazing chemical you can prepare yourself from baking soda and vinegar. You can cool a solution of sodium acetate below its melting point and then cause the liquid to crystallize. The crystallization is an exothermic process, so the resulting ice is hot. Solidification occurs so quickly you can form sculptures as ...
The crystallization is an exothermic process, so the resulting ice is hot. Solidification occurs so quickly you can form sculptures as you pour the hot ice. Here is the reaction between the baking soda and vinegar to produce the sodium acetate: Na+ [HCO3]- + CH3-COOH → CH3-COO- Na+ + H2O + CO2. Discover real scientist in you with ...
This can be a bit of a tricky experiment, but when it works, it's fantastic! Combine vinegar and baking soda to make 'hot ice'. Warning: boiling water involved #adultsupervision. What you need: Vinegar, baking soda, saucepan, jug, bowl. What to do: Put 4 cups (1 L) of white vinegar into a saucepan.
Making hot ice is an easy fun experiment three to eight-year-old kids can try with ingredients you have at home. It takes about 1-2 hours to conduct the experiment. Your children will be amazed as the "ice" forms yet isn't cold at all! Hot ice is used in hand warmers, ...
In this video, I talk about the chemistry behind the classic Hot Ice demonstration. I talk about the supersaturation of sodium acetate and how the formation ...
165 grams (g) sodium acetate. 30 milliliters (mL) water. Parafilm. Graduated cylinder. Scale to weigh the sodium acetate. Hot plate or stove. 500mL glass flask. Safety googles. Gloves.
Hot ice experiment - conclusion Almost every substance has a freezing point, but for something to solidify the molecules must rearrange from a liquid to a solid or crystal arrangement. However, hot ice, or sodium acetate trihydrate, is a supercool liquid where the molecules do not rearrange until they are disturbed, in this case by ...
1) Measure out 30 mL of water (approximately 1 fluid ounce) and pour into a small stove-top pot. Weigh out 170 grams of Sodium Acetate Trihydrate and dump into the pot. Stir the water and sodium acetate trihydrate together to wet the dry flakes. 2) Put the sauce pot over medium heat on a stove and immediately begin to stir the mixture.
Making Science Accessible Through Hot Ice. Hot ice exemplifies how complex scientific principles can be demonstrated and understood through simple experiments. It serves as a bridge connecting theoretical chemistry with tangible experiences, making learning engaging and fun. By exploring phenomena like hot ice, we can inspire curiosity and ...
Sprinkle baking soda into the saucepan and pour vinegar over it. Stir thoroughly. Put the resulting solution on the hot plate and evaporate until it turns dry, and try to break up the lumps of the resulting powder. Then put the powder in the glass container, add water and heat in a water bath until it ...
Preparation. Weigh 125 g of the sodium ethanoate into the beaker and add 12.5 cm 3 of water. Place the beaker onto a tripod and gauze over a Bunsen burner and heat gently, stirring until the solid has completely dissolved. Place the watch glass over the top of the beaker to minimise evaporation and prevent dust particles getting in, which can ...
Hot ice experiment using vinegar and baking soda.The Science behind is called supercooling or undercooling : A liquid crossing its standard freezing point wi...
Melting ice is slowing Earth's spin and causing changes to its axis, new studies find. The shifts are causing feedback beneath the surface, impacting the planet's molten core.
Researchers explain a new mechanism for ice formation. Ice can form near the free surface of a water droplet via small precursors with a structure resembling ice 0. These are readily formed by ...
Sea ice and the snow on top of the ice insulate the ocean from the atmosphere, reflecting the Sun's radiation back towards space, and helping to cool the planet. Less sea ice and darker surfaces result in more of the Sun's radiation being absorbed at the surface or trapped between the surface and the clouds.
Sea ice and the snow on top of the ice insulate the ocean from the atmosphere, reflecting the sun's radiation back towards space, and helping to cool the planet.